BetterLinks makes it effortless to build a beautiful, custom bio link page right inside WordPress, giving your Instagram, TikTok, or YouTube profile a central hub on your own domain. Instead of relying on third-party hosted bio-link platforms, you retain complete ownership of your traffic. Also, every button on your bio page routes through a tracked short link, keeping all your click data and analytics seamlessly centralized in your WordPress dashboard.
Note: Before you start, ensure to install & activate BetterLinks and BetterLinks PRO on your WordPress website.
Step 1: Open the Bio Links Dashboard #
Navigate to BetterLinks → Bio Links from your WordPress dashboard.
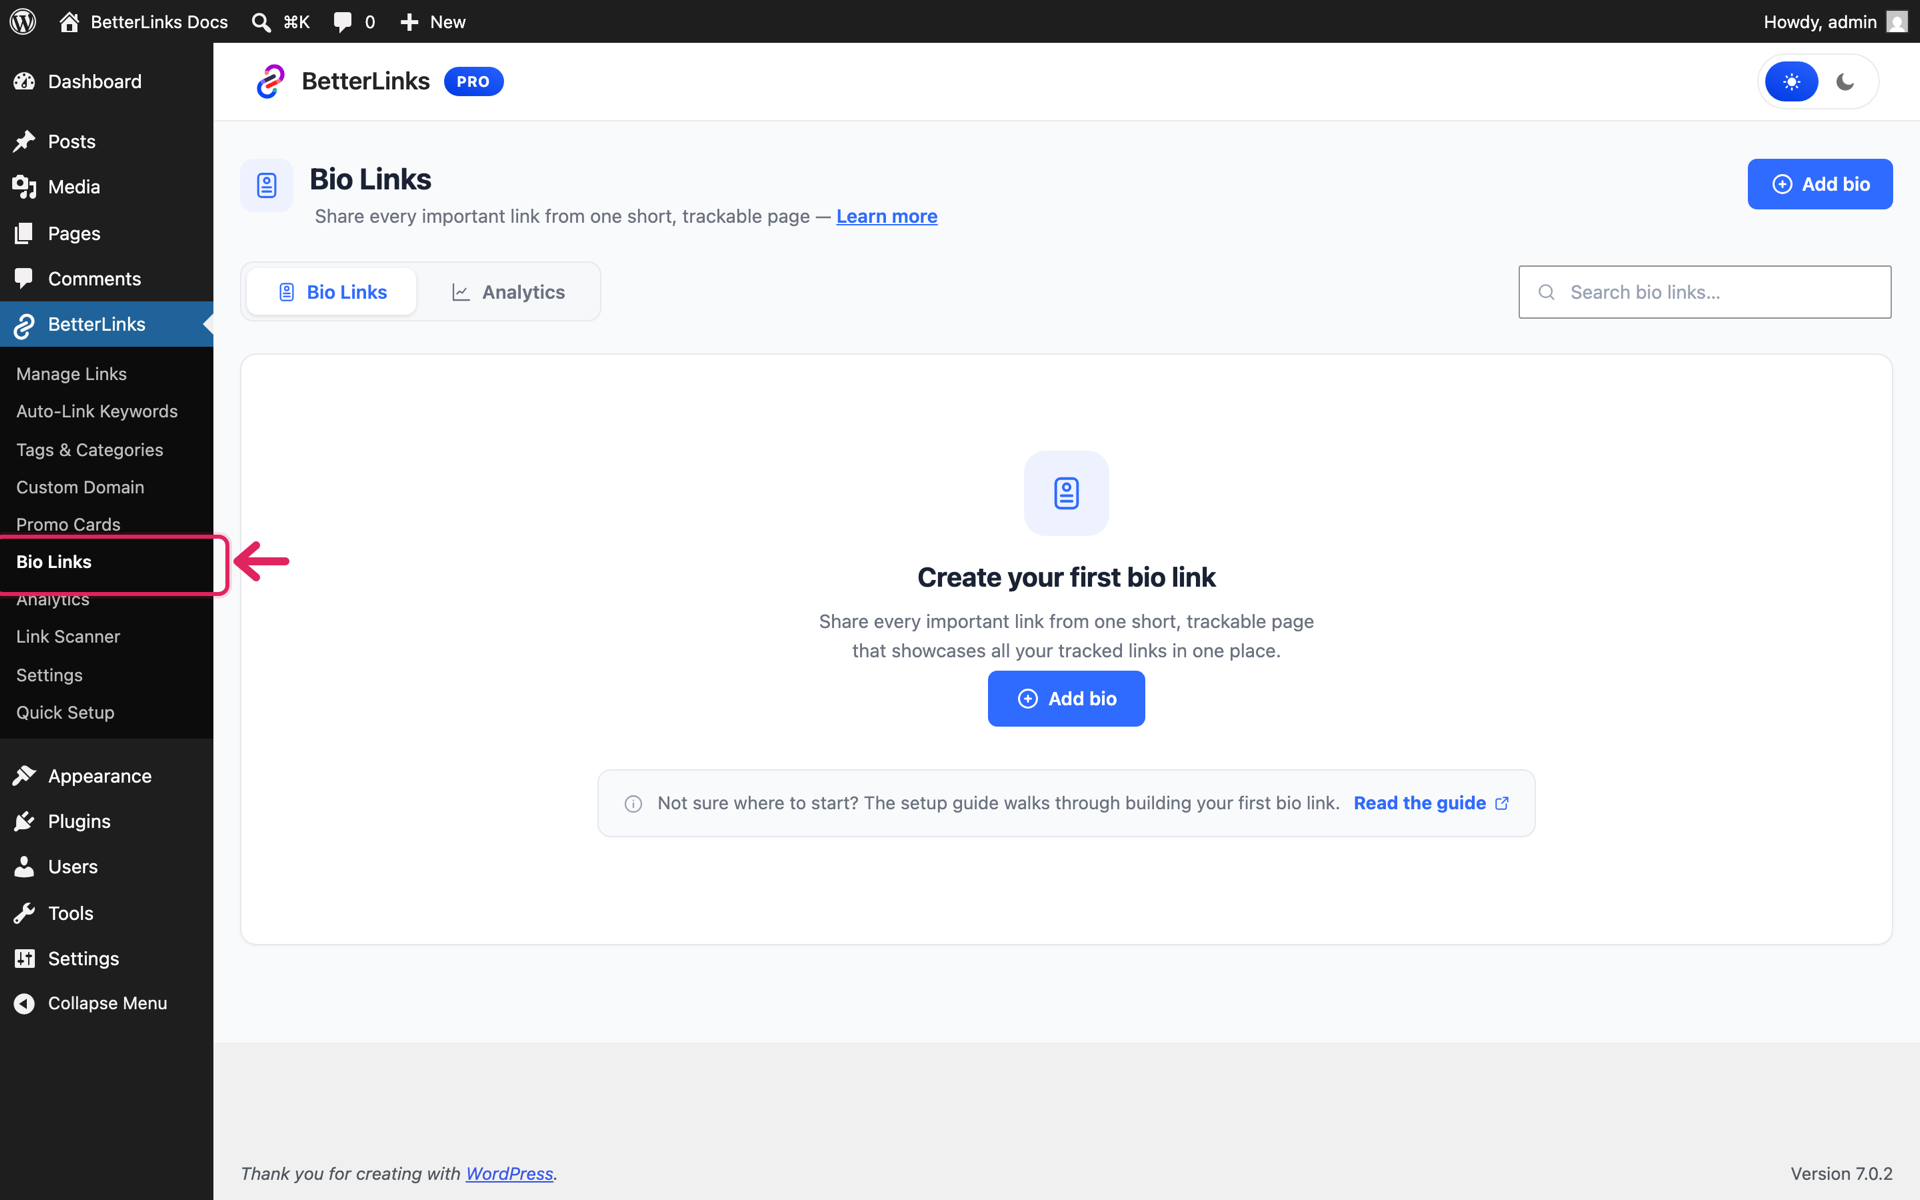
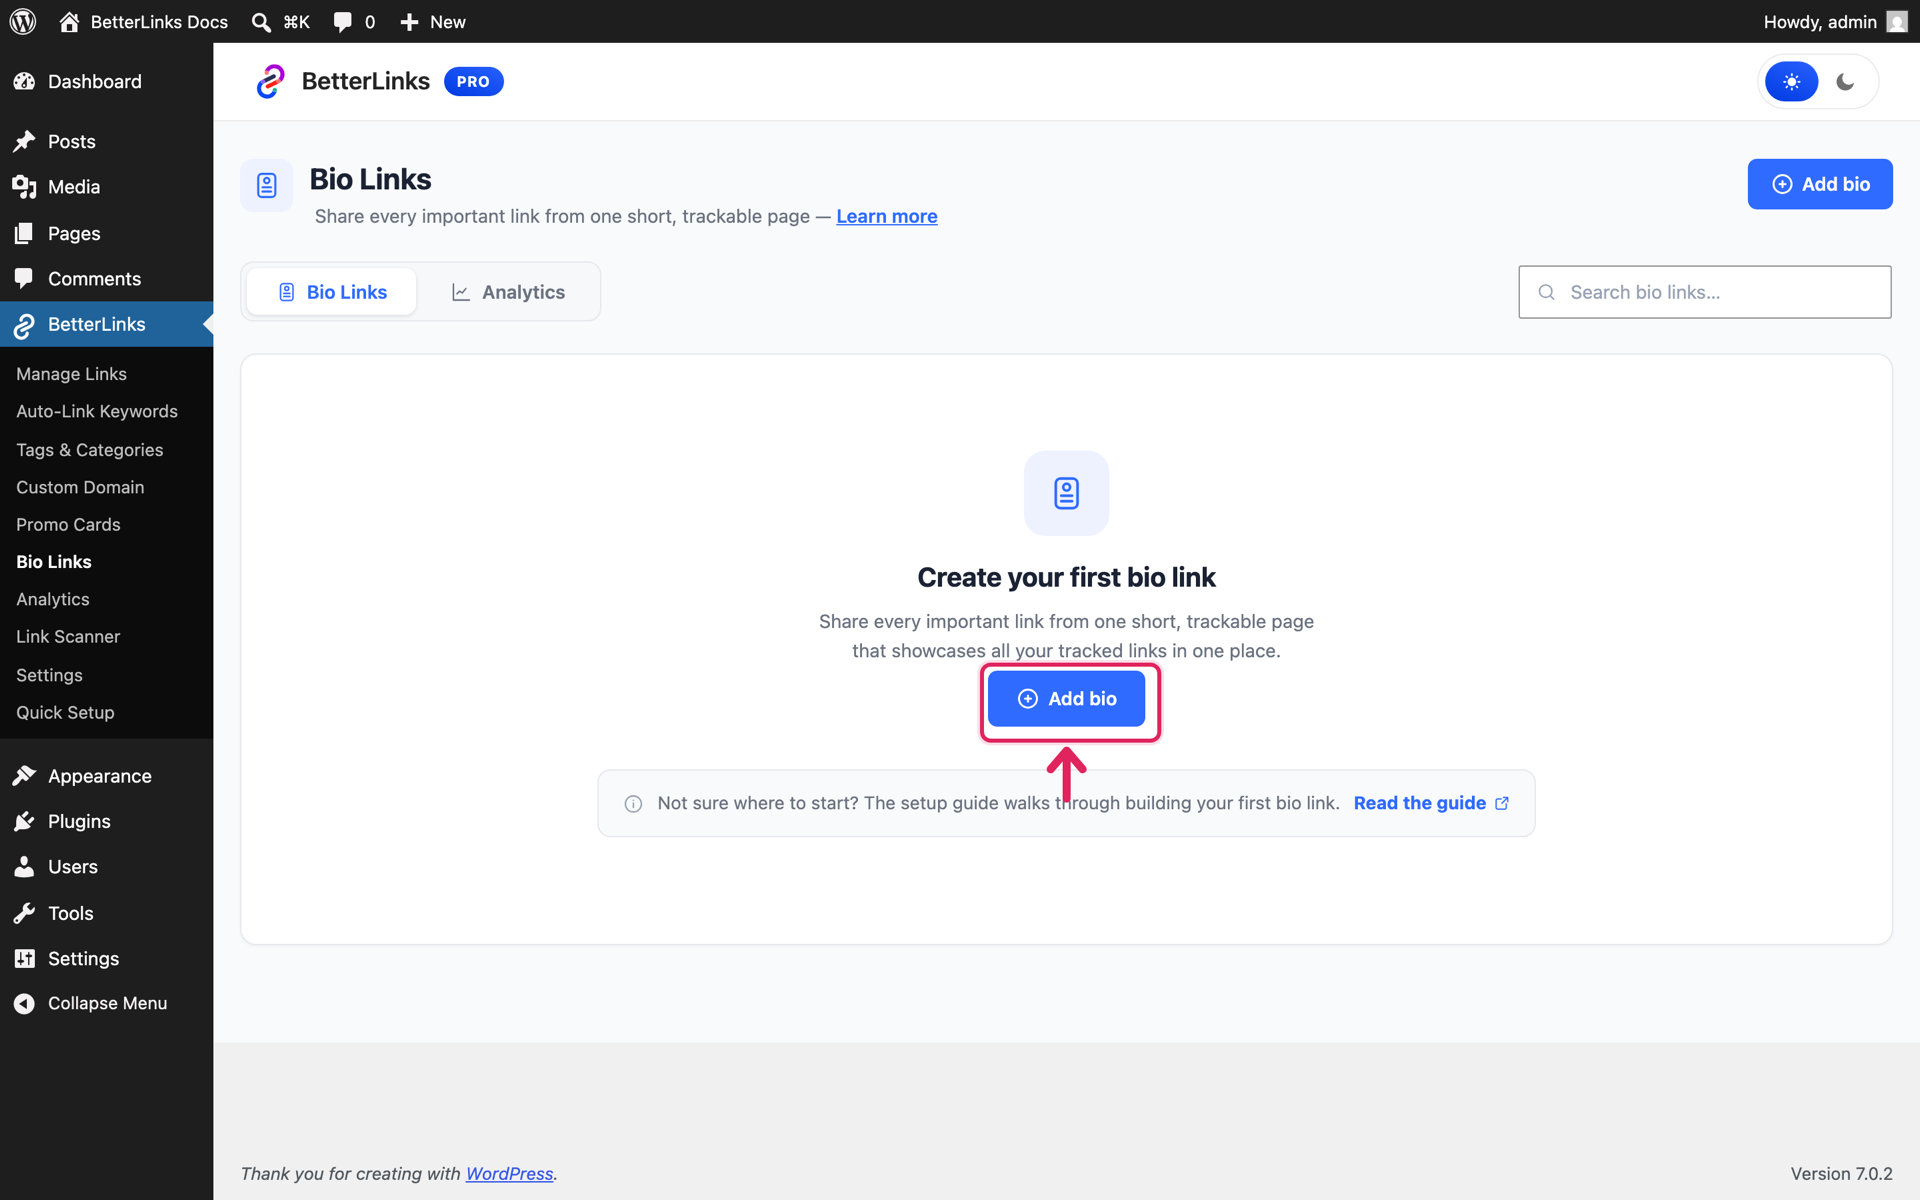
The Bio Links dashboard has two tabs: ‘Bio Links’, where your pages are listed, and ‘Analytics’, where you track their performance. Click on the ‘Add bio’ button to get started.
This opens the full-screen builder with a live phone preview on the right, your page takes shape as you type.
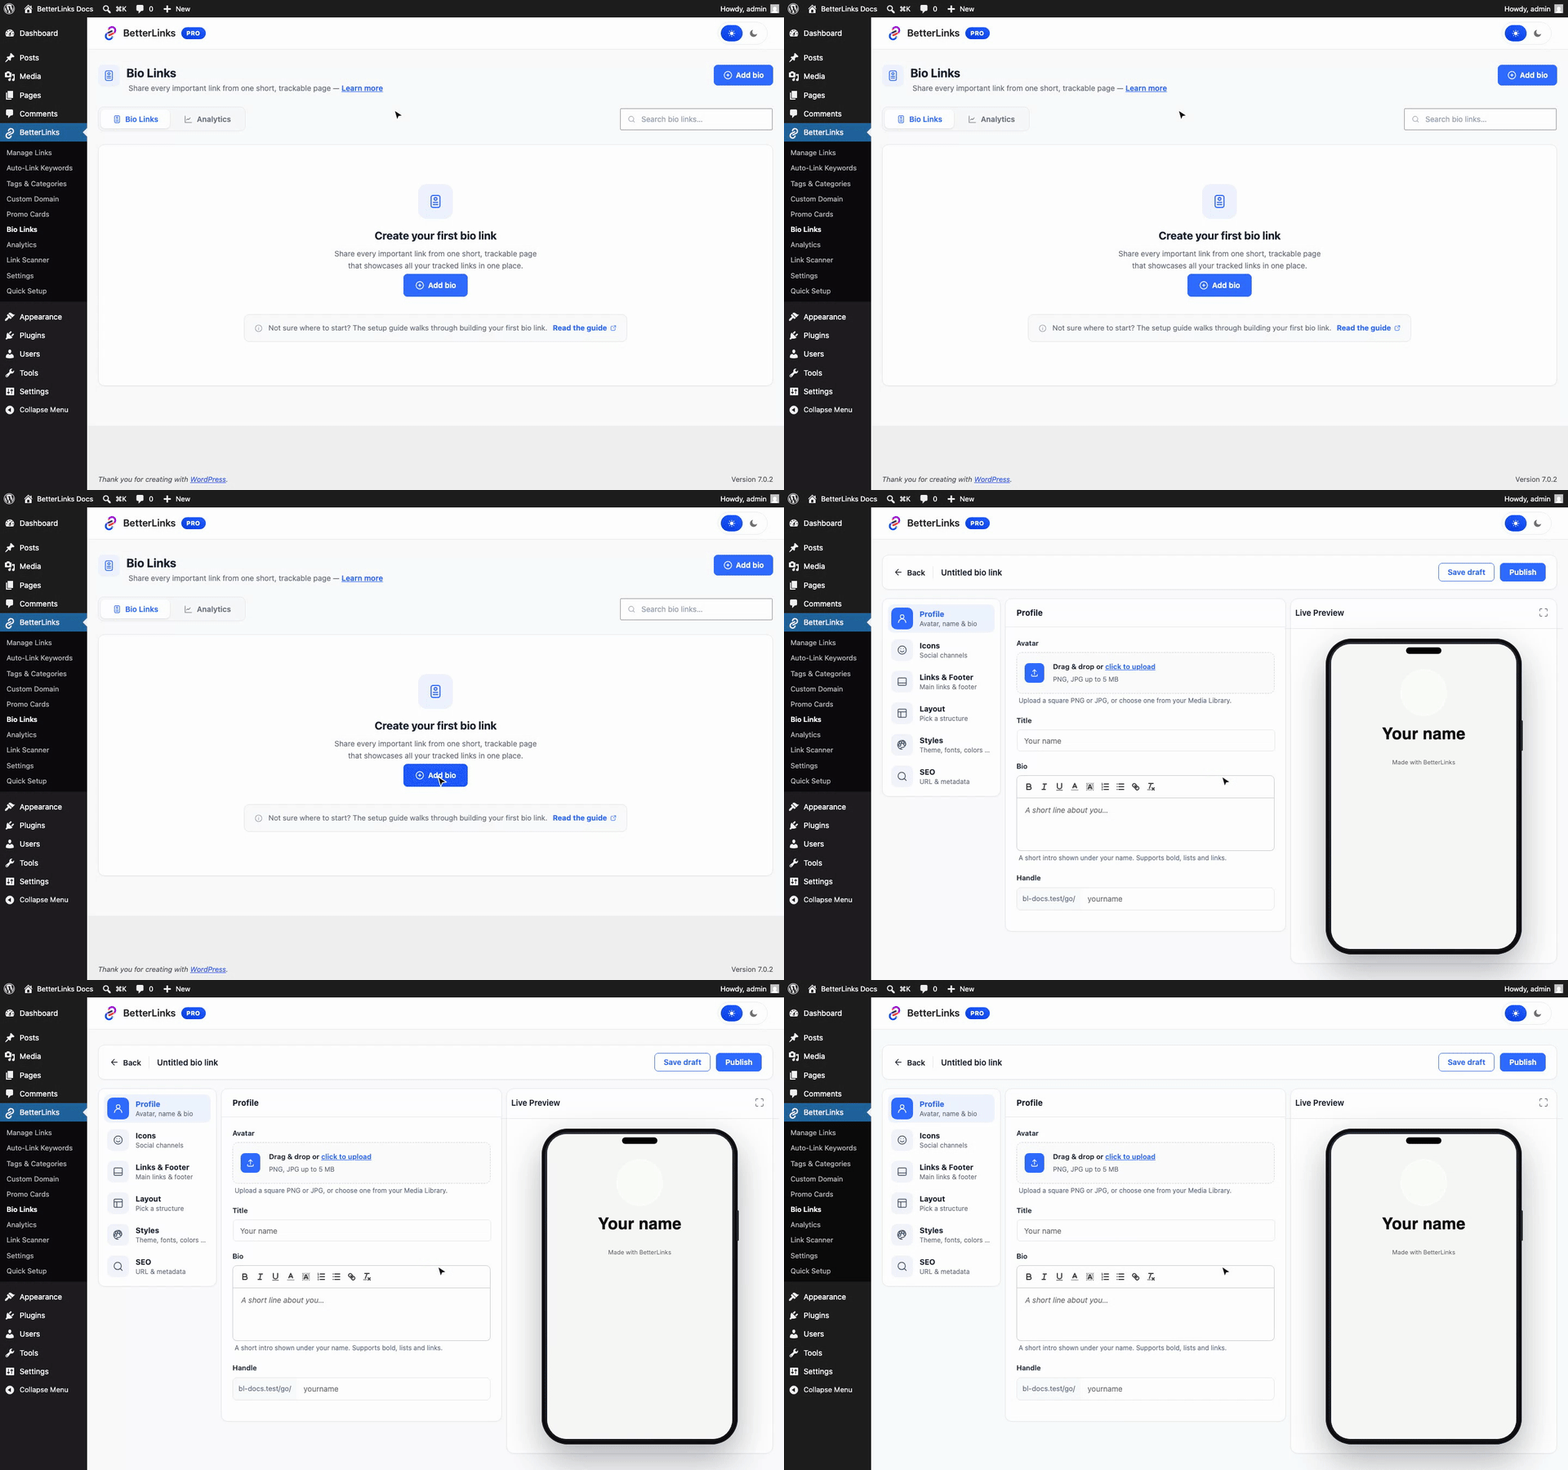
Step 2: Build Your Bio Page #
Build Your Bio Page
Crafting your custom bio link page takes just a few clicks inside WordPress. Easily design a sleek, responsive landing page that features your top links, social profiles, and essential content, all perfectly styled to match your brand.
Set Up Your Profile #
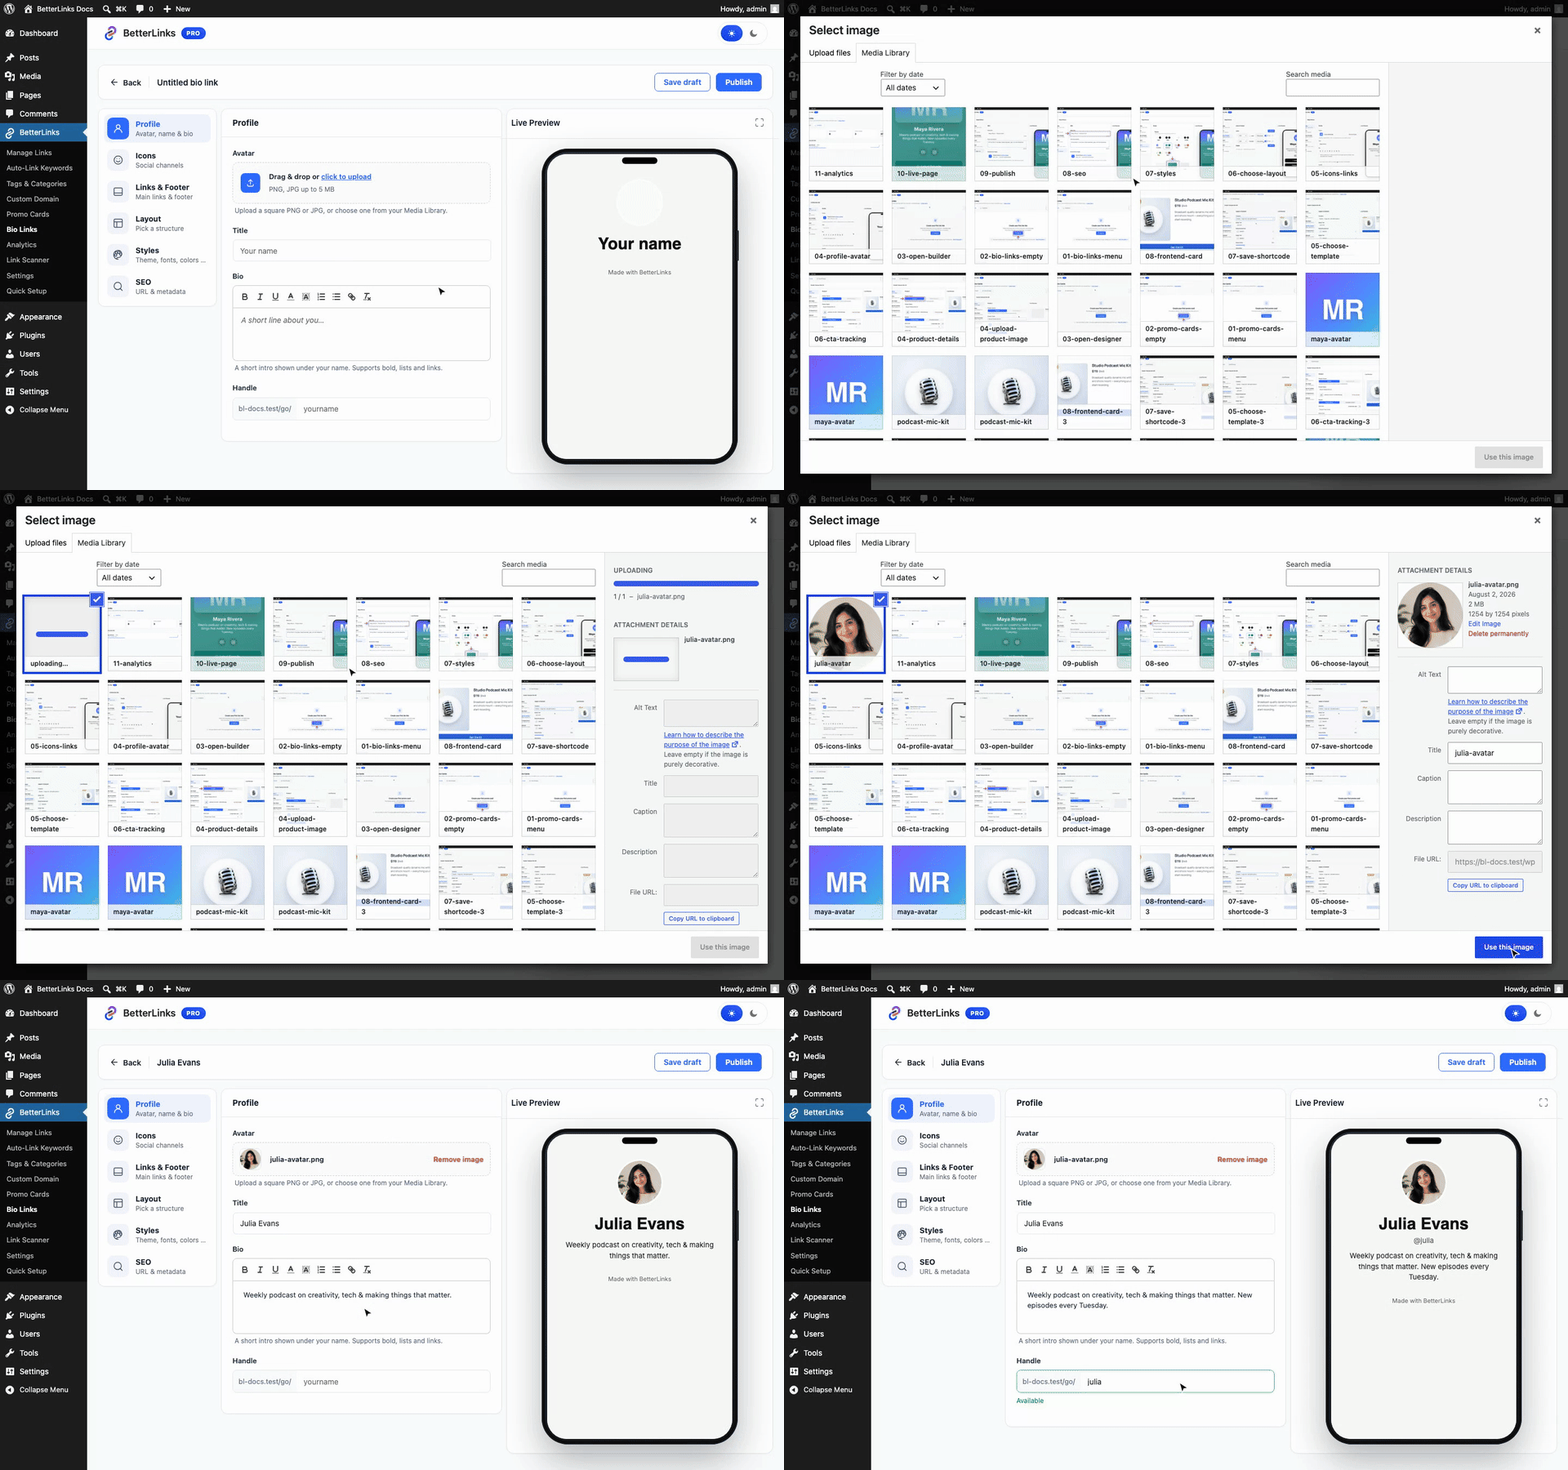
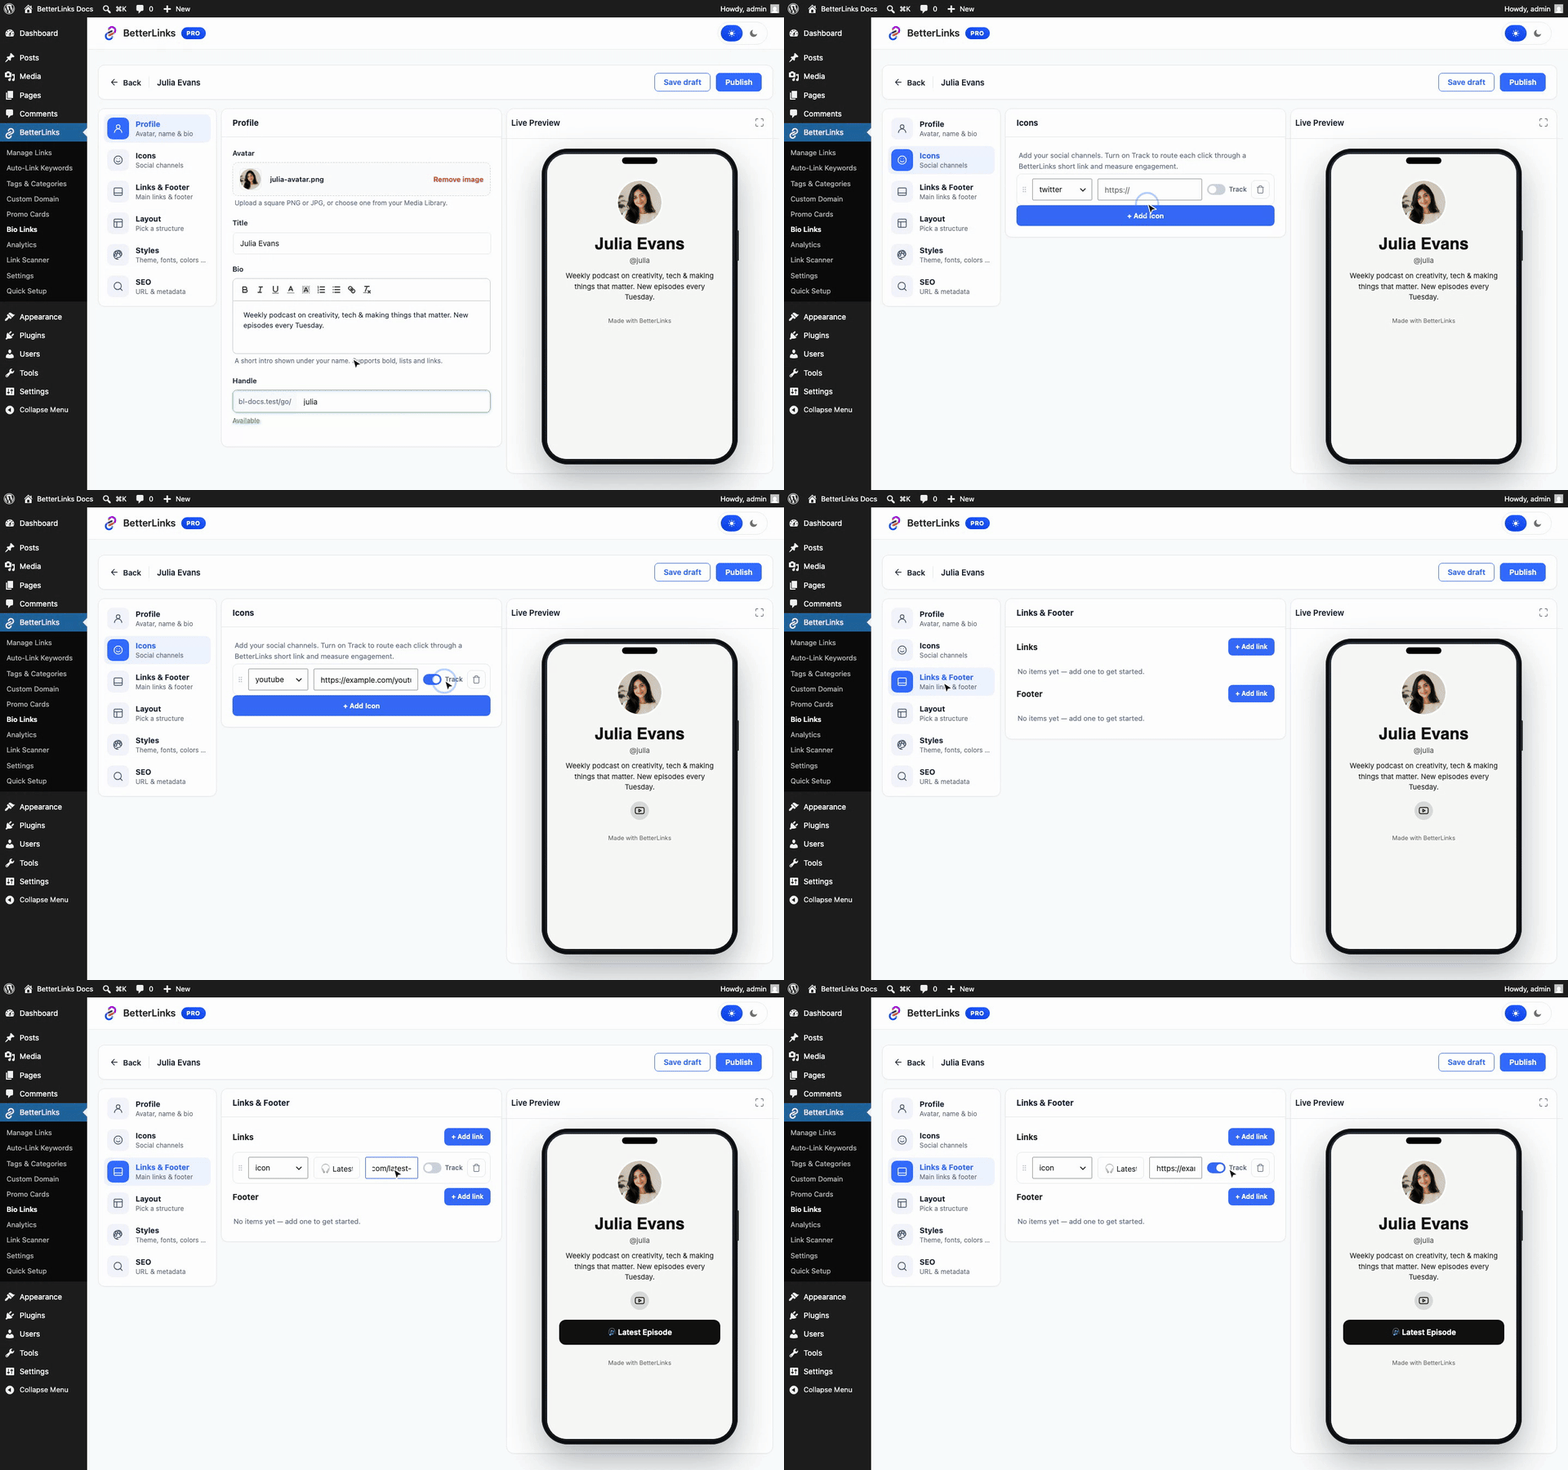
From the ‘Profile’ section, upload your avatar from the Media Library, then enter your name and a short bio that appears under it. This is also where you set your page’s Handle, the last part of your bio page URL (e.g. yoursite.com/go/julia).
Add Social Icons & Link Buttons #
Head to the ‘Icons’ section and click ‘+ Add Icon’ to add your social channels, pick the platform and paste your profile URL. Then, from ‘Links & Footer’, click ‘+ Add link’ to create the main buttons of your page, each with a label and destination URL.
Notice the ‘Track’ toggle on every icon and link: when enabled, BetterLinks quietly creates a short link behind that button, so every click shows up in your analytics. Footer links are simple text links at the bottom of the page and are never tracked.
Choose a Layout #
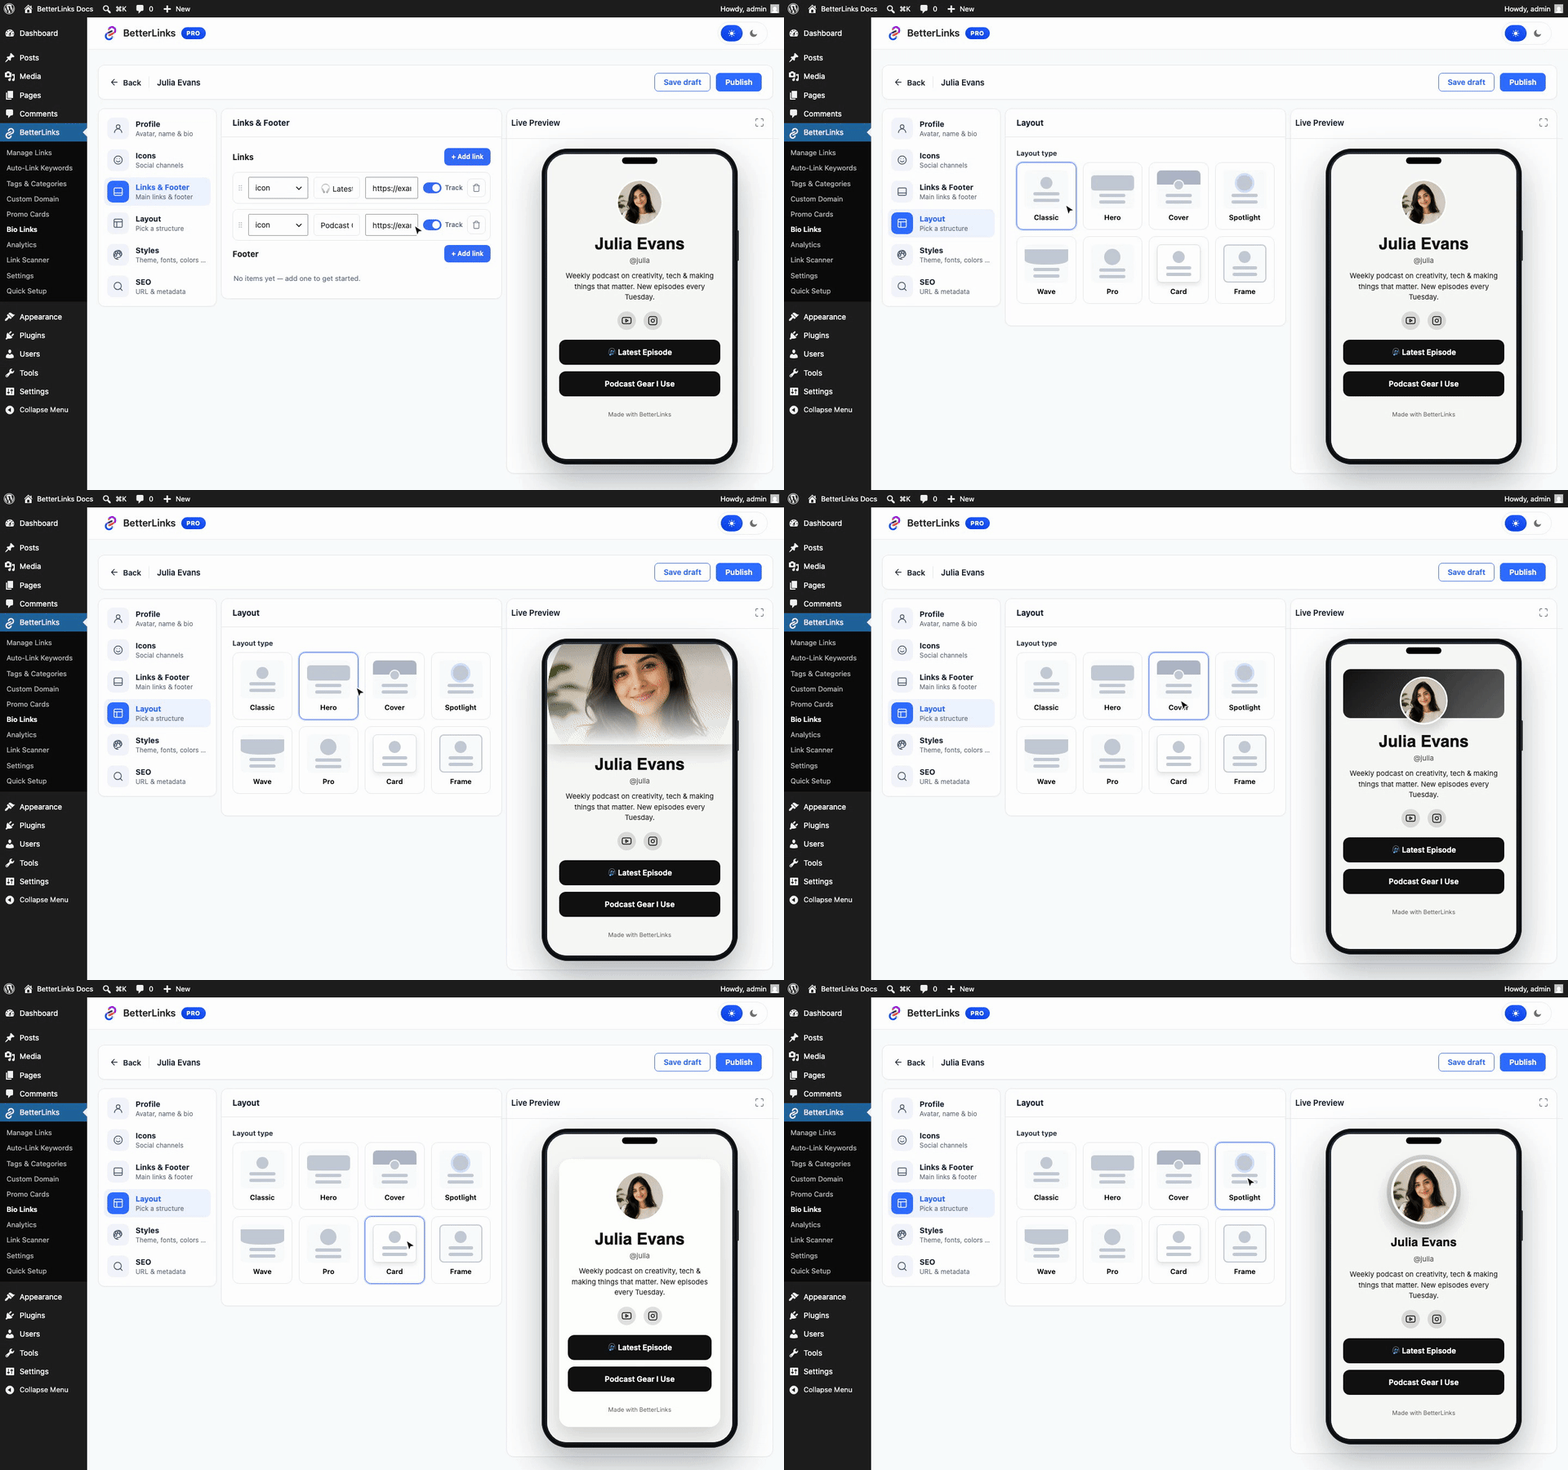
The ‘Layout’ section offers eight page structures, Classic, Hero, Cover, Spotlight, Wave, Pro, Card and Frame. Click through them and watch the phone preview switch instantly.
Style Your Page #
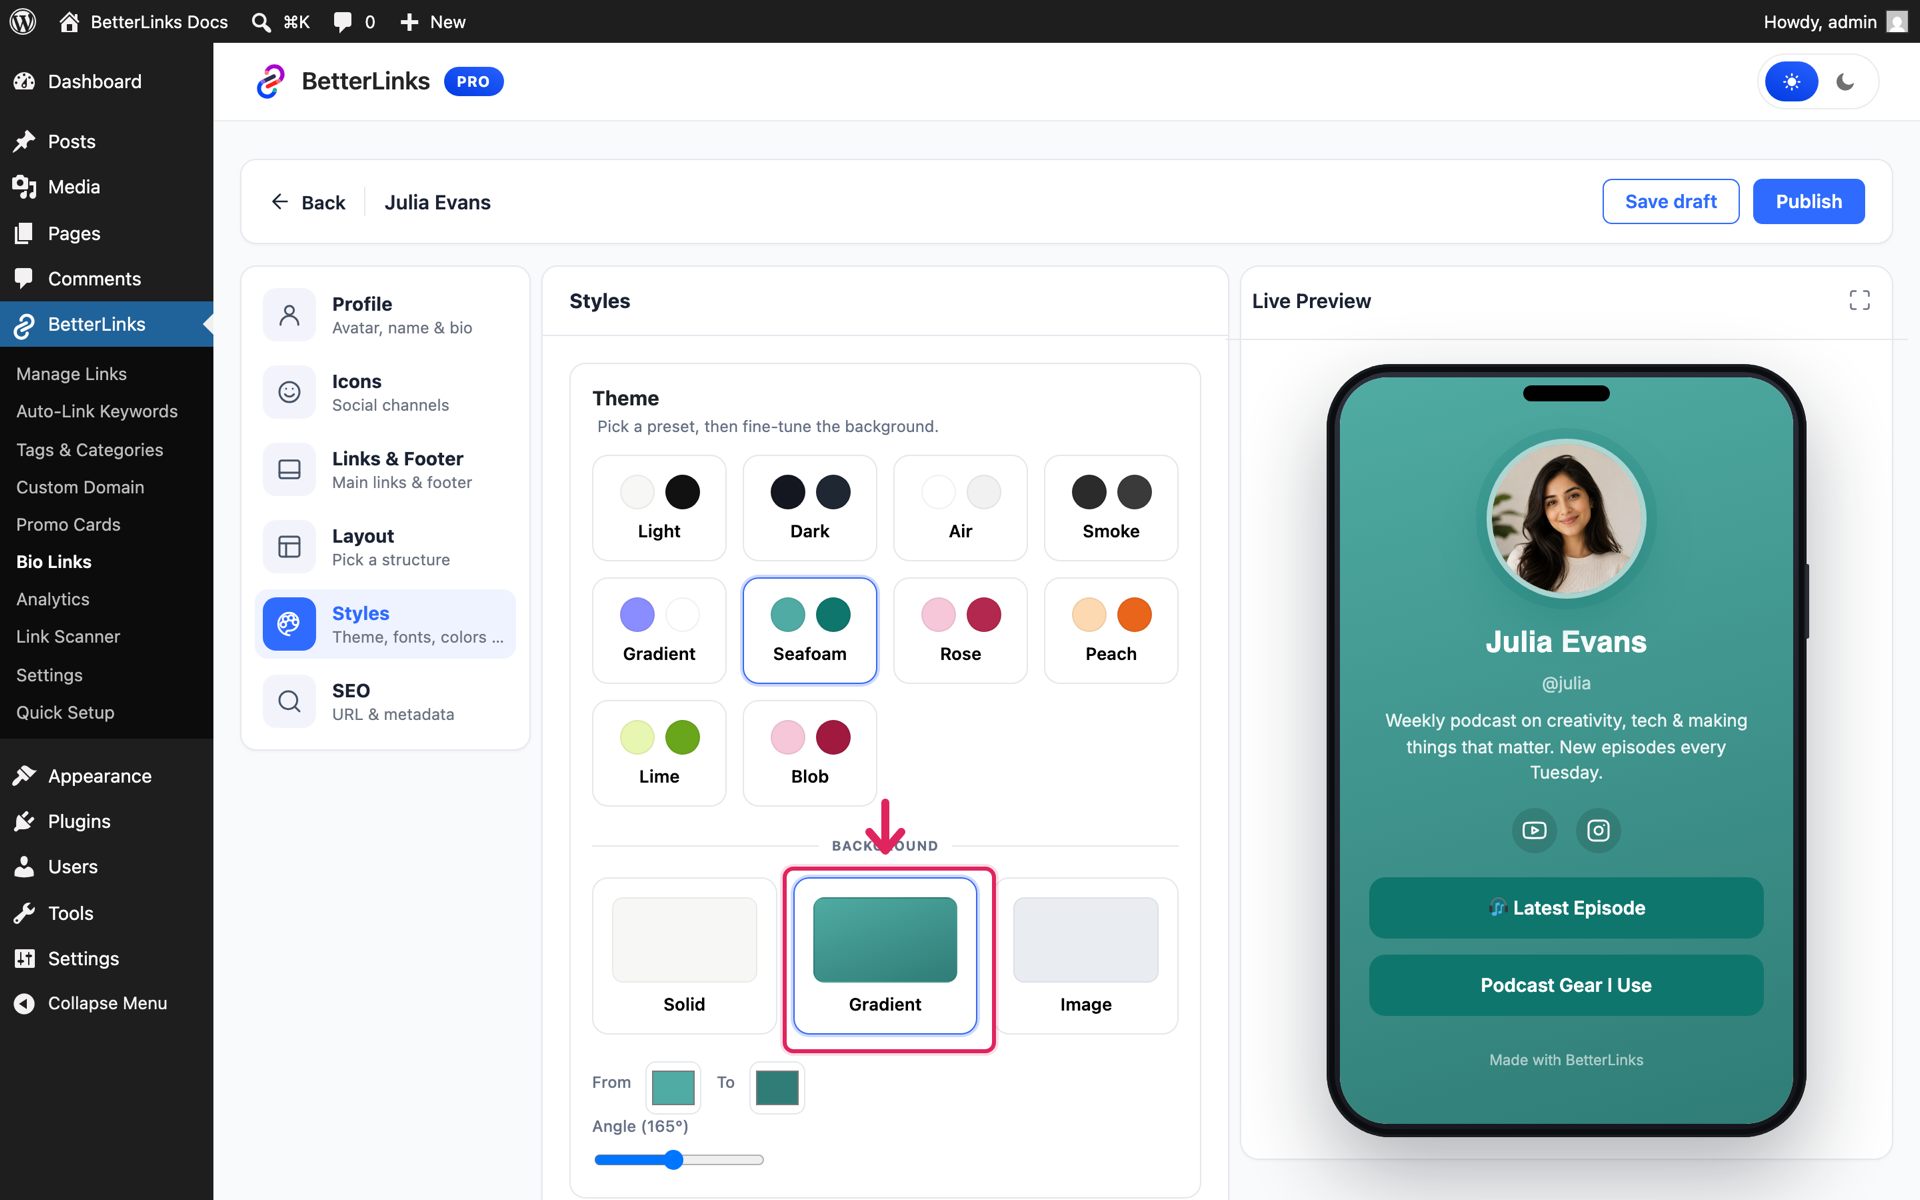
From ‘Styles’, pick a ready theme preset or design your own: choose from 28 Google fonts, customize button style, animation, and shape, and set a solid, gradient, or image background.
Fine-Tune Your SEO #
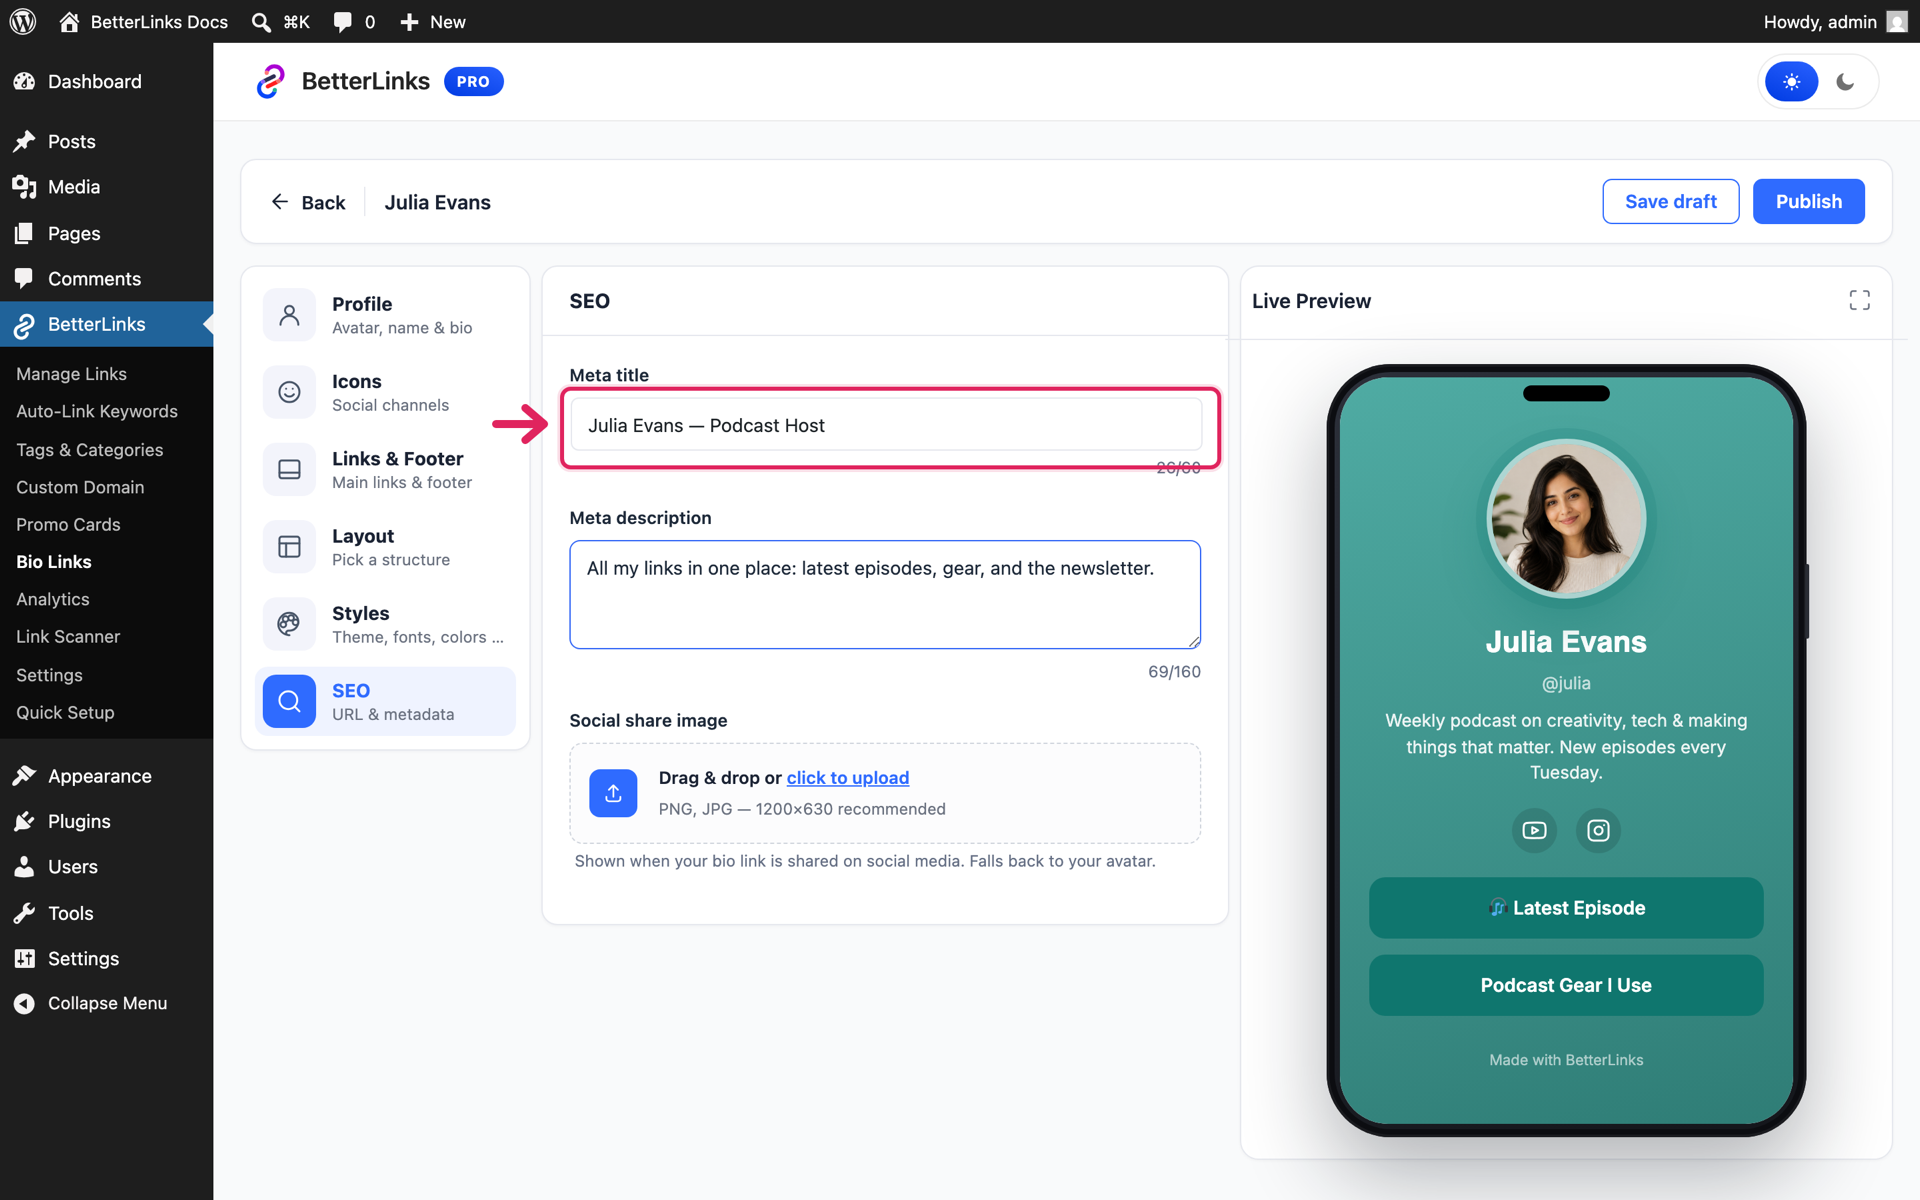
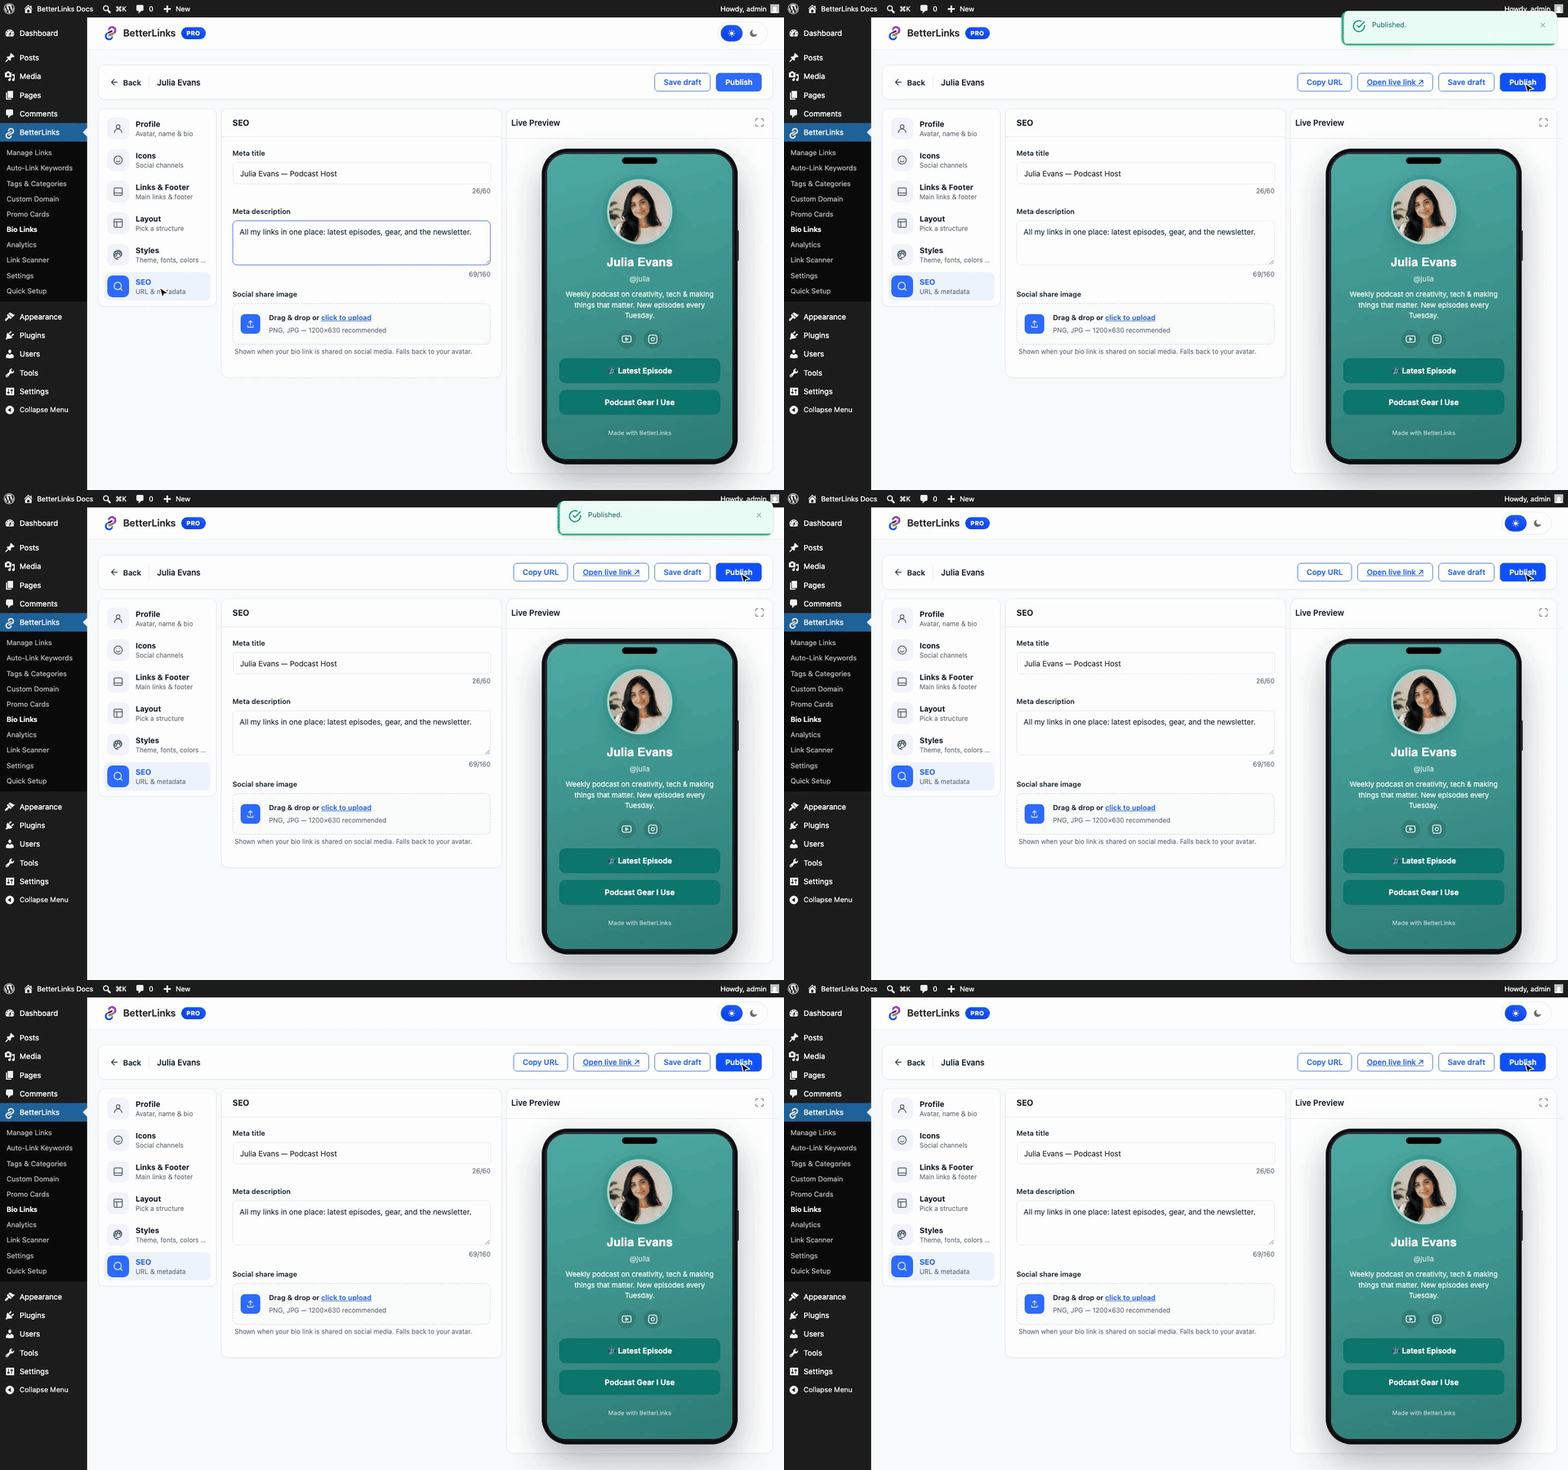
Finally, the ‘SEO’ section controls how your page appears in search results and social shares, set a meta title, meta description, and a social share image.
Step 3: Publish & Share Your Bio Page #
When the preview looks right, hit ‘Publish’. The top bar now shows ‘Copy URL’ and ‘Open live link’ — your page is live at yoursite.com/go/your-handle.
Final Outcome #
Copy the URL and paste it into your Instagram, TikTok, or YouTube bio. Here is how the finished page looks to your visitors:
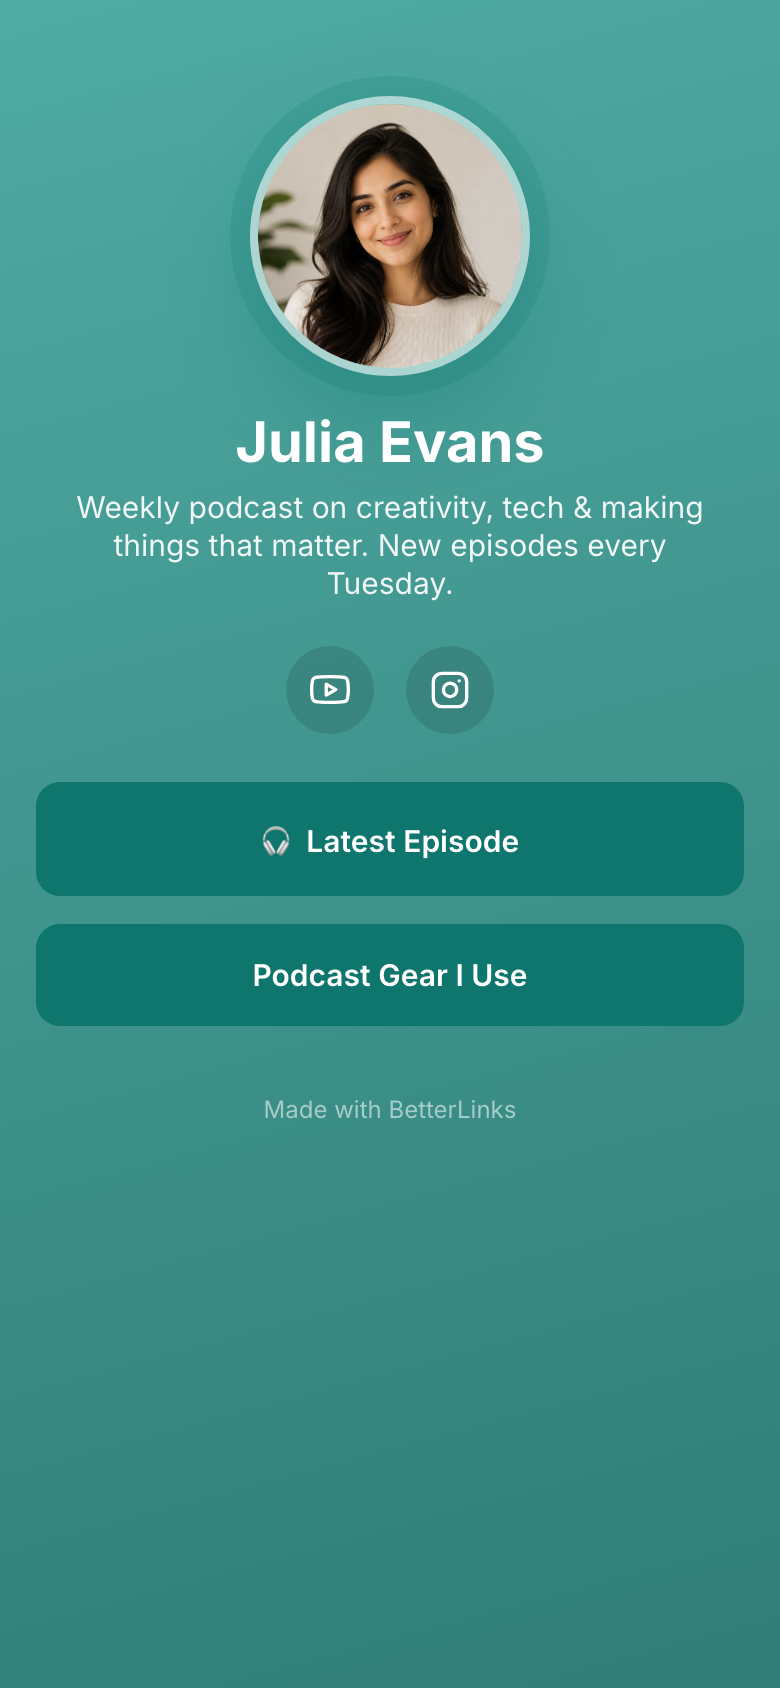
💡 Your bio page is served as a standalone, lightning-fast page, it loads independently of your WordPress theme, so it stays clean and quick on mobile.
Track Your Bio Page Performance #
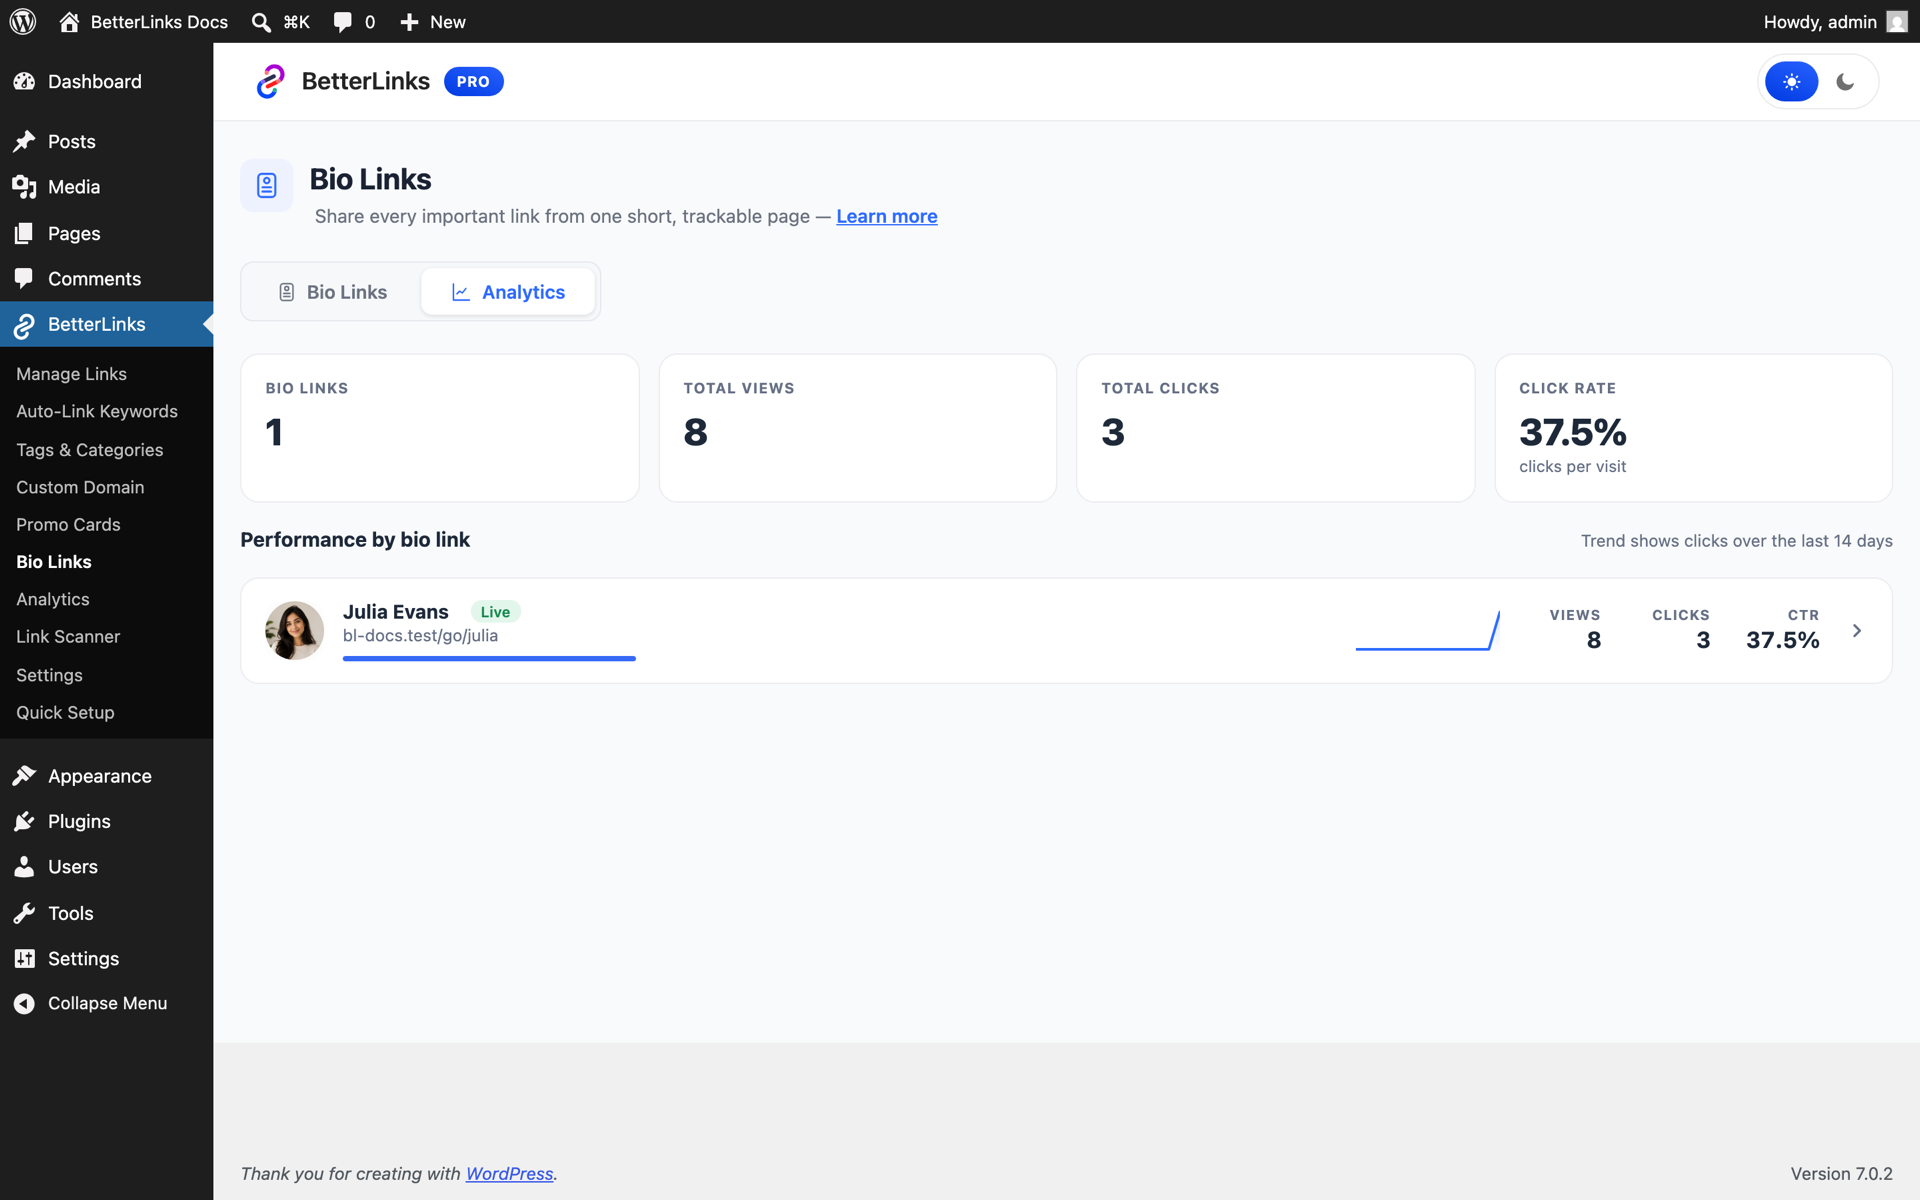
Switch to the ‘Analytics’ tab of the Bio Links dashboard to see how your page performs: total views, total clicks on tracked buttons, and your click rate, per page, with a 14-day trend.
That’s how you can use Bio Links in BetterLinks to create a fully customized landing page on your own domain, drive more engagement from your social profiles and track all your link analytics right inside WordPress.
Need help with something? You are welcome to contact our support team at any time.