BetterLinks has introduced a freemium new feature called Quick Link Creation, allowing users to create short links quickly with just one click. This feature enhances the user experience by streamlining the process of link creation without admin access, making it more efficient and user-friendly.
Quick Link Creation is designed to save time and effort, especially for users who need to manage multiple links for marketing campaigns or content distribution. Let’s see the step-by-step guide to configure quick link creation in BetterLinks.
How To Enable The Quick Link Creation Feature? #
Follow the step-by-step guide below to learn how to configure Quick Link Creation with BetterLinks.
Note: Quick Link Creation is a freemium feature of BetterLinks. To use the Advanced options, you need to have the latest free and PRO versions installed and activated on your website. This feature is available from BetterLinks 2.0.0 and later and PRO 1.9.3 and later.
Step 1: Enable The Quick Link Creation #
From your WordPress dashboard, navigate to Betterlinks → Settings. Now, under the ‘Advanced Options’ tab, enable the ‘Quick Link Creation’ feature.

Step 2: Check Available Link Options #
By default, in the ‘General’ tab the existing link options would be applied to your Quick Link Creation. If you need a customized Link Option only for the Quick Link Creation, it’s available in the BetterLinks PRO.

Step 3: Drag and Drop The Button #
Before you enable the drag-and-drop feature, make sure your browser’s bookmark bar/ bookmark toolbar is enabled. Now go to the ‘Quick Link Creation’ then drag and drop the button to the bookmark toolbar on your browser.

Step 4: Create Short Links Quickly #
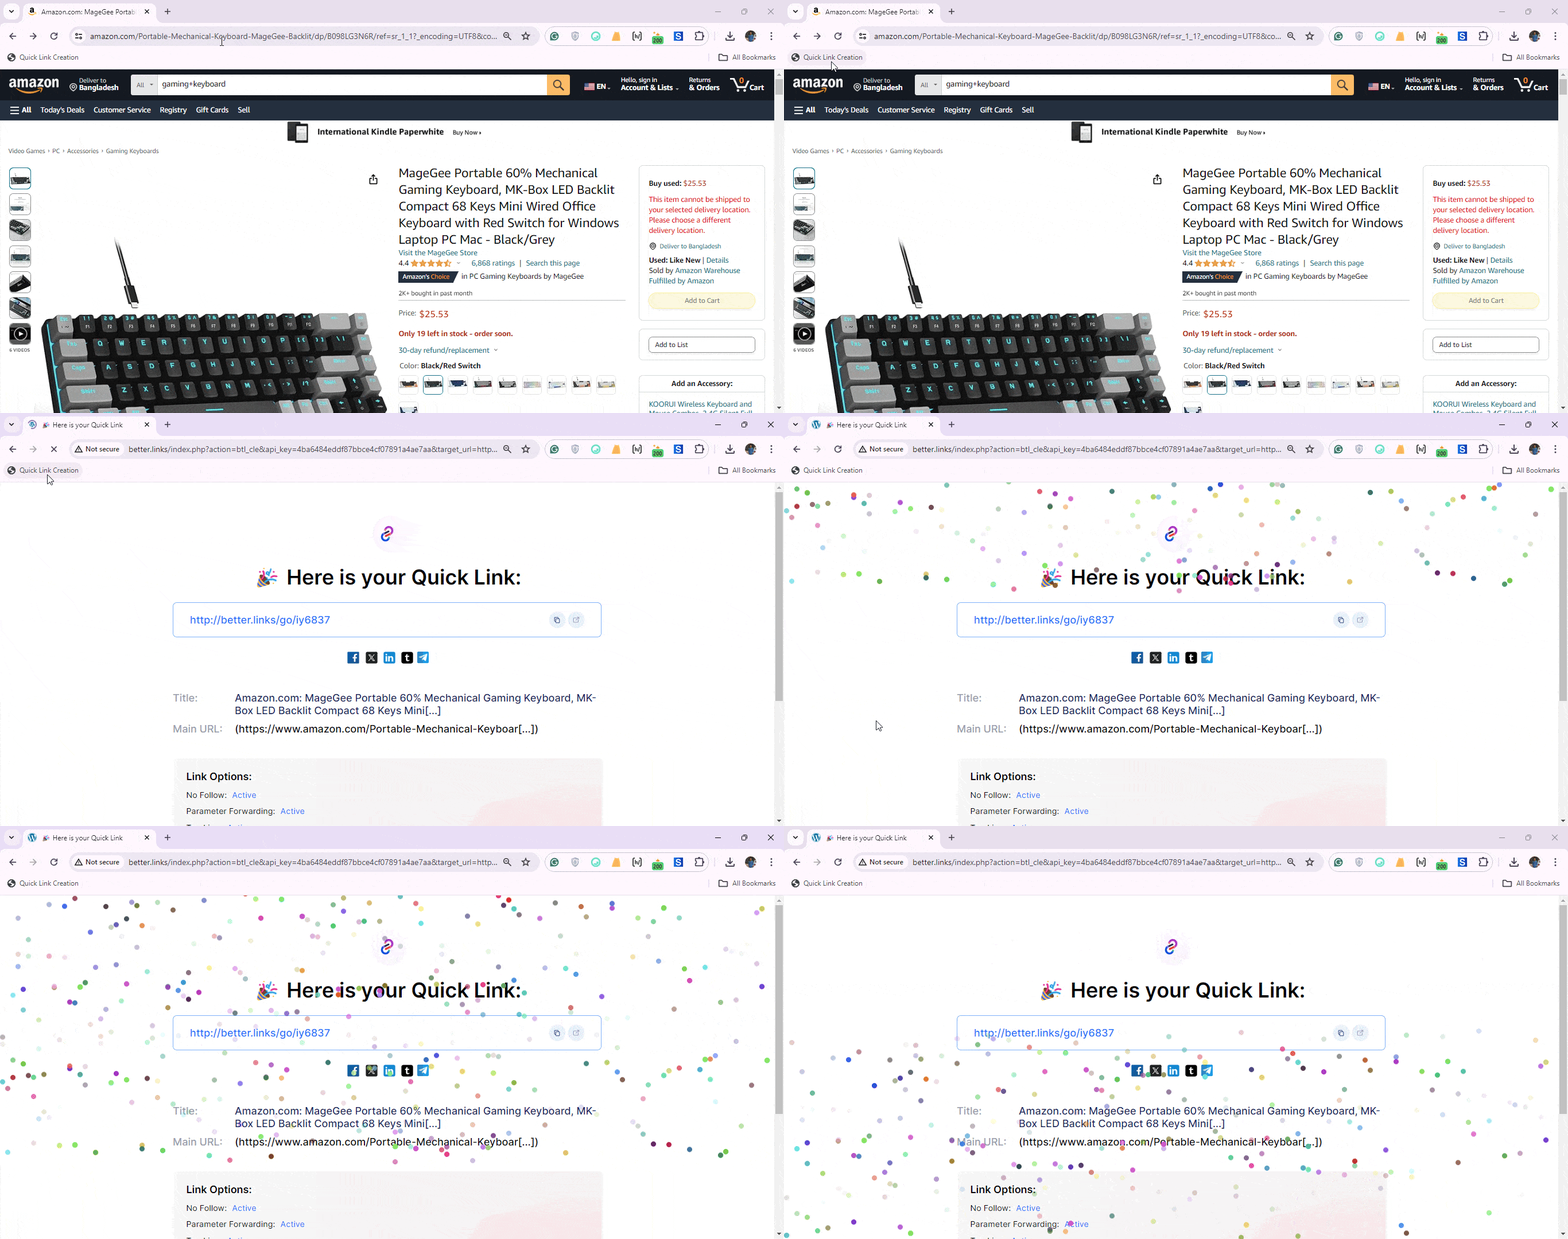
Now get into your preferred browser and open any website. When it’s opened just click on the ‘Quick Link Creation’ You’ll see the shortened link created instantly. Also, you’ll get to see the available link options for your created link.

Step 5: Manage Your Quick Links #
All the links you’ve created through the ‘Quick Link Creation’ feature, to see them, go to ‘BetterLinks’ plugin and click on, ‘Manage Links.’ All the links you create will be in the default category, labeled as ‘Uncategorized’ with the PRO version you can create the category and select the links on the preferred category.

Step 6: Advance Link Options #
With the PRO version of BetterLinks, you’ll get access to use link options you want for your quickly created link. Such as Redirection types (301, 302, 307), Social Share, No Follow, Sponsored, Parameter Forwarding, etc.

Step 7: Check Out The Link Options #
Once your link is created by the Quick Link Feature, you’ll get detailed information about the quick link.

This is how you can easily create quick links just by dragging and dropping to the bookmark bar and simply clicking on it. By doing so, you can keep the important URLs in one place for easy access to them further.
Note: You can’t create a quick link on the quick link creation page itself. If you try to create it’ll show you the following, ‘Quick link creation is unavailable for this page’

Troubleshooting Tips #
Your authentication key (AUTH_KEY) is missing if you found this notice. It means that it’s not configured on your wp-config file.

To generate the auth key you can use the official WordPress salt generator. It’ll help you to easily copy the code from there.

Open your wp-config.php file from your WordPress installation directory, and paste the code you copied from the salt generator as shown below:

That’s how you can easily configure your authentication key easily.
Are you stuck or have any queries? Feel free to contact our support team for further assistance.


