Many AI-powered applications require an API key to connect with large language models. This guide explains how to generate an API key from OpenAI and Google AI Studio (Gemini).
Before you begin, make sure you have:
- An OpenAI account or a Google account
- A stable internet connection
- Access to your application’s AI settings where you’ll paste the API key
📌 Important: Keep your API key private. Anyone with access to your API key can use your API quota and may generate charges on your account. Store it securely and never expose it in public repositories, client-side code or shared documents.
Generate an OpenAI API Key #
OpenAI API keys allow your application to access OpenAI models such as GPT-5 and other supported models.
Step 1: Sign In to OpenAI Platform #
Open your browser and visit: OpenAI Platform
Sign in with your existing OpenAI account. If you do not have an account, click Sign Up and complete the registration process.
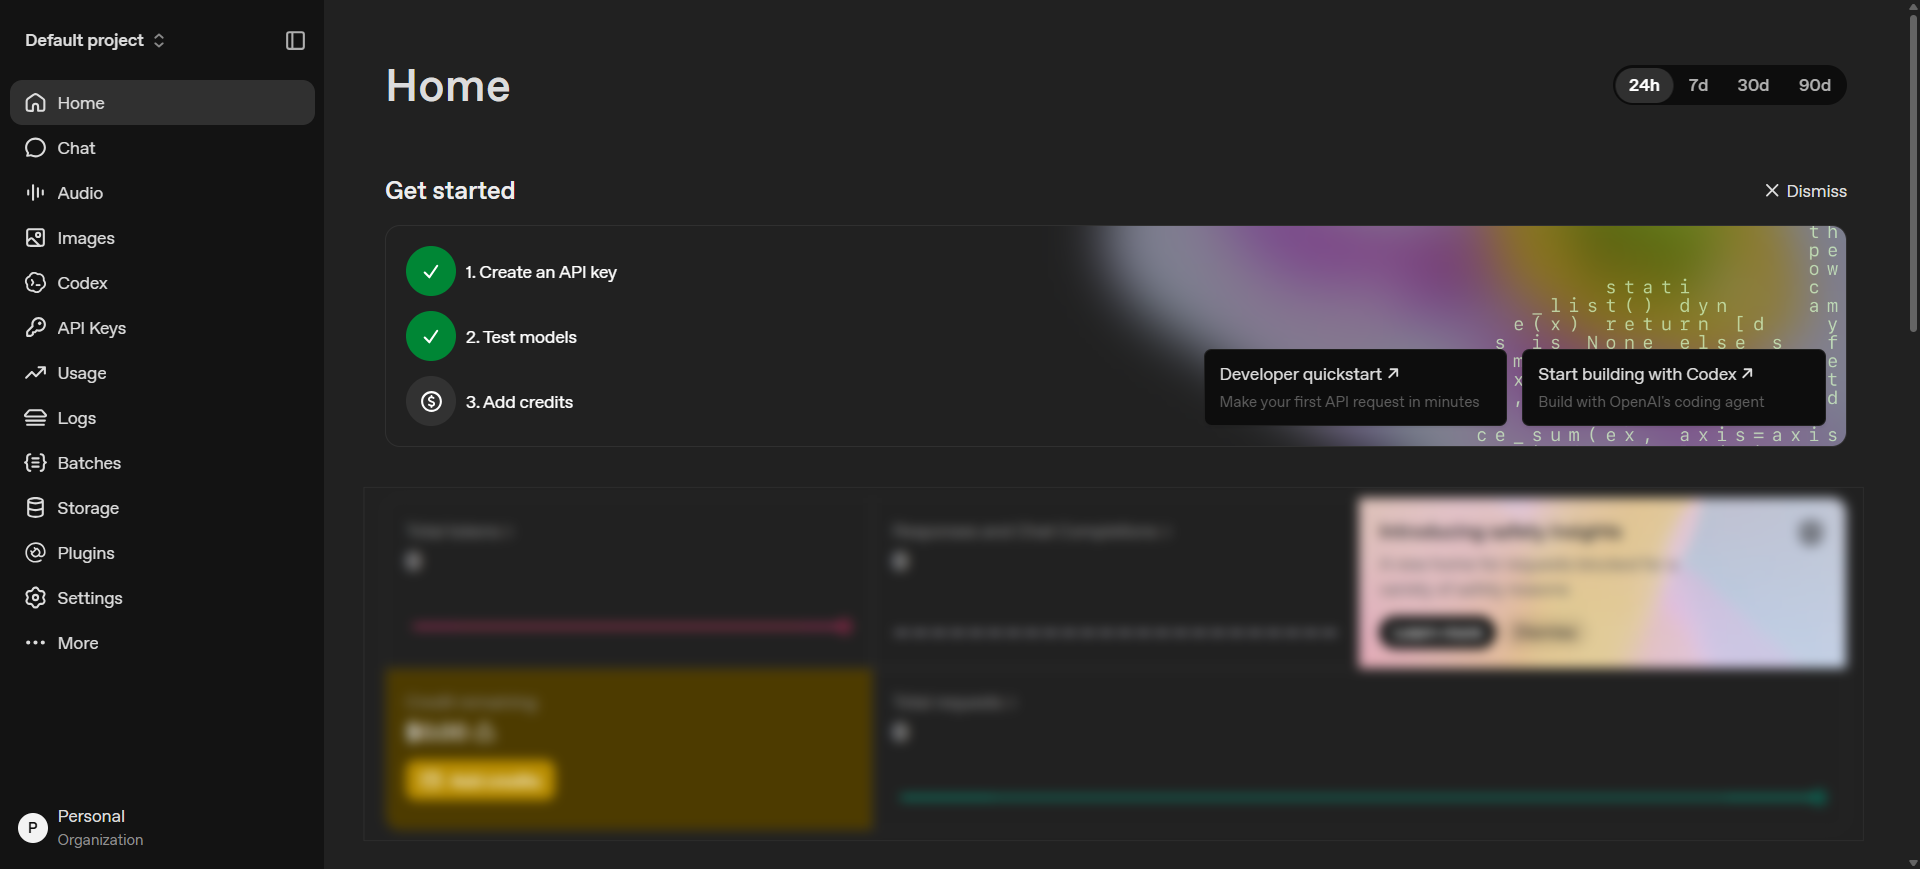
Note: A ChatGPT Plus subscription is not required to use the OpenAI API. ChatGPT subscriptions and API billing are separate services.
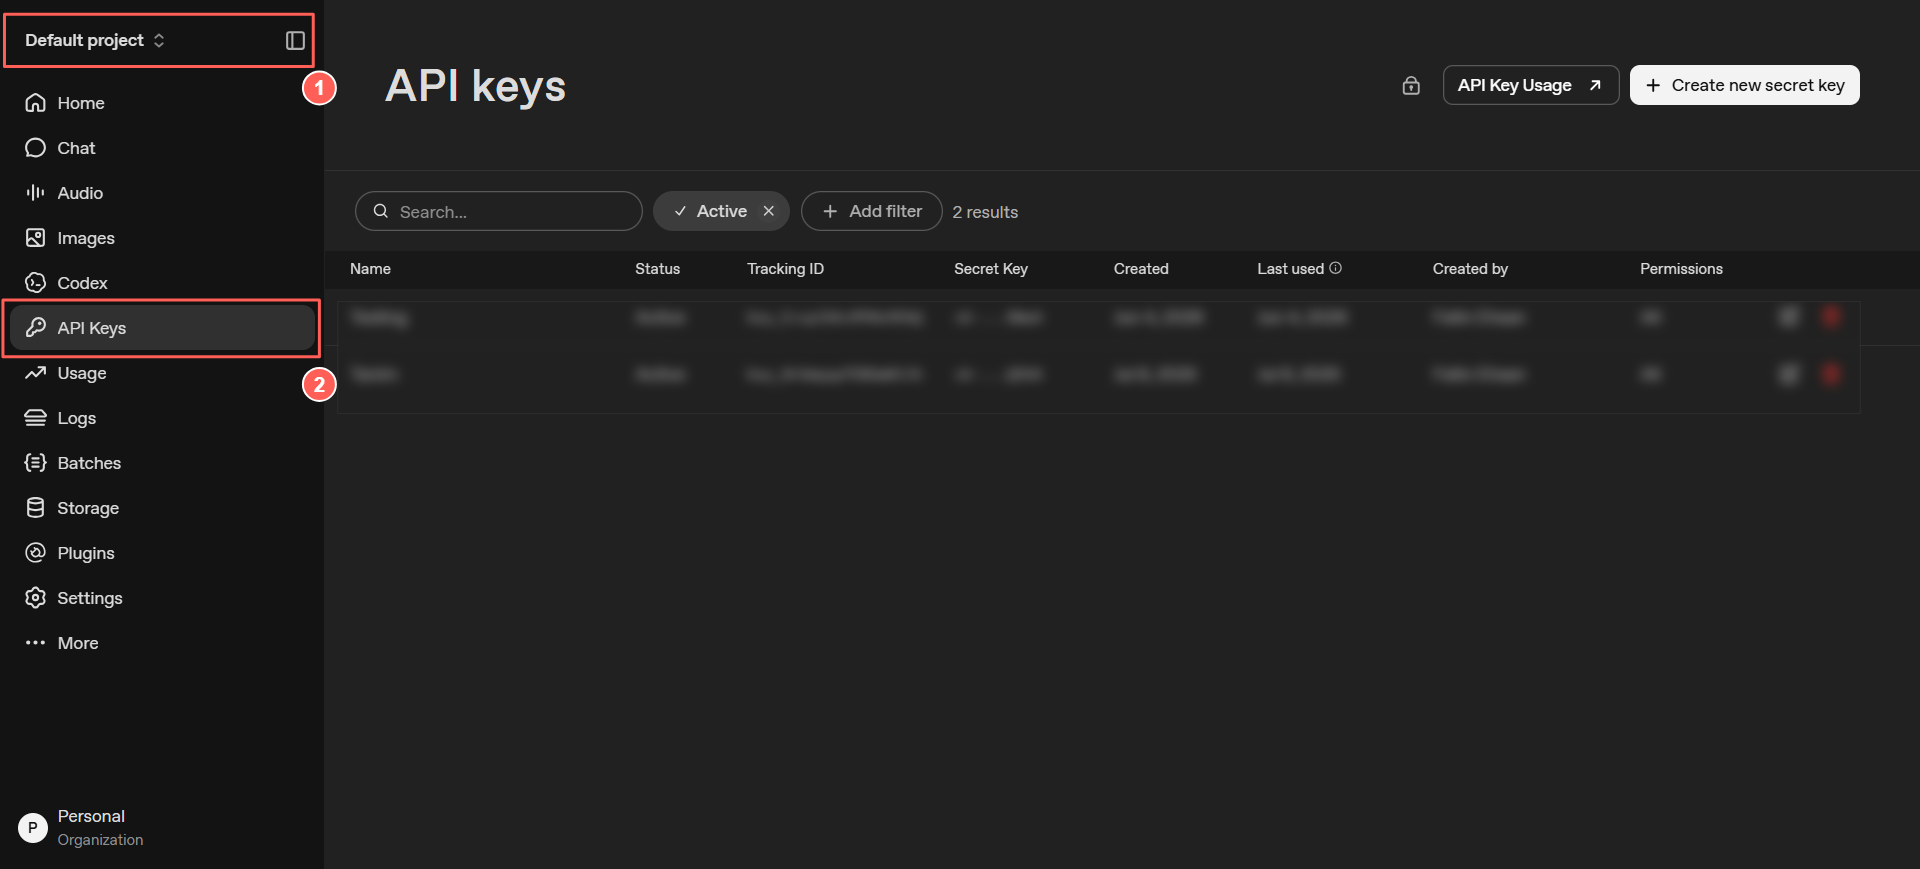
Step 2: Open the API Keys Page #
After signing in, click your ‘Sidebar Icon’ in the upper-left corner. Select ‘API Keys’. Or visit the API Keys page directly: OpenAI API Keys
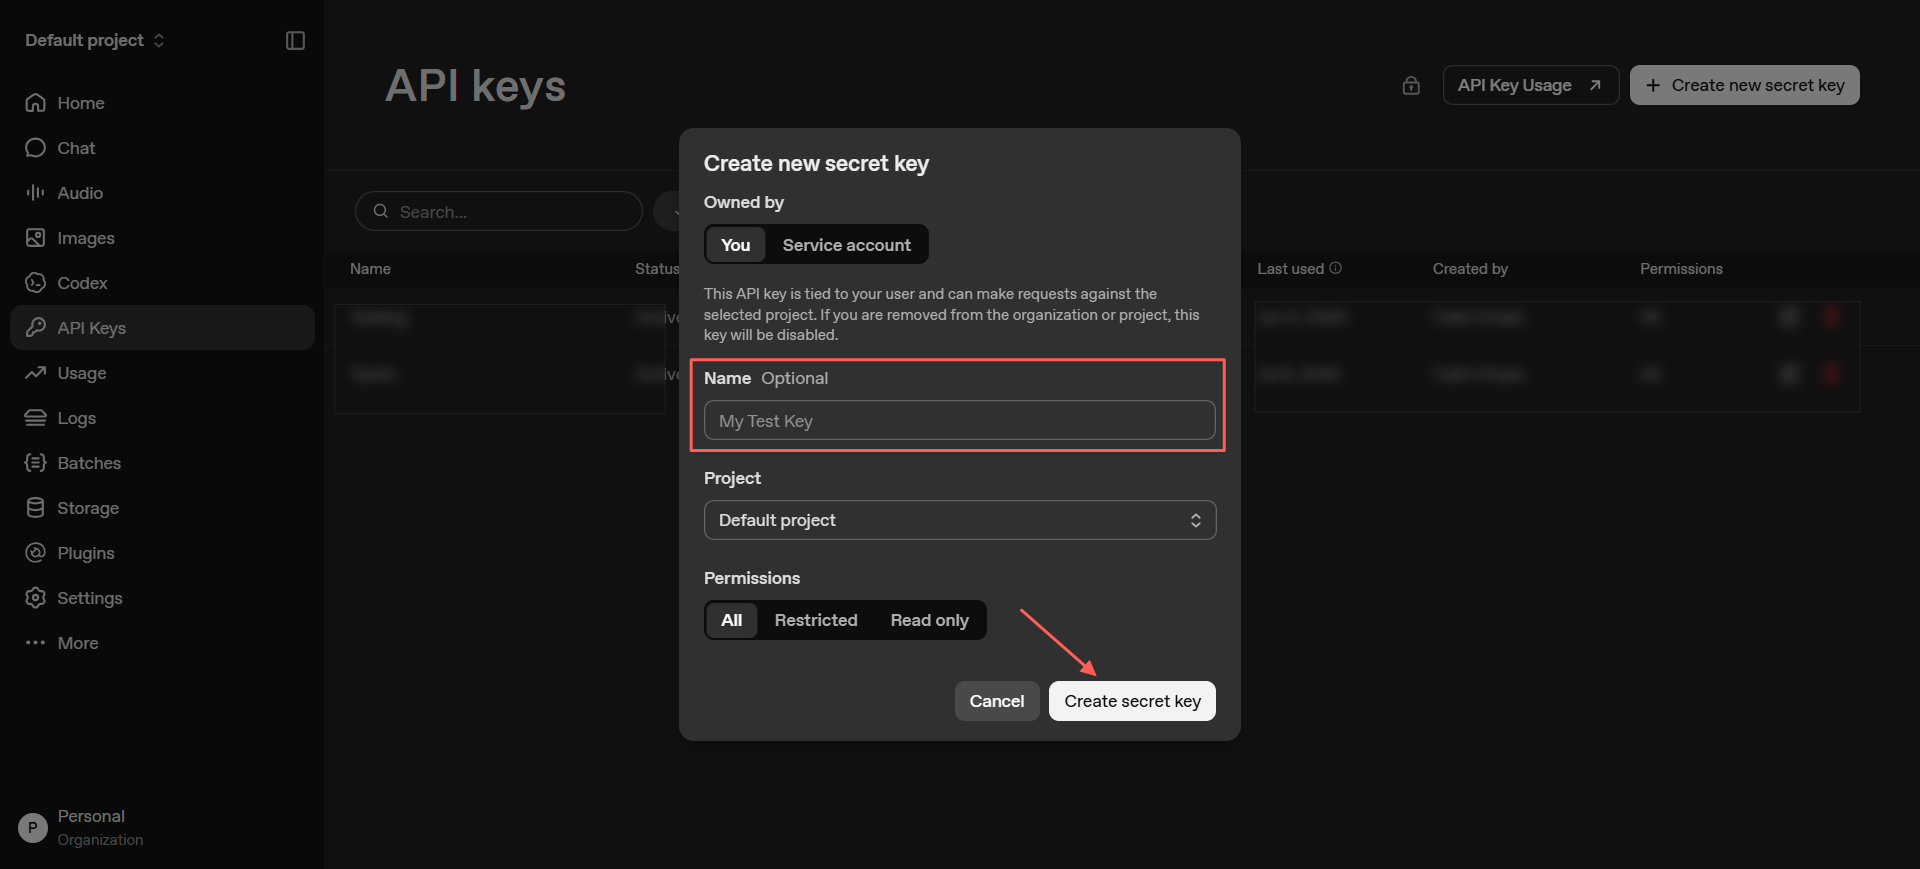
Step 3: Create a New API Key #
After opening the ‘API Keys’ page, click ‘Create new secret key’. Enter a name for the key (optional but recommended). Click ‘Create secret key.’
Step 4: Copy Your API Key #
OpenAI will immediately generate your new API key. Your API key is displayed only once.
Click ‘Copy’ and store it in a secure location. A typical OpenAI API key looks similar to:
sk-proj-XXXXXXXXXXXXXXXXXXXXXXXXXXXXXXXXXXXXXXXX
Note: After closing the dialog, you cannot view the complete API key again. If you lose it, you’ll need to create a new one.
Step 5: Configure Billing (If Required) #
Some OpenAI models require an active billing account. To configure billing:
Open Settings. Navigate to Billing. Add a payment method if prompted. Enable pay-as-you-go billing or purchase API credits if applicable.
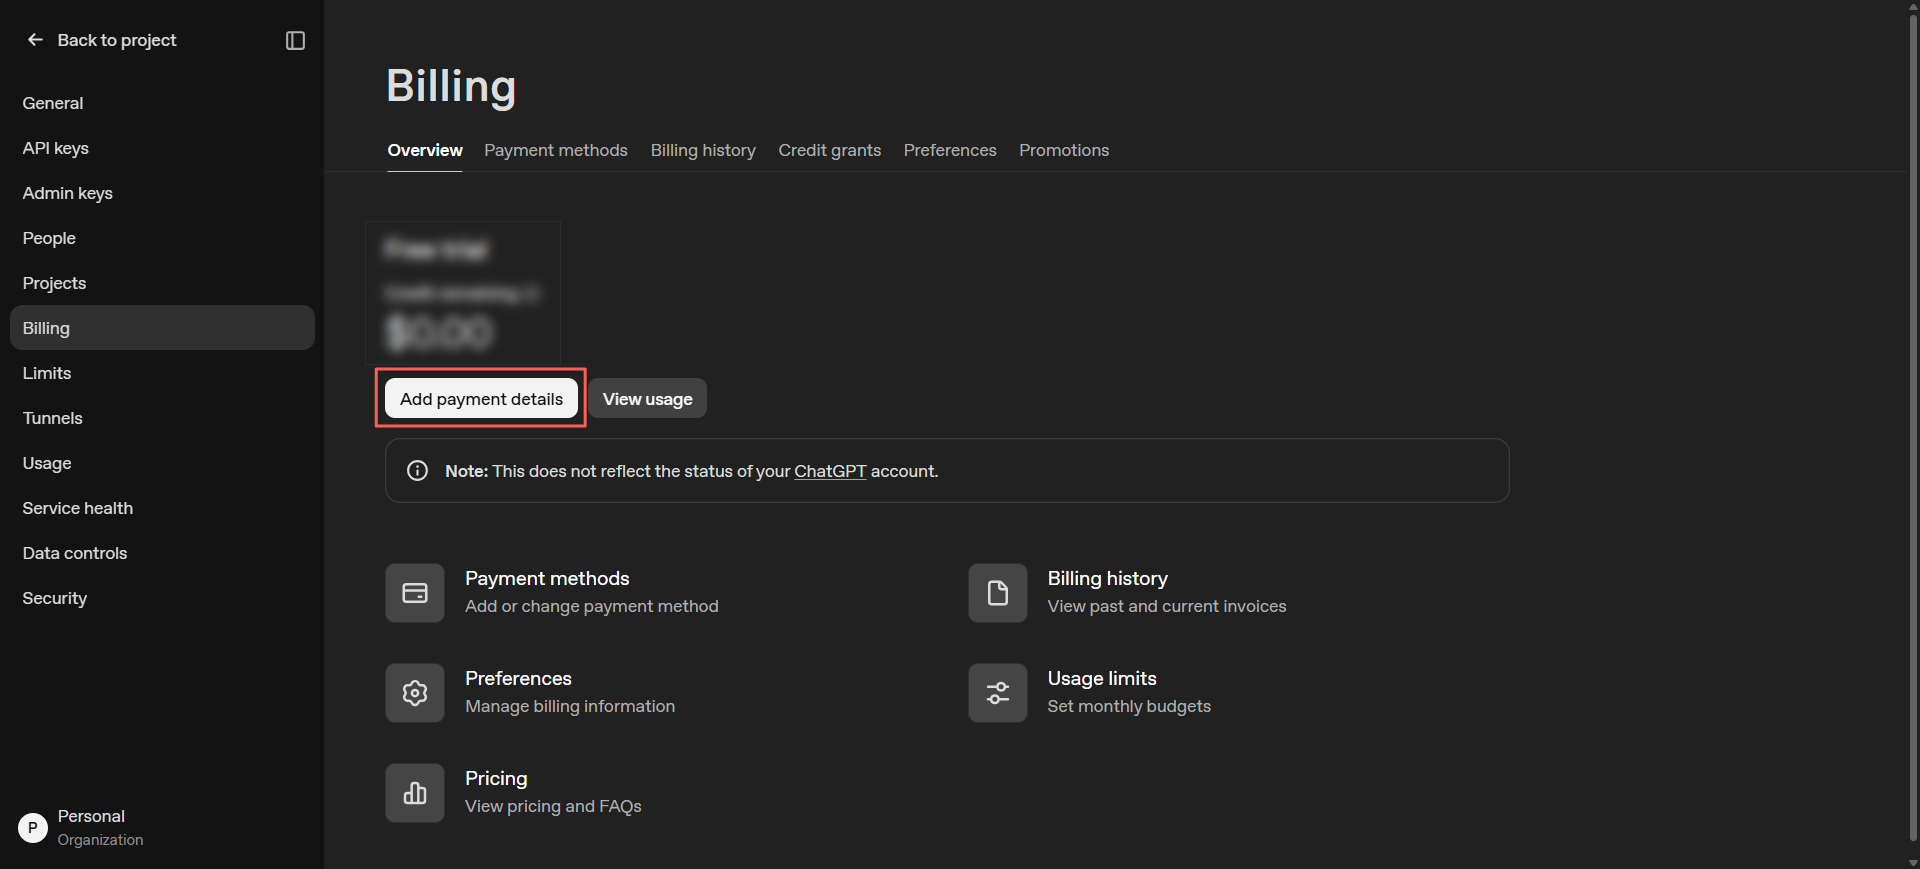
Note: If your account has no available quota, API requests may return billing or quota errors.
Once you’ve copied your API key, you’re ready to connect your application to OpenAI models.
Generate a Google Gemini API Key #
Google AI Studio makes it easy to generate an API key for accessing Gemini models. Follow the steps below to create your Google Gemini API key and connect it to your application.
Google AI Studio allows developers to generate API keys for Gemini models.
Step 1: Open Google AI Studio #
Visit Google AI Studio. Sign in using your Google account. If prompted, accept the required terms and conditions.
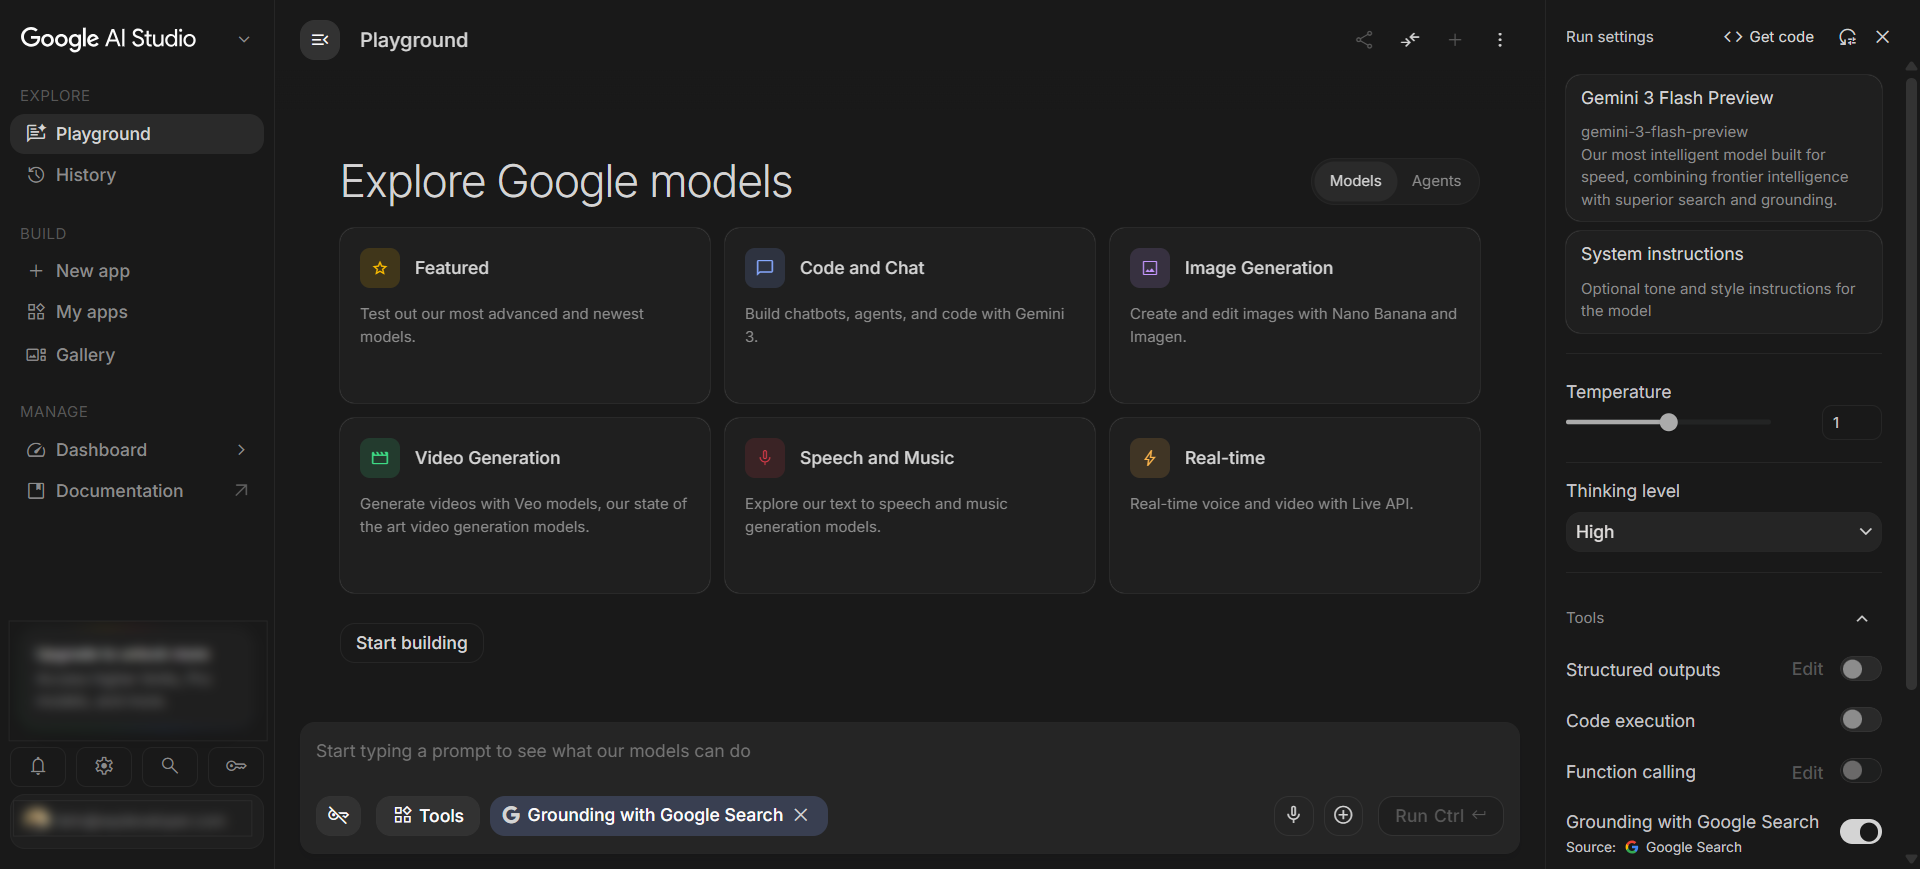
Step 2: Open the API Key Page #
From the left navigation menu, click the key icon named ‘Get API Key’.
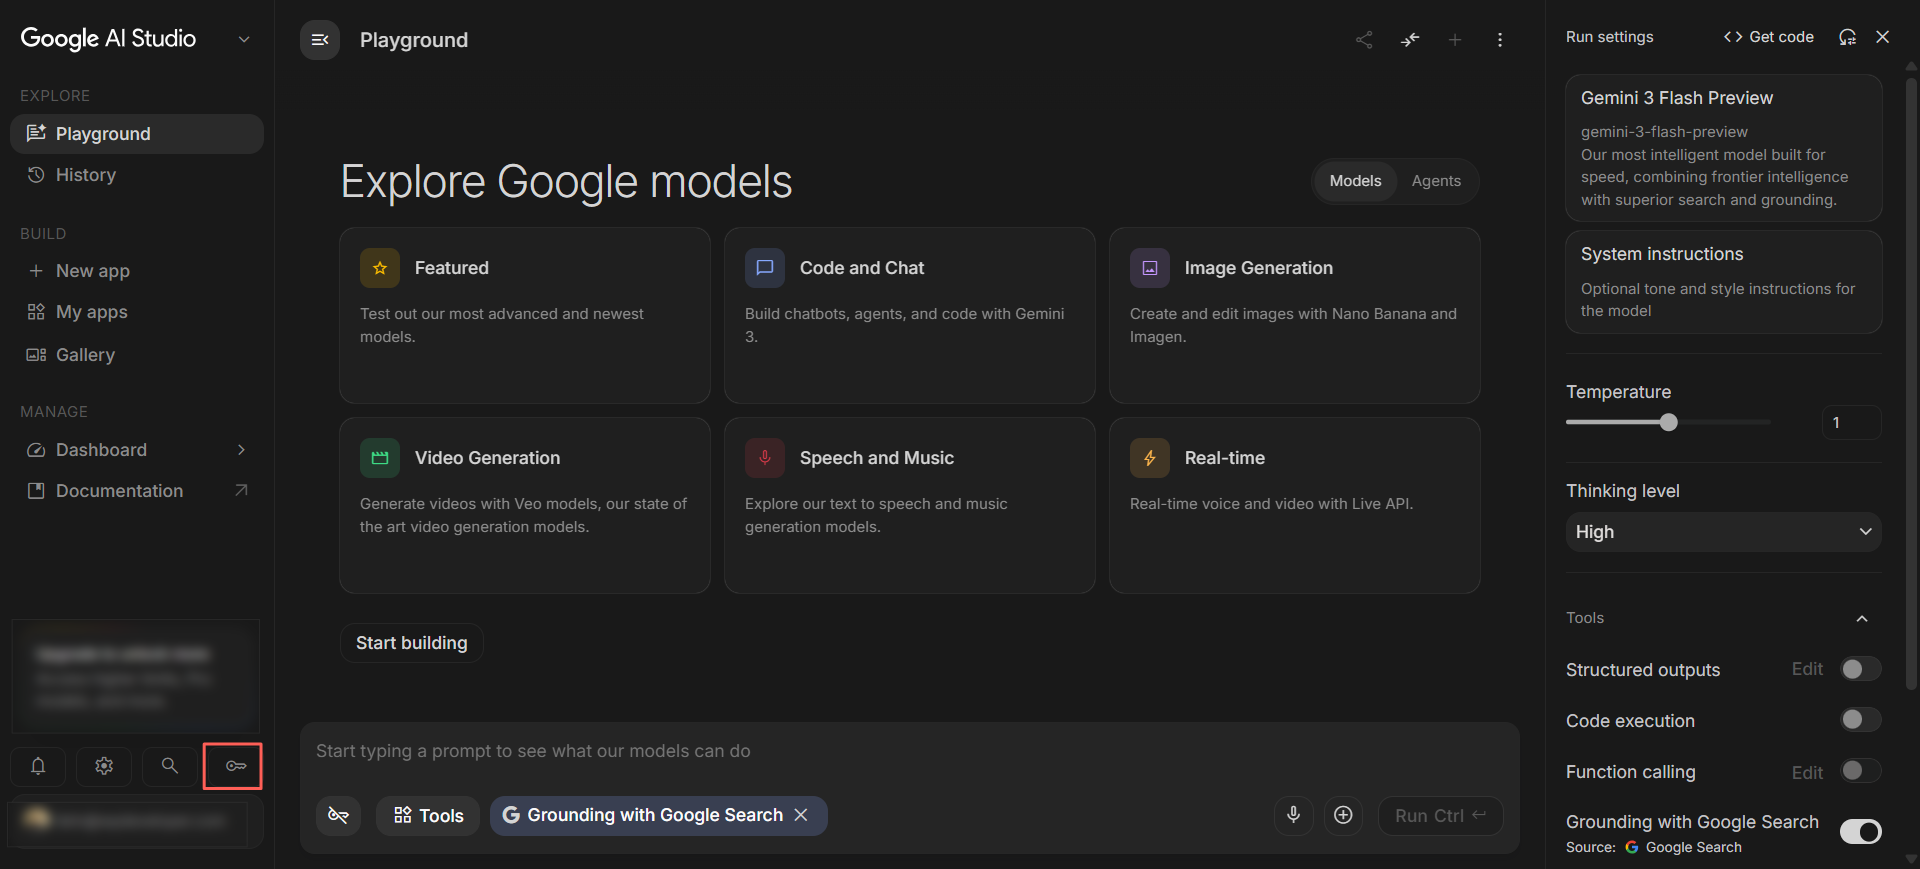
You can also visit: Gemini API Keys.

Step 3: Create an API Key #
Click ‘Create API Key’
Google may ask you to:
- Name your key
- Select an existing Google Cloud project, or
- Create a new project.
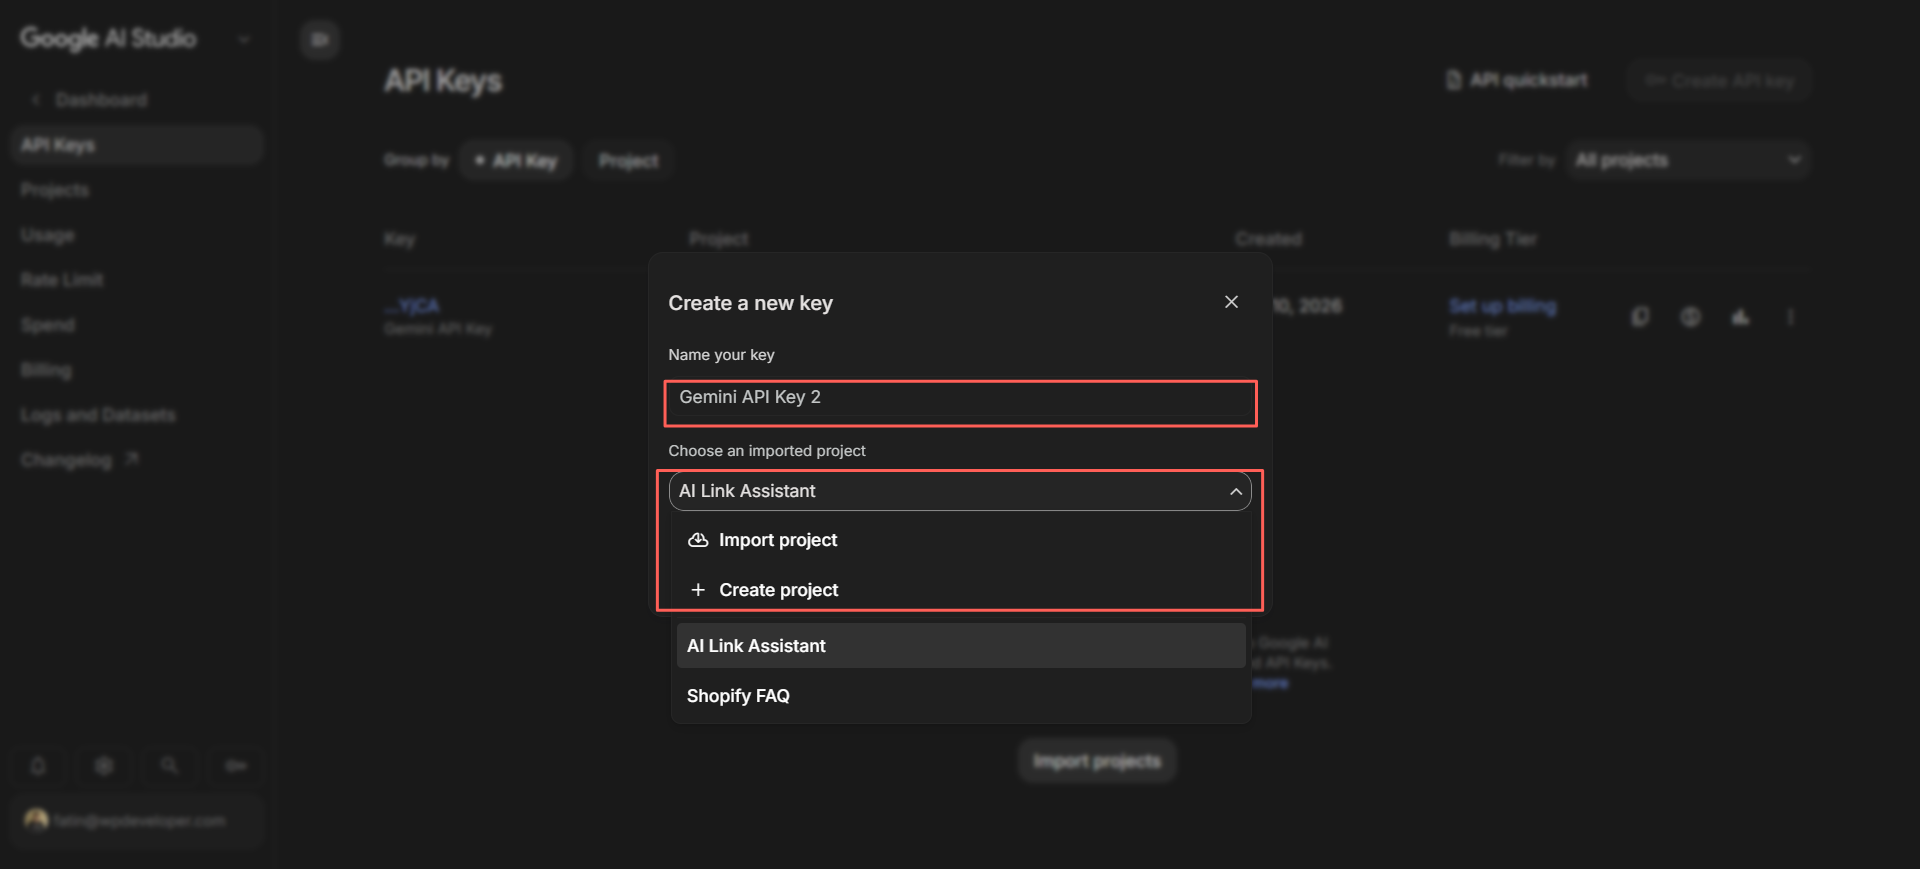
Step 4: Copy Your API Key #
After selecting a project, click ‘Create key’. Google generates your API key. Copy the generated key and store it safely.
A Gemini API key usually looks similar to: AIzaSyXXXXXXXXXXXXXXXXXXXXXXXXXXXXXXXX
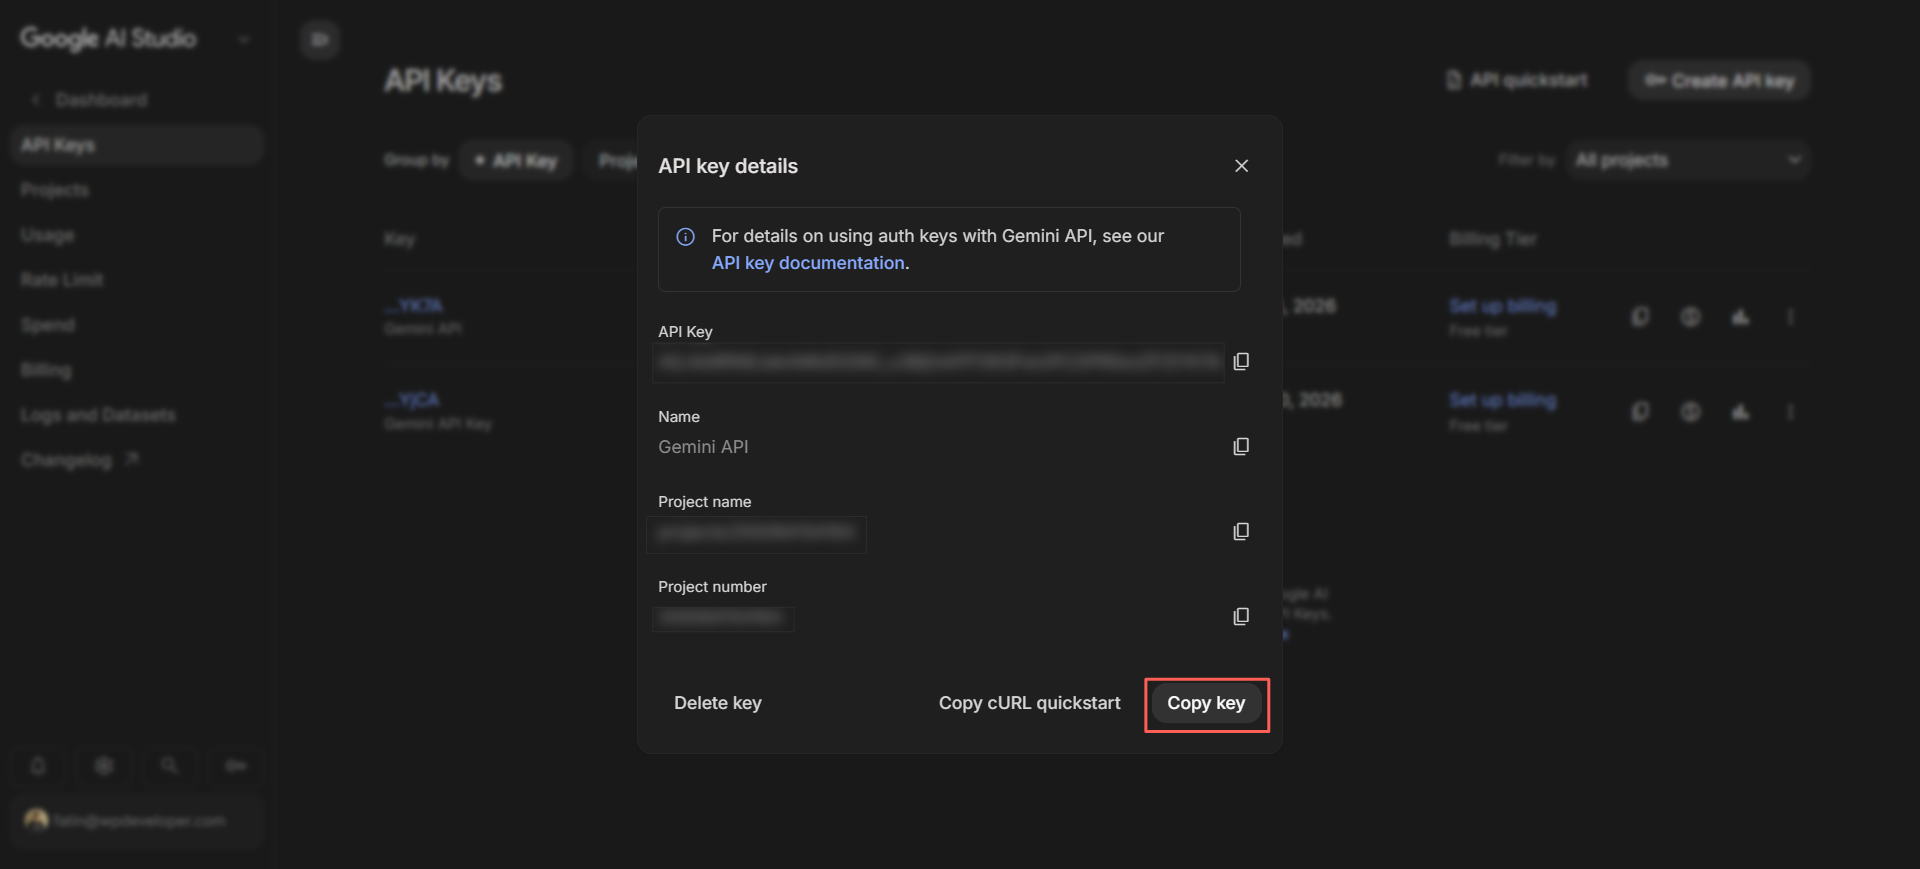
Note: Keep this key private. Anyone with access to your API key may use your API quota.
Step 5: Understand Usage Limits #
Google AI Studio provides a free usage tier with rate limits. If you need higher quotas or production usage, you can upgrade your Google Cloud billing account.
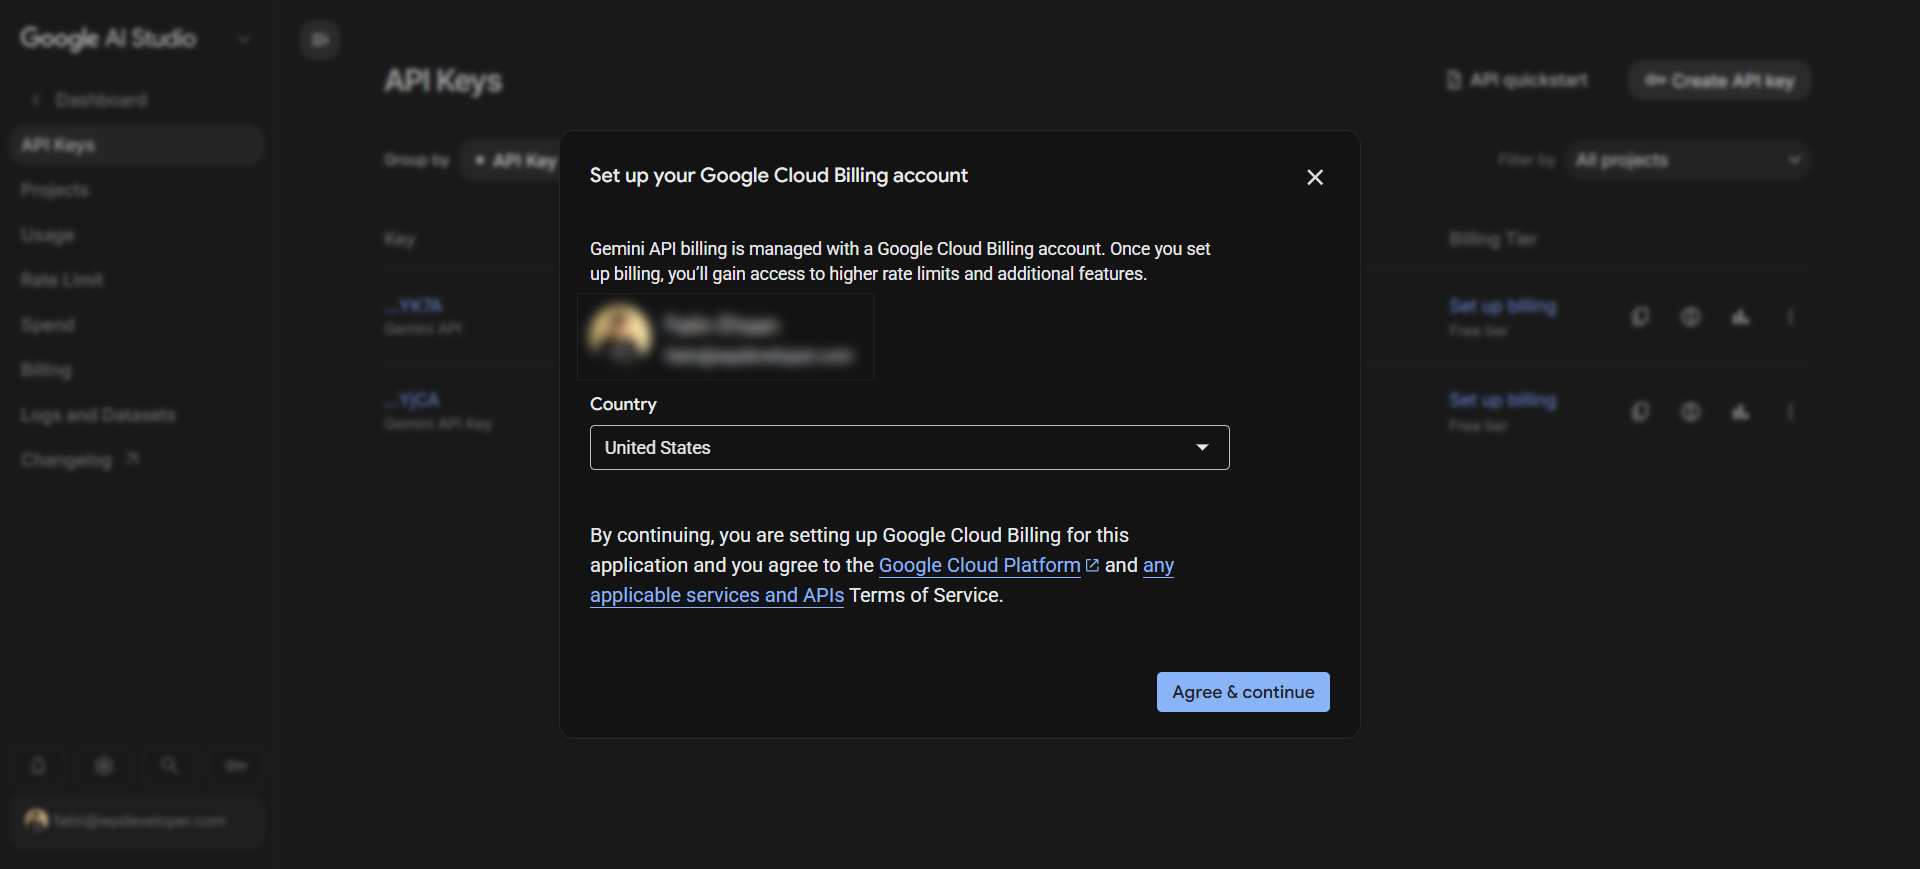
For more information, check out the official Google Gemini API documentation: Gemini API Keys Documentations
Need More Help? #
If you’re experiencing issues generating or using your API key, visit the official documentation:
These resources provide the latest information about API usage, billing, authentication and model support.
Need help with something? You are welcome to contact our support team at any time.