BetterLinks offers you to configure Google Analytics on your WordPress website so that you can get insightful data about your website links, click-through-rates and more.
Follow the steps below to configure Google analytics with your BetterLinks plugin on your website with some simple steps below.
How To Configure Google Analytics With BetterLinks? #
First, make sure you have installed and activated BetterLinks on your website. Since Google Analytics is a premium feature, you will also need to install BetterLinks Pro on WordPress.
Step 1: Get Your Tracking Code From Google Analytics #
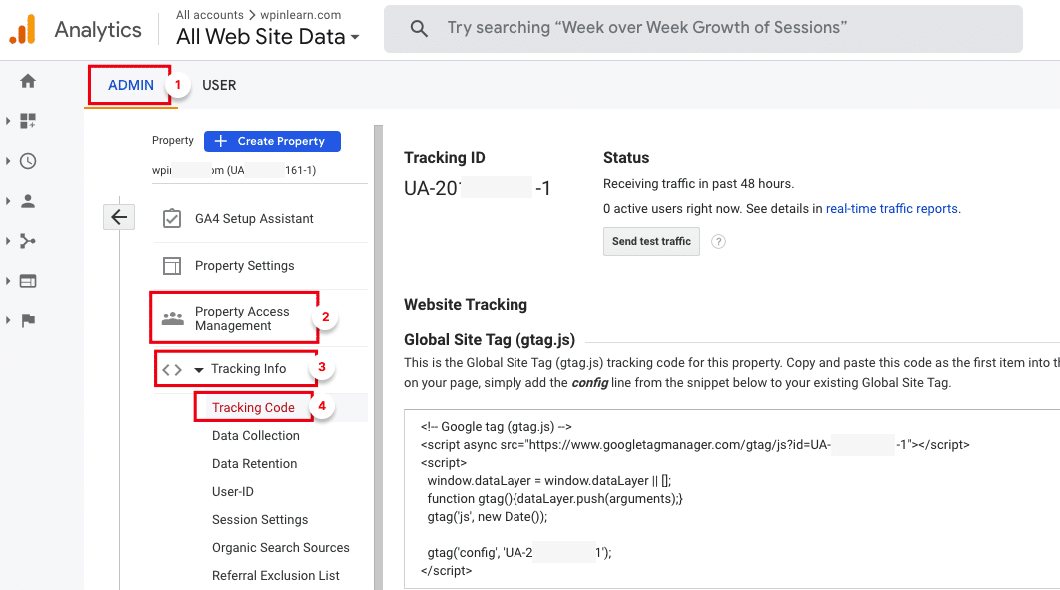
First, navigate to your Google Analytics account. Click on Admin → Property Access Management from your account. Next you need to click on the Tracking Info → Tracking Code.

Step 2: Find And Retrieve Your Tracking ID #
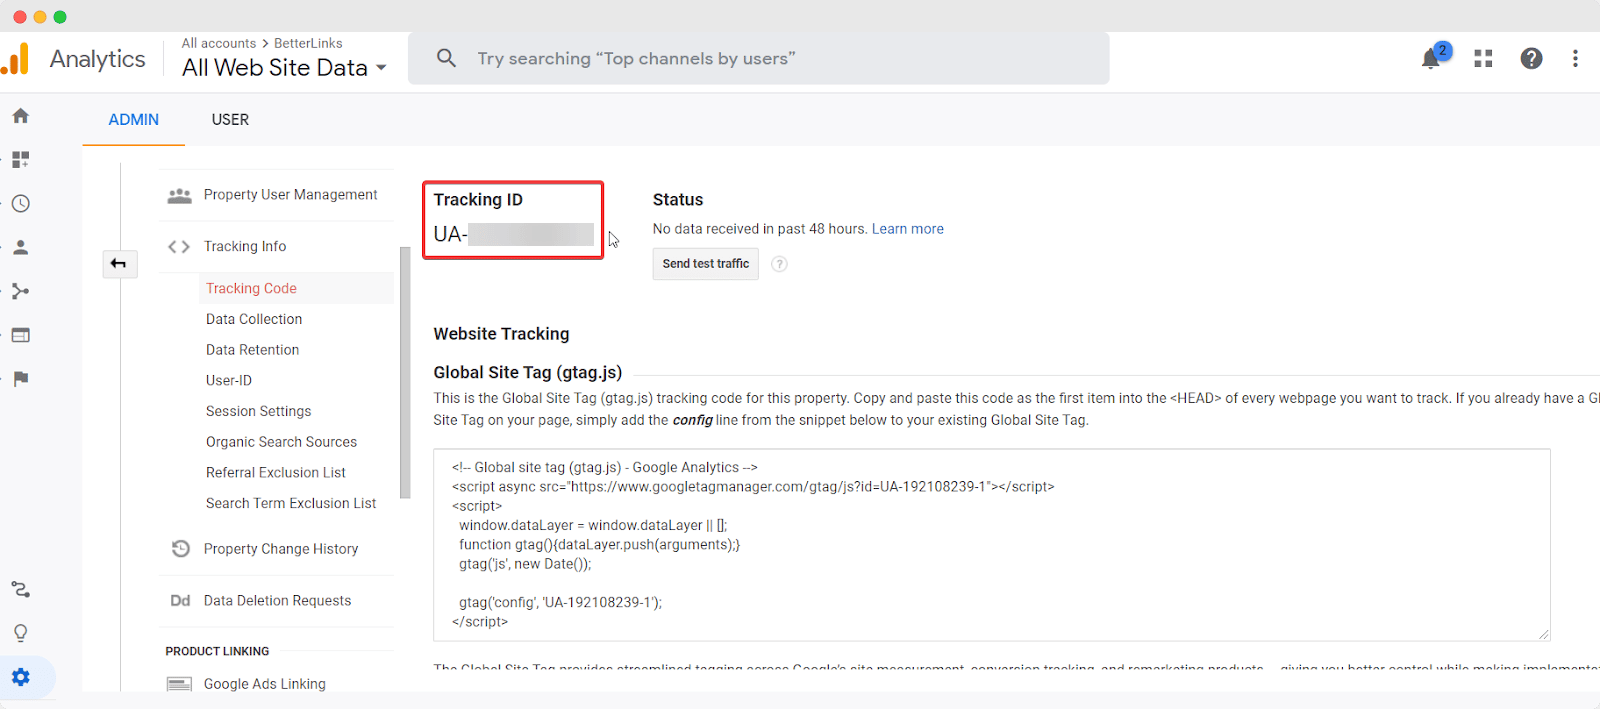
When you click on the “Tracking Code” option, you will find the “Tracking ID” as shown below. Simply copy the ID from there.

Step 3: Paste The Tracking ID In BetterLinks #
Now go back to your WordPress dashboard and navigate to BetterLinks –> Google Analytics as shown below. Check the box beside ‘Enable Google Analytics’. Paste the ‘Tracking ID’ you had copied earlier and click on the ‘Save Settings’ button.

This is how you can easily configure Google Analytics with BetterLinks.
Need assistance? You are welcome to contact our support team at any time or join our Facebook community to share your experience.


