Businesses use Facebook Pixel Tracking to monitor & analyze the performance of website links and manage campaigns better. Now you can do Facebook Pixel Tracking with BetterLinks as well.
BetterLinks offers you to configure Facebook Pixel Tracking on your WordPress website so that you can track links, click-through & conversion rates, and more.
How To Enable Facebook Pixel Tracking With BetterLinks? #
Follow the steps below to integrate Facebook Pixel using BetterLinks on your website.
Note: Make sure that you have both the Free & PRO version of BetterLinks installed & activated on your site.
From your WordPress dashboard, navigate to BetterLinks → Settings →Tracking. Check the ‘Enable Facebook Pixel Tracking’ option.

The Facebook Pixel Tracking feature has been enabled. Now, you will require your Pixel ID and Pixel API Access Token.
How To Retrieve Pixel ID And Pixel API Access Token? #
To retrieve the Pixel ID and Pixel API Access Token, go through the following steps below.
Step 1: Login To Your Meta Business Account #
First, from Facebook Business Manager, log in to your meta business account or create a new one.

Step 2: Set Up Meta Pixel #
Now, go to Events Manager and click on the green ‘+’ icon to connect data sources. Select ‘Web’ as the data source. Afterward, select ‘Meta Pixel’ and click on ‘Connect’.

Next, you will see another popup to create your Pixel. Give your pixel your preferred name and click on ‘Create Pixel’.

You will now be directed to enter your website’s URL in another popup. So, place your website’s URL there and click on the ‘Check’ button.

Once the previous steps are done, you will now be directed to connect your WordPress website with meta with detailed instructions.

Click on the Next button and at Stage 3 you will need to verify your connection. For that, place your website URL in the ‘Enter URL’ field and click on the ‘Send Test Traffic’ button.
Step 3: Collect The Pixel Id & Access Token #
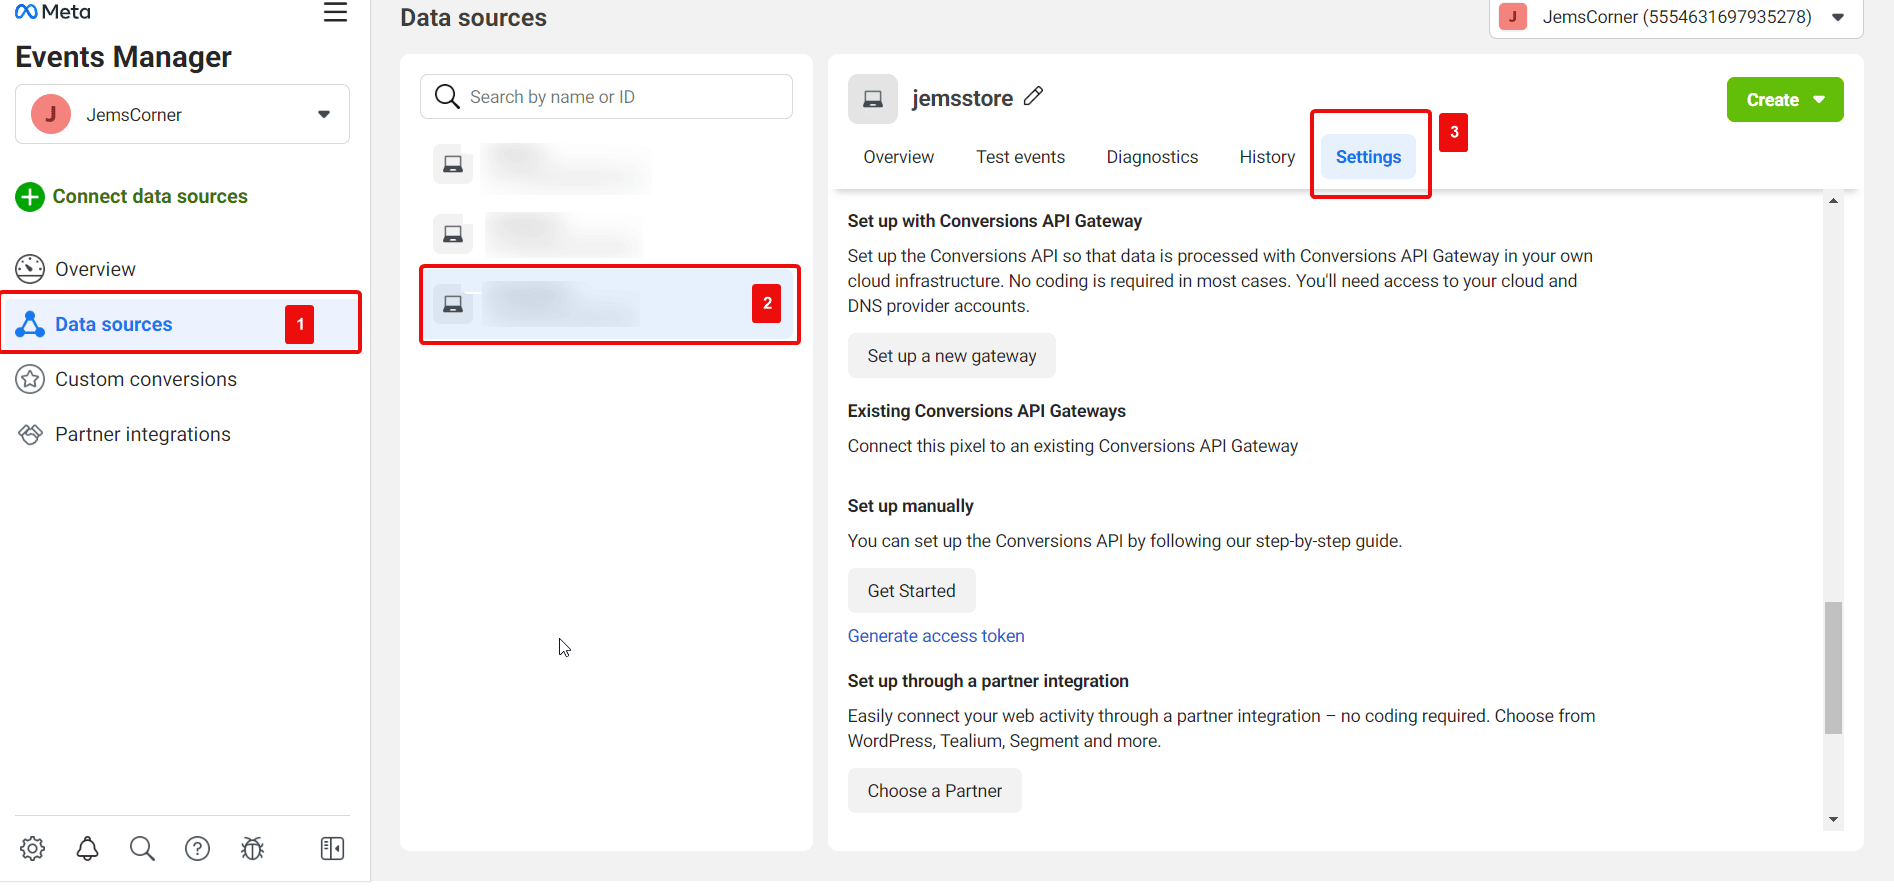
Go back to your Event Managers dashboard now. Click on ‘Data Sources’ and select the pixel you want to collect the Pixel ID & Access Token for. Go to the ‘Settings’ tab afterward.

Step 4: Copy The Pixel ID & Generate Access Token #
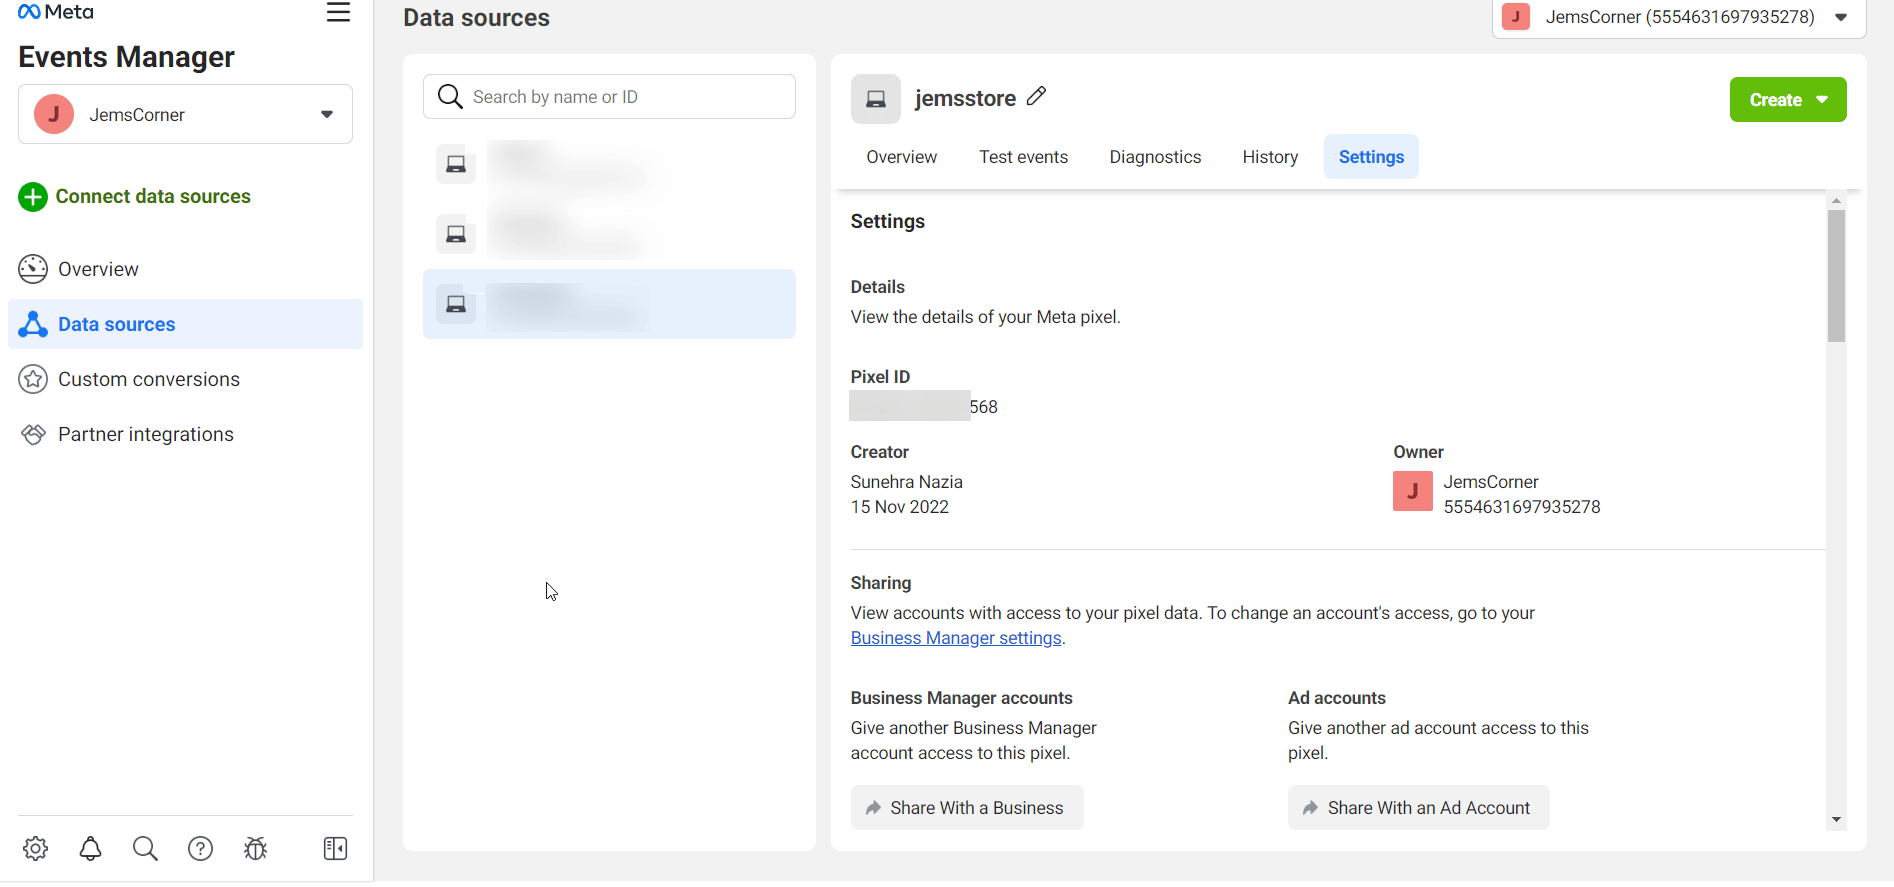
You will see the Pixel ID once you click on the Pixel you created. You need to copy that pixel ID first.

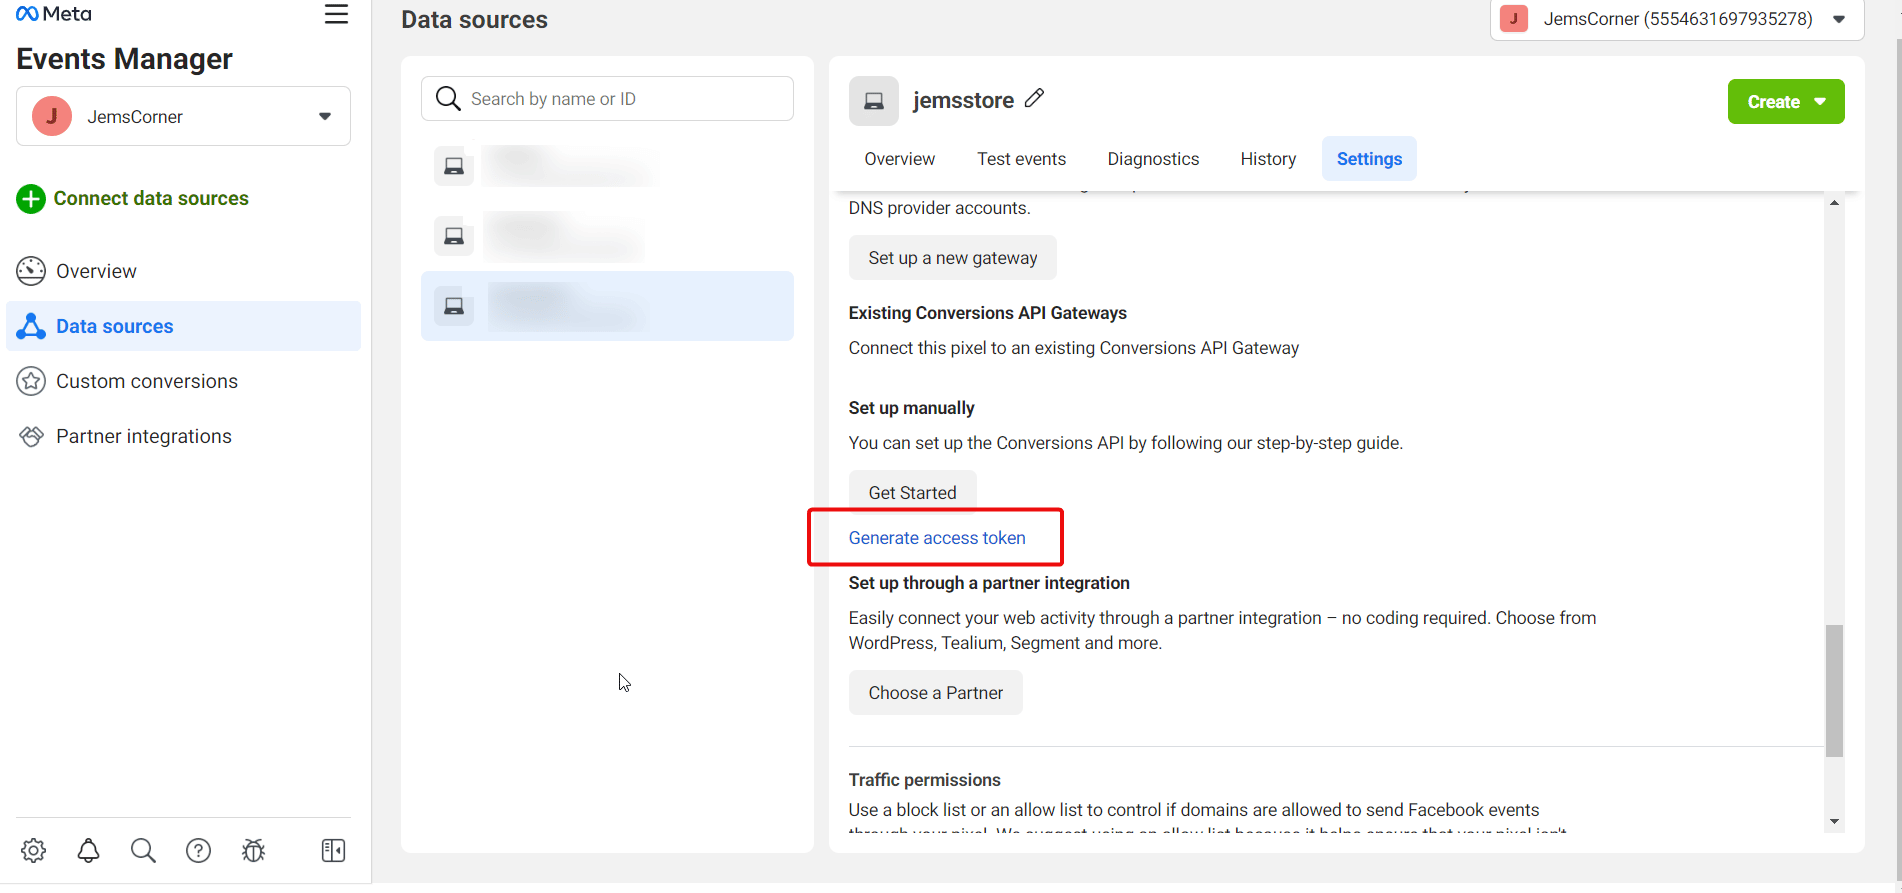
Now, scroll down and you will see an option to generate the Access Token. Click on the ‘Generate Access Token’ button to get the Pixel API Access Token. To copy the token, simply click on it and it will be copied.

How To Connect Facebook Pixel Tracking With BetterLinks? #
Go back to the BetterLinks dashboard from where you enabled the Facebook Pixel Tracking. Now paste the Pixel ID and API Access Token in the respective fields. Hit the ‘Save Settings’ button after that.

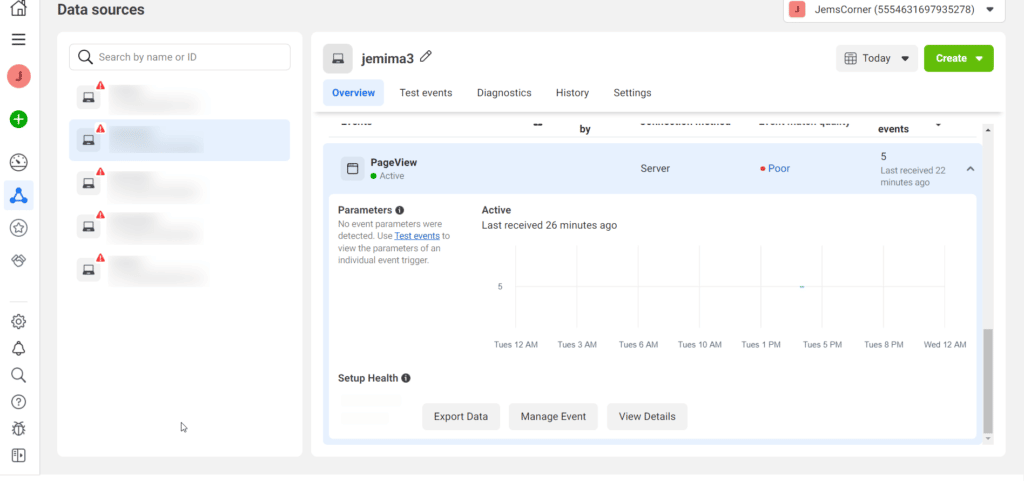
You can now track & monitor user activity, traffic, and detailed tracking data as displayed below if you go to the ‘Overview’ tab of the Pixel you created from your Events Manager dashboard.

For detailed data, click on ‘View Details’. Select URLs from the dropdown menu to monitor the URLs of your website.

Thus, you can configure Facebook Pixel Tracking with BetterLinks and track links effortlessly. Got stuck? Contact our dedicated support team for further assistance.


