With BetterLinks, you can easily add and manage tags to add to your new or existing links. This feature lets you sort and organize your links with the help of tags. Additionally, you can search, manage, and view analytics for links under specific tags to make the link management job easy and quick.
How To Add & Manage Tags Using BetterLinks #
Follow the step-by-step guide below to easily create and manage tags with BetterLinks.
Step 1: Add & Manage Tags In BetterLinks #
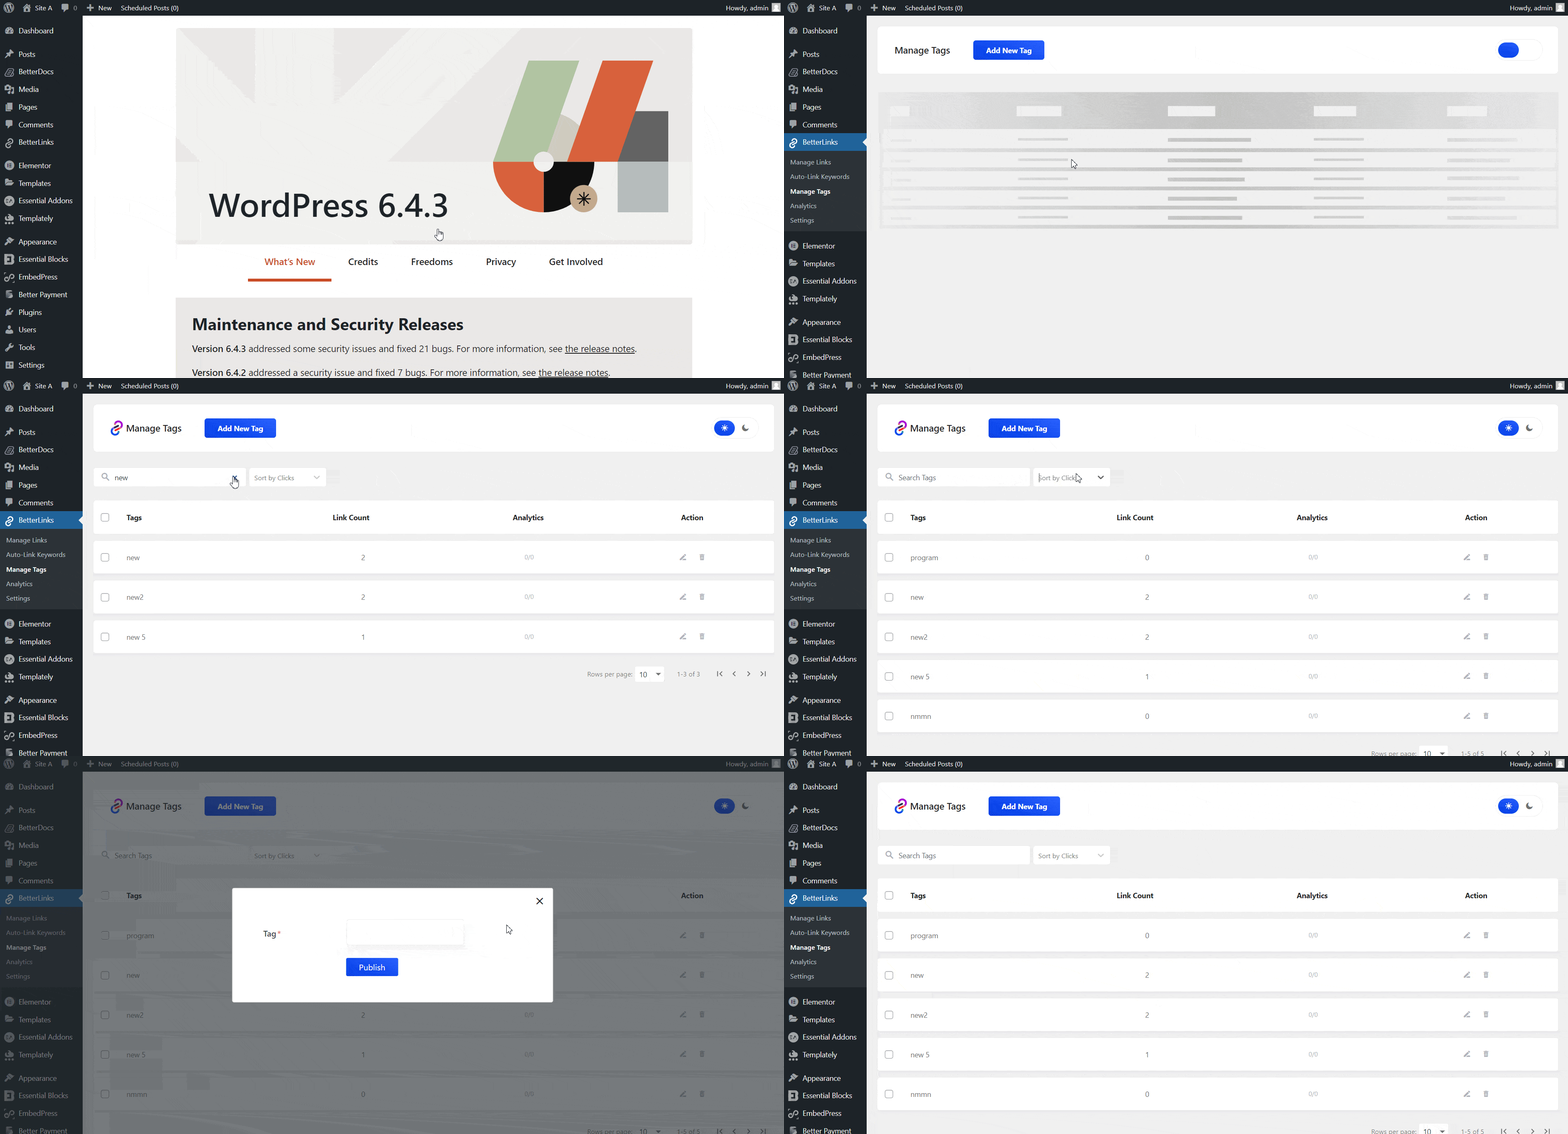
From your WordPress dashboard, navigate to BetterLinks → Manage Tags. Here, you can add new tags, search them with a search box, and sort them with some criteria.

To Add a new tag, simply click on the ‘Add New Tag’ button and set a name for your tag.

Under a tag, you can view analytics of how all of the links are performing. Just click on a tag below the ‘Analytics’ options, and you will find all the analytics of clicks and unique clicks for a specific period.

You can edit or delete a single tag from this tab or select multiple tags and take the same actions in bulk.

Step 2: Add Tags To New/Existing Links #
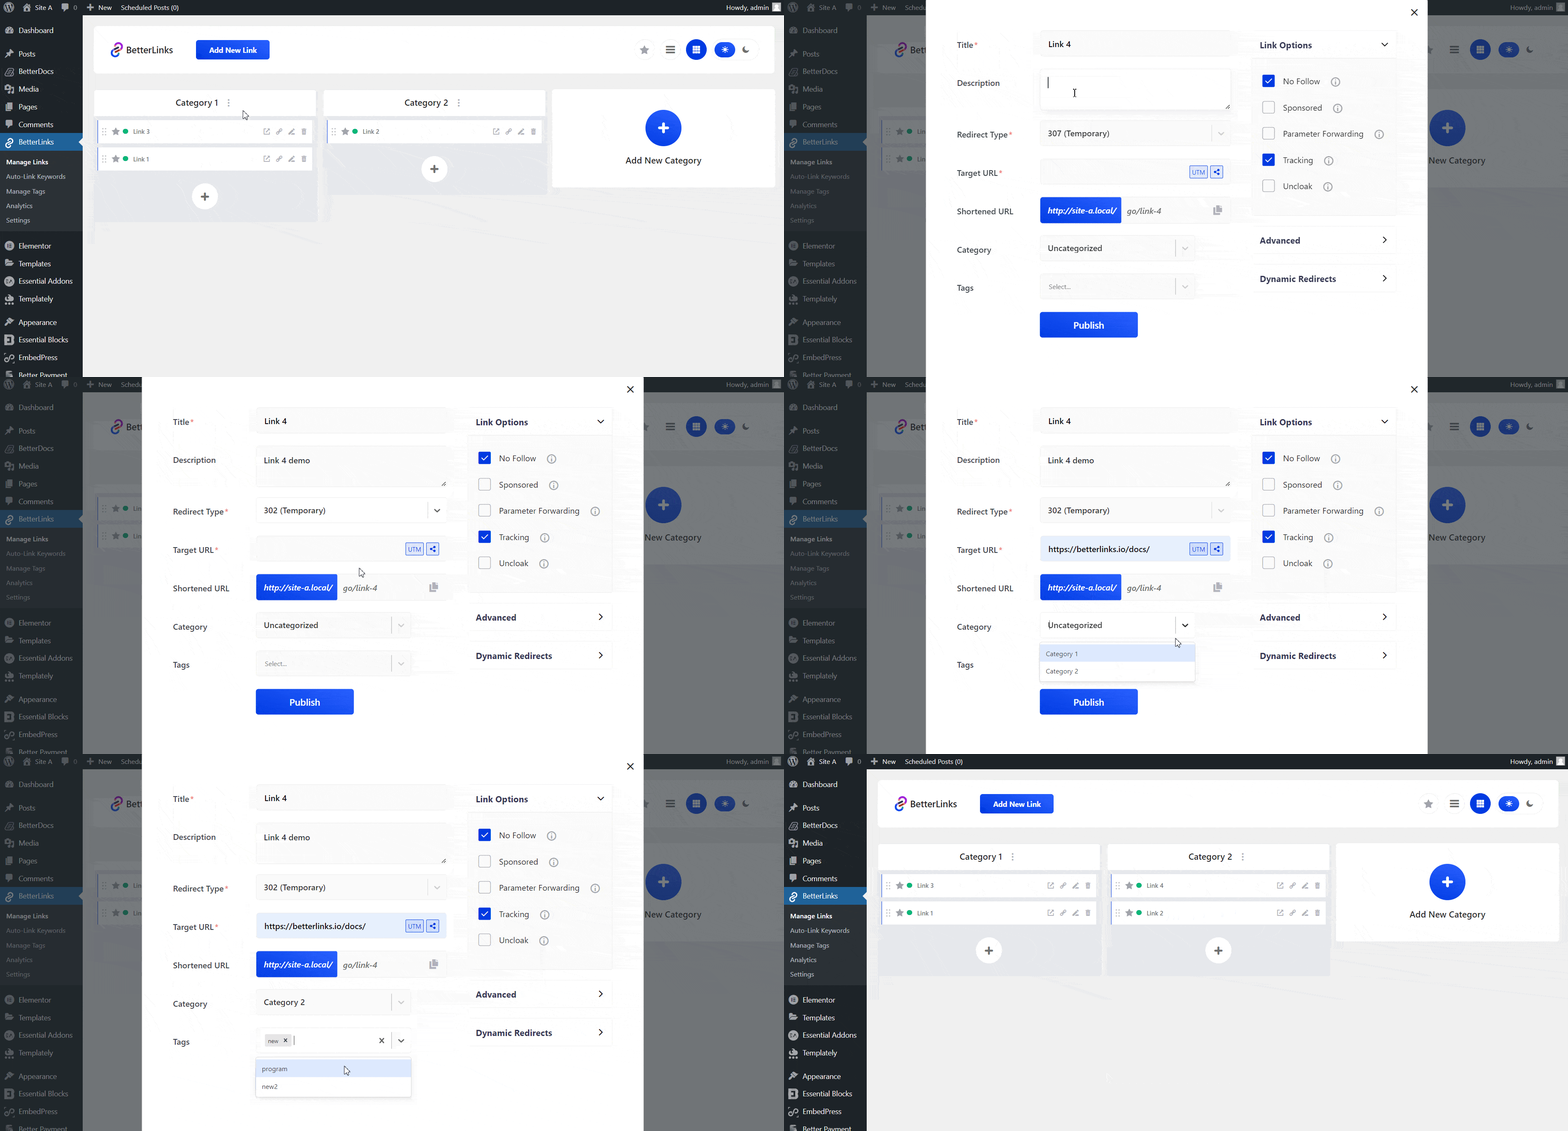
You can add tags to the new or existing links in BetterLinks. To do that, navigate to BetterLinks → Manage Links tab from your WordPress dashboard. Just click on ‘Add New Link’, provide the necessary details, and select your preferred tag from the ‘Tags’ option. Even if you don’t find a preferred tag, you can create one and add it instantly from here.

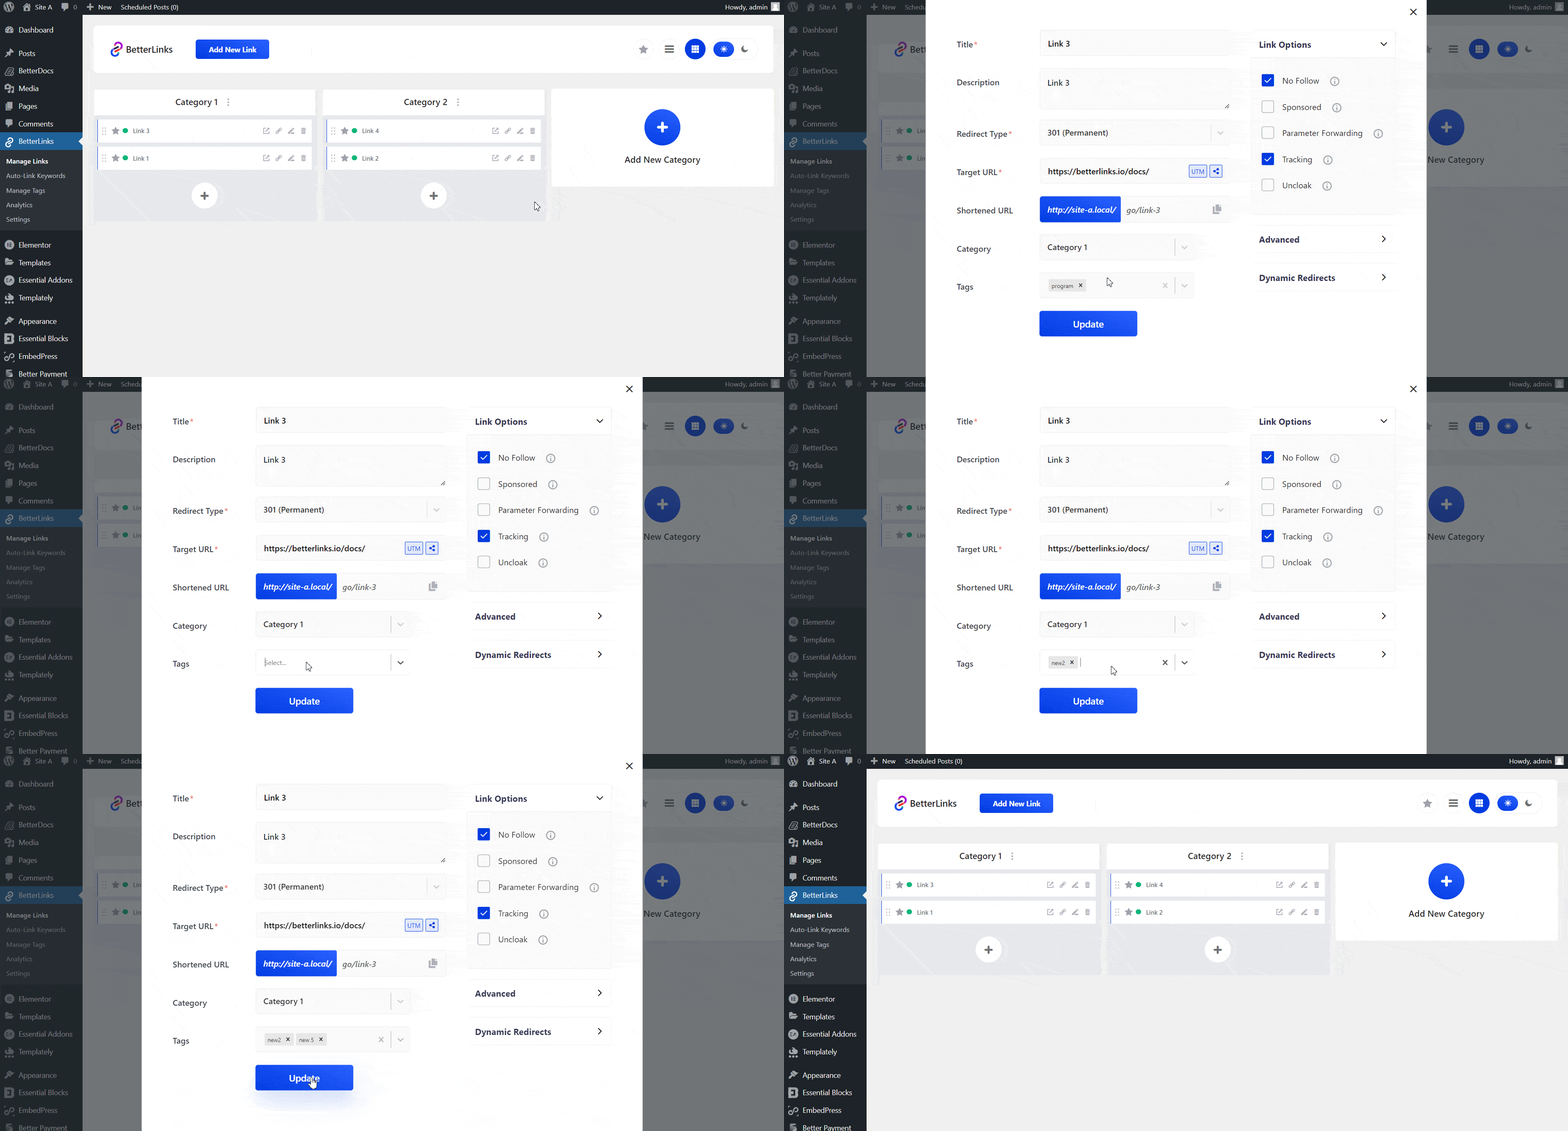
To add or remove tags from an existing link, simply click on the ‘Edit Link’ option and select or delete your preferred tags. Once done, update your link.

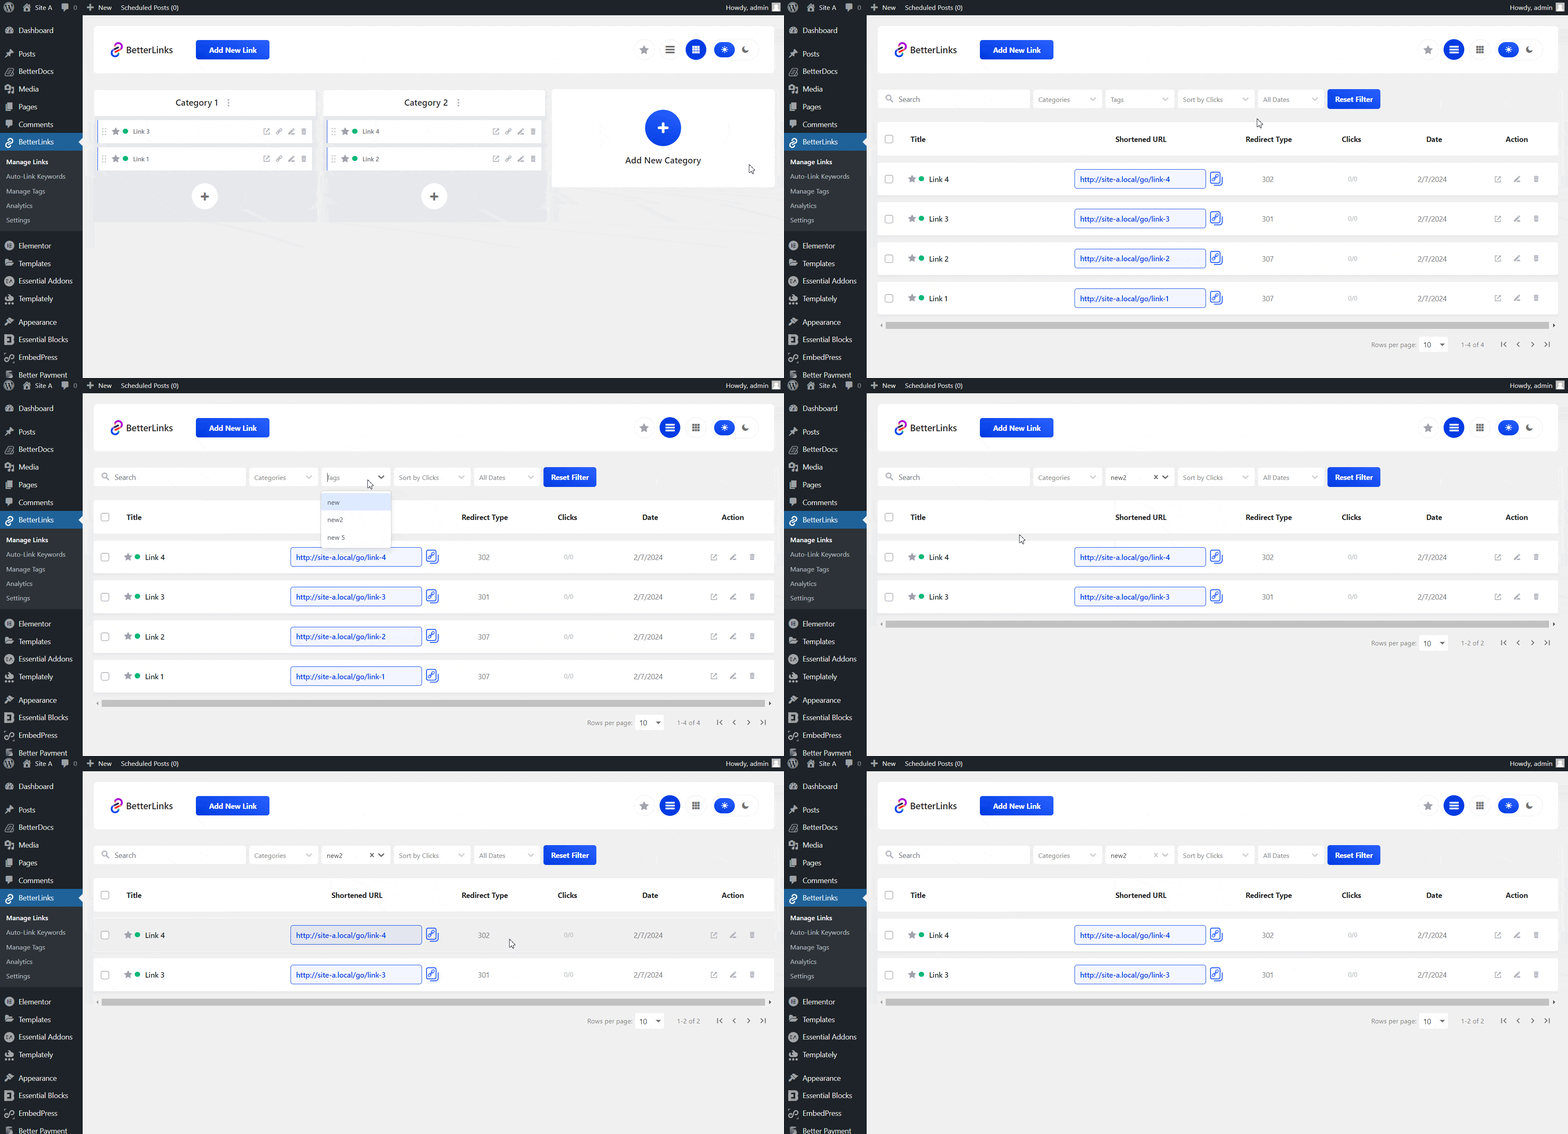
From this page, you can also filter and search your links by tags. To do that, use the ‘List View’ mode and choose your preferred tags from the ‘Tags’ field. It will display all the available links under the specific tags.

This is how you can create and manage tags with BetterLinks.
Need assistance? You are welcome to contact our support team at any time. And don’t forget to join our Facebook community group for regular updates.


