BetterLinks helps you to add and create new links with ease. You will be able to use the shorter version of the new link outside of your website as well. Start to follow this step-by-step guide below to create new links from your website dashboard.
Step 1: Add New Category in BetterLinks #
Go to your dashboard and navigate to BetterLinks → Manage Links. In the middle of the page, you will find the option to ‘Add New Category’.
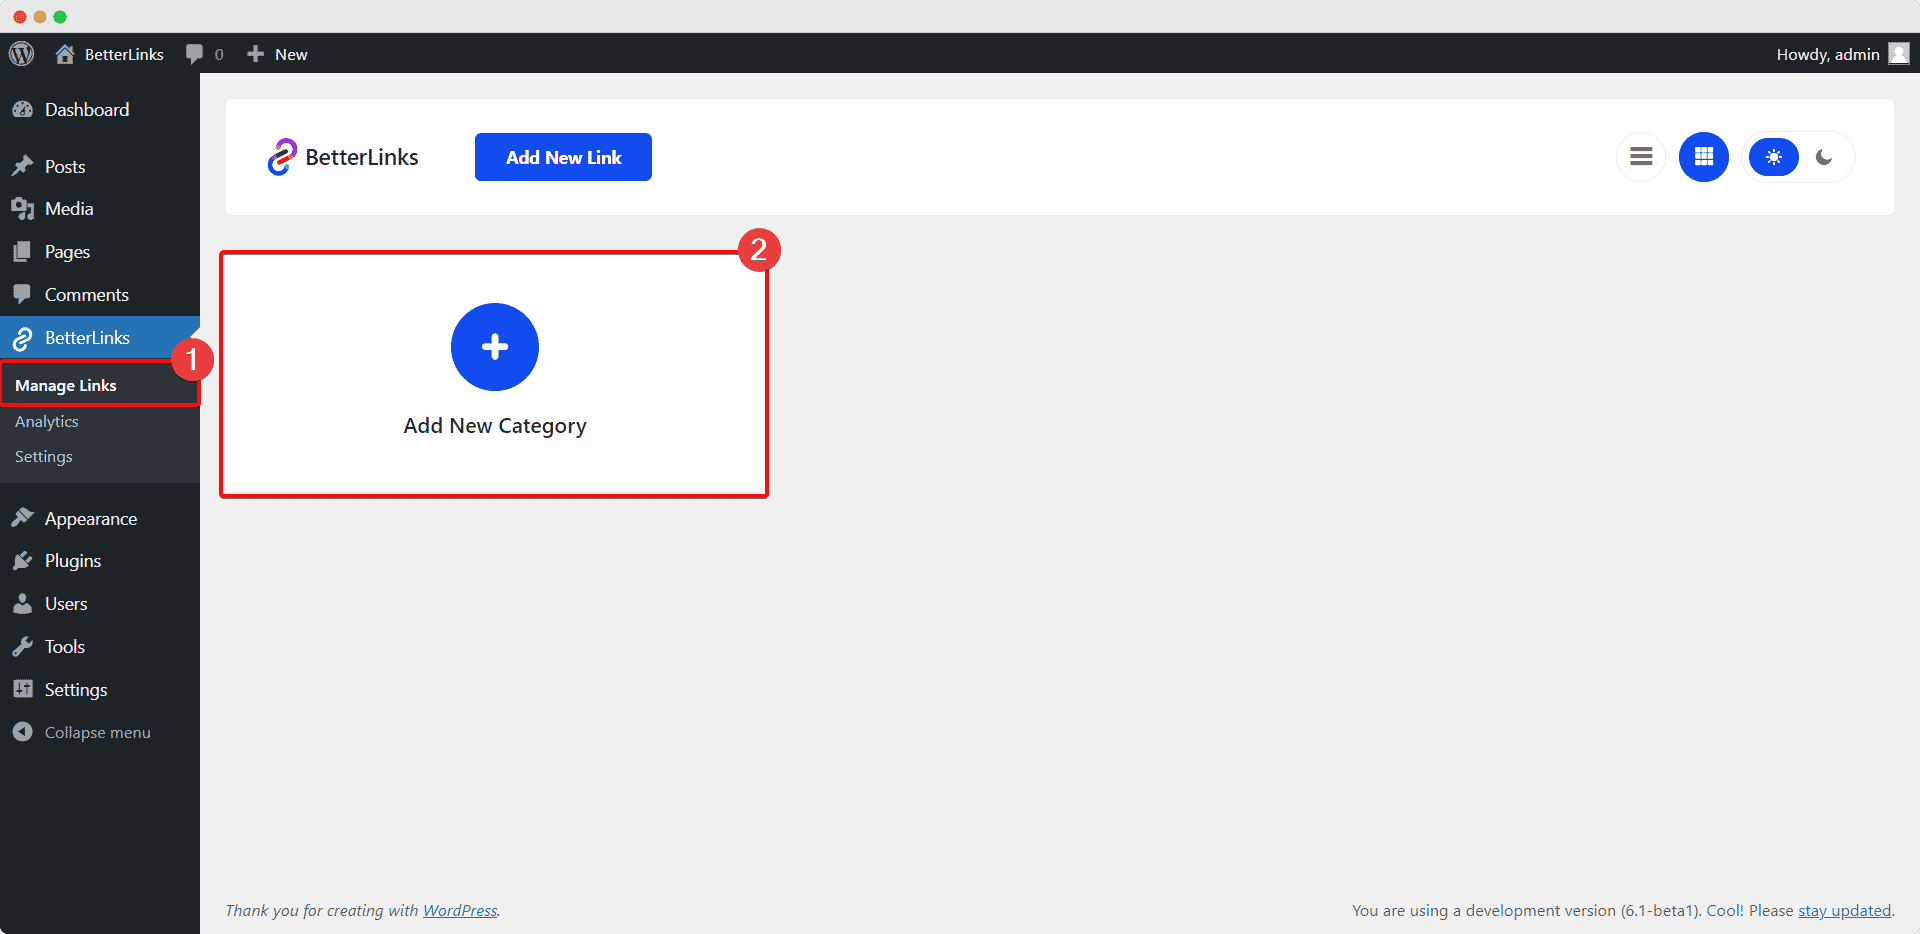
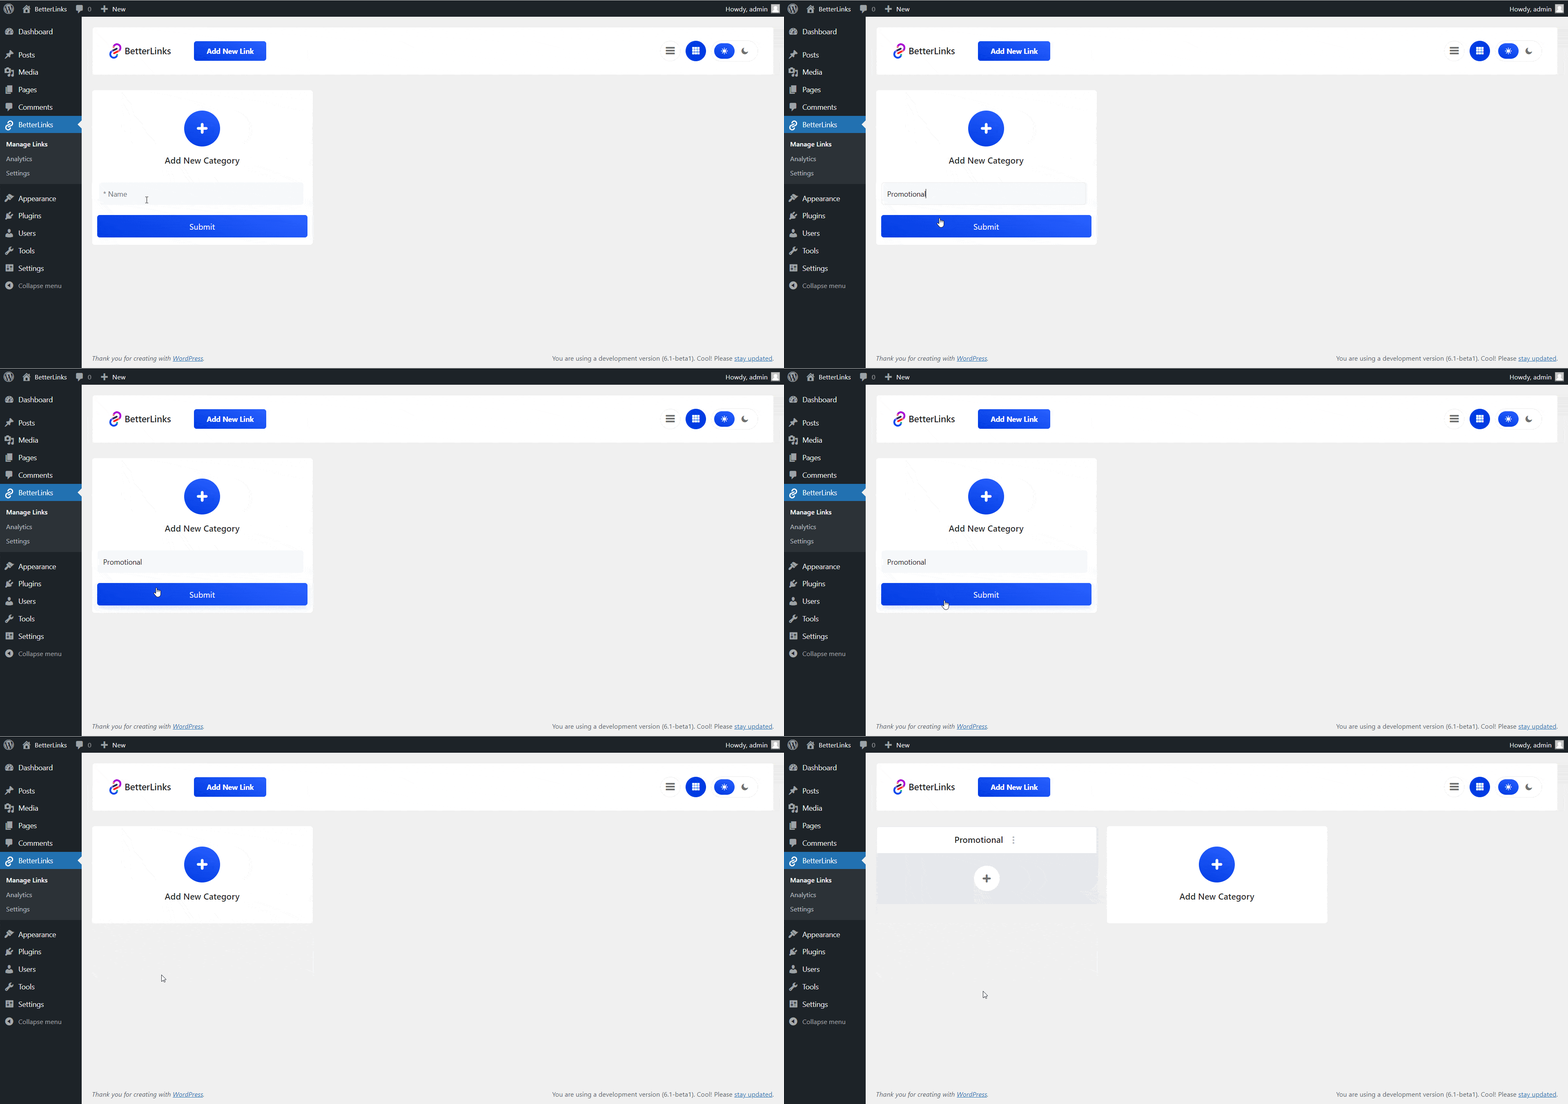
Click on the blue ‘+’ icon to add a new category. Provide a suitable name for your new category and hit the ‘Submit’ button. Thus how you can add new category successfully to manage links.
Step 2: Create New Links #
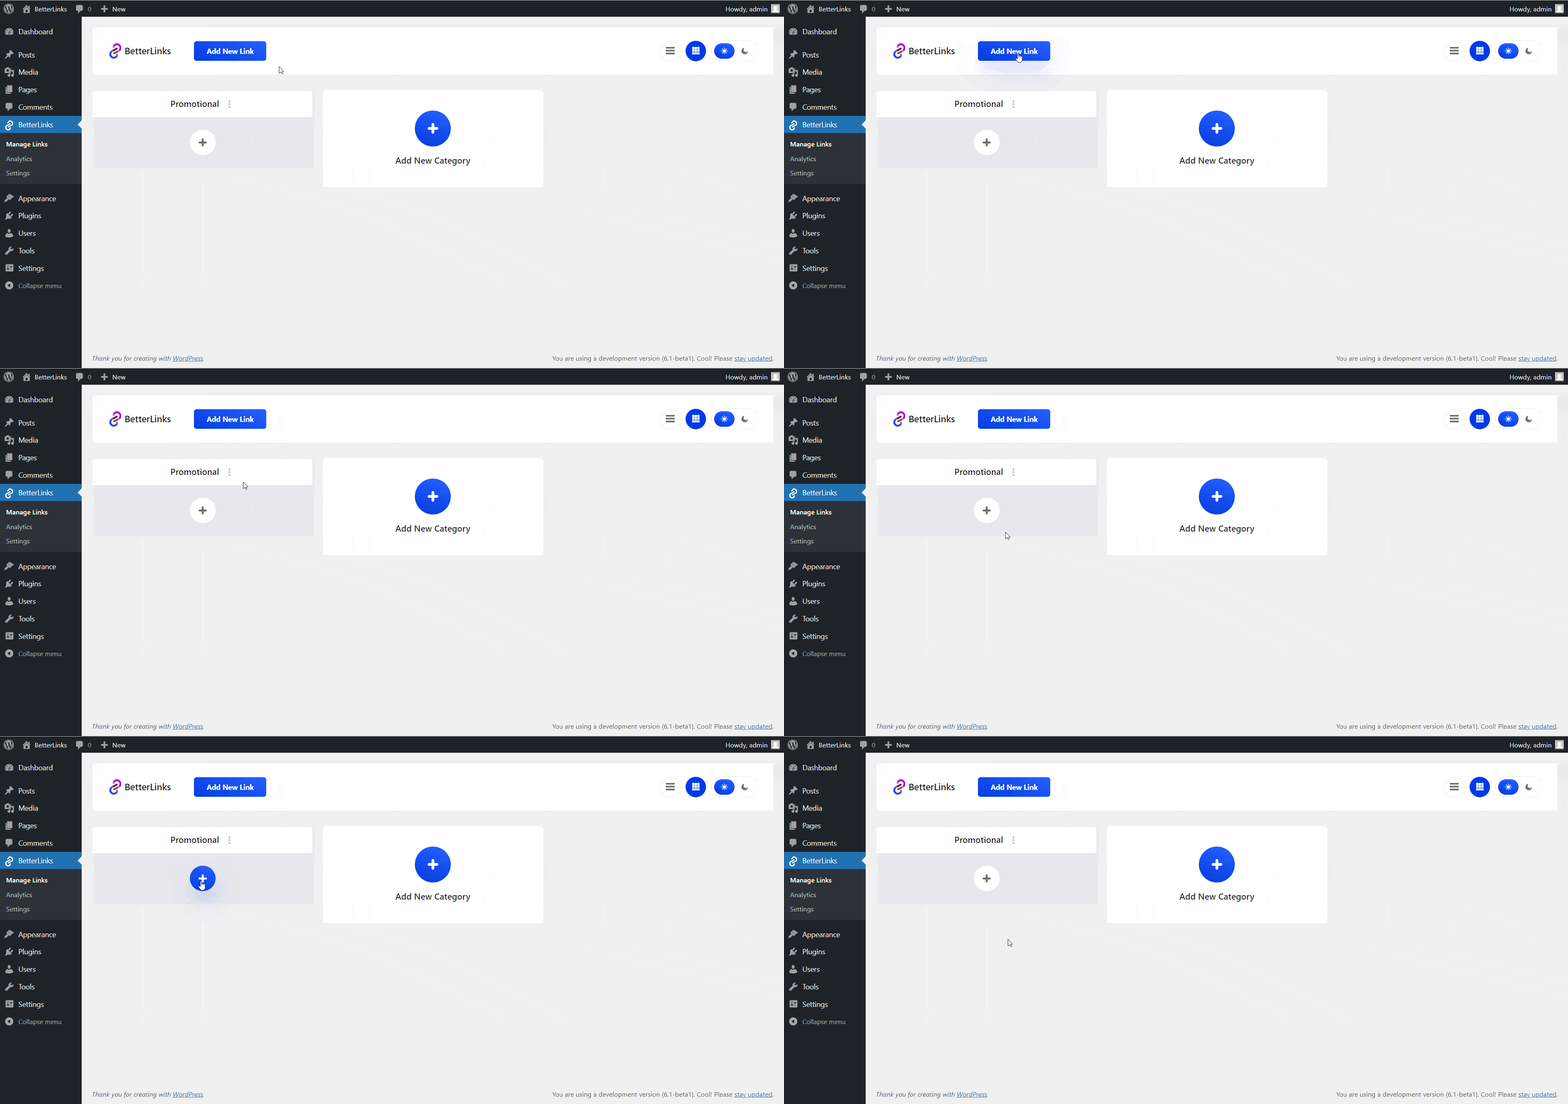
It’s time to create new links with BetterLinks, and you can make it happened in two ways. You can click on the ‘Add New Link’ or click the plus icon button under the new category.
Either way, a popup will appear as you can see below and you have to fill up some mandatory fields like Title, Redirect Type, Target URL, and you can manage your shortened URL from there.
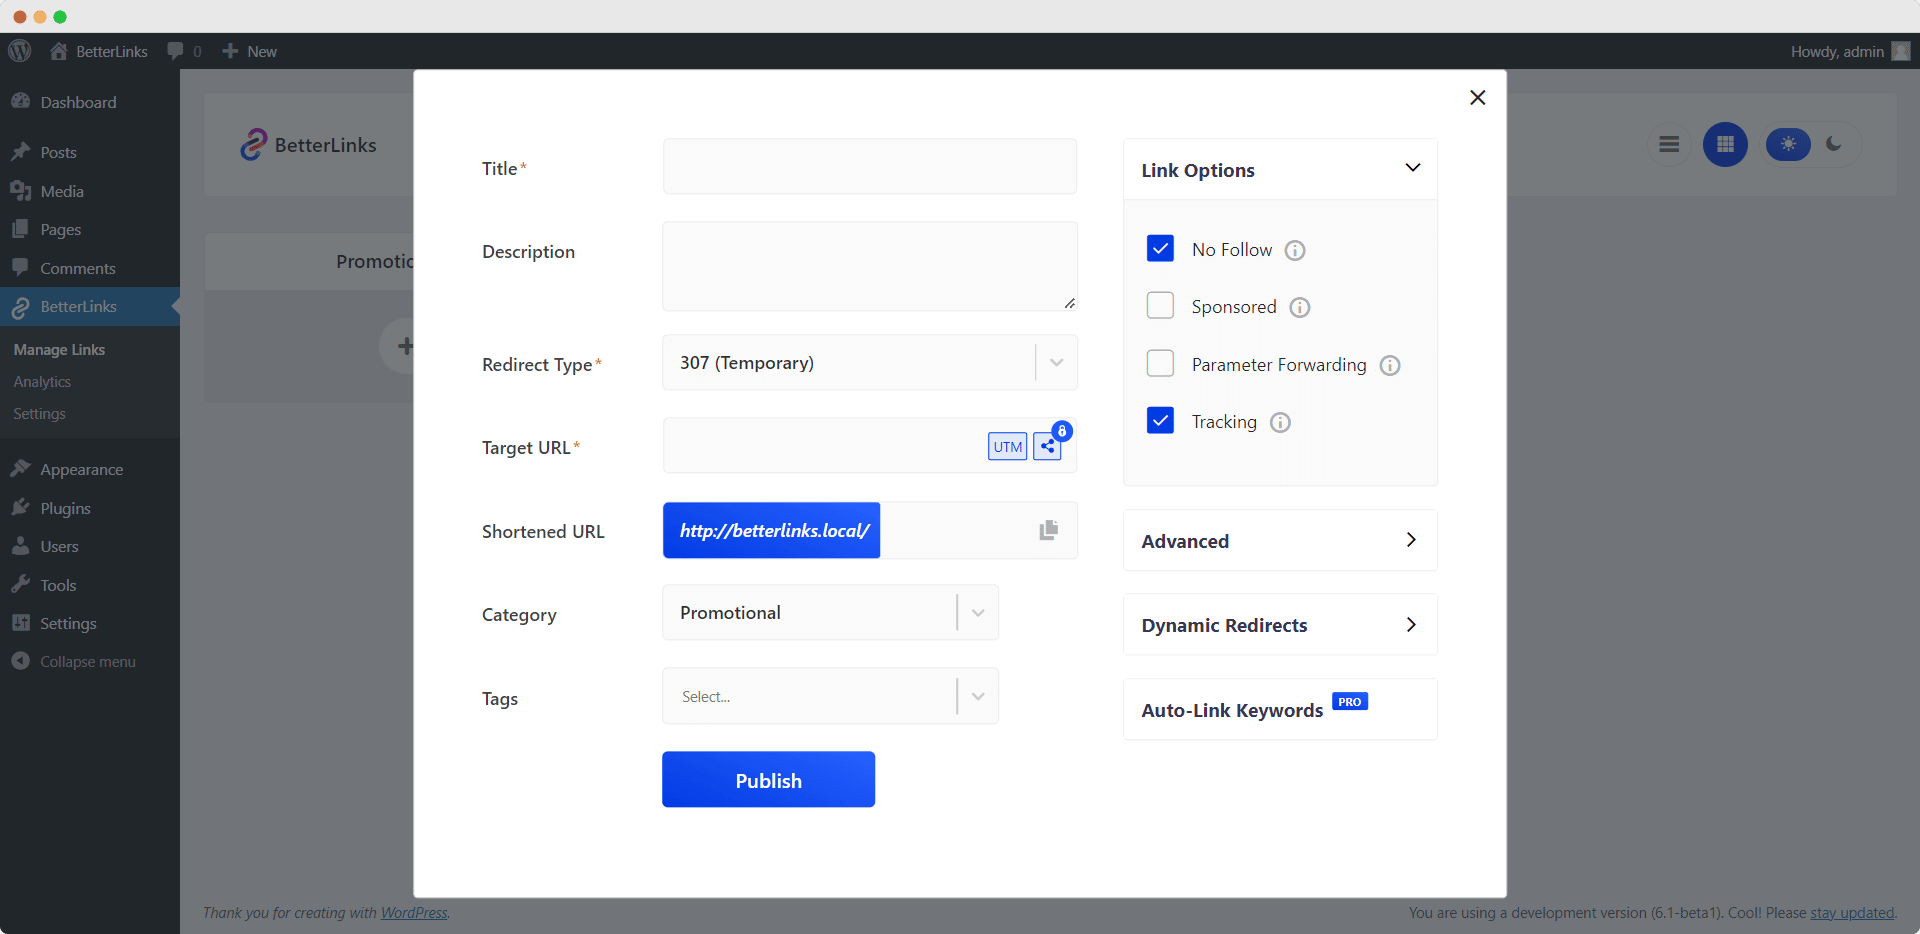
Besides, you can add Description, Category, and Tags as per your preferences. Let’s go over which input field represents what.
Title: You have to add a title to create new links. It’s a mandatory field and it’s not necessary to copy and paste exactly the same title of the post. For your better understanding, you can add any type of meaningful title.
Description: It’s an optional field. You can add a short description of the new link in fewer lines. later on, you will be able to find out the purpose of those links at a glance.
Redirect Type: Select your preferred redirect from the drop-down. It’s also a mandatory field. There are now available 3 types of redirections; 301(Permanent), 302(Temporary), and 307(Temporary).
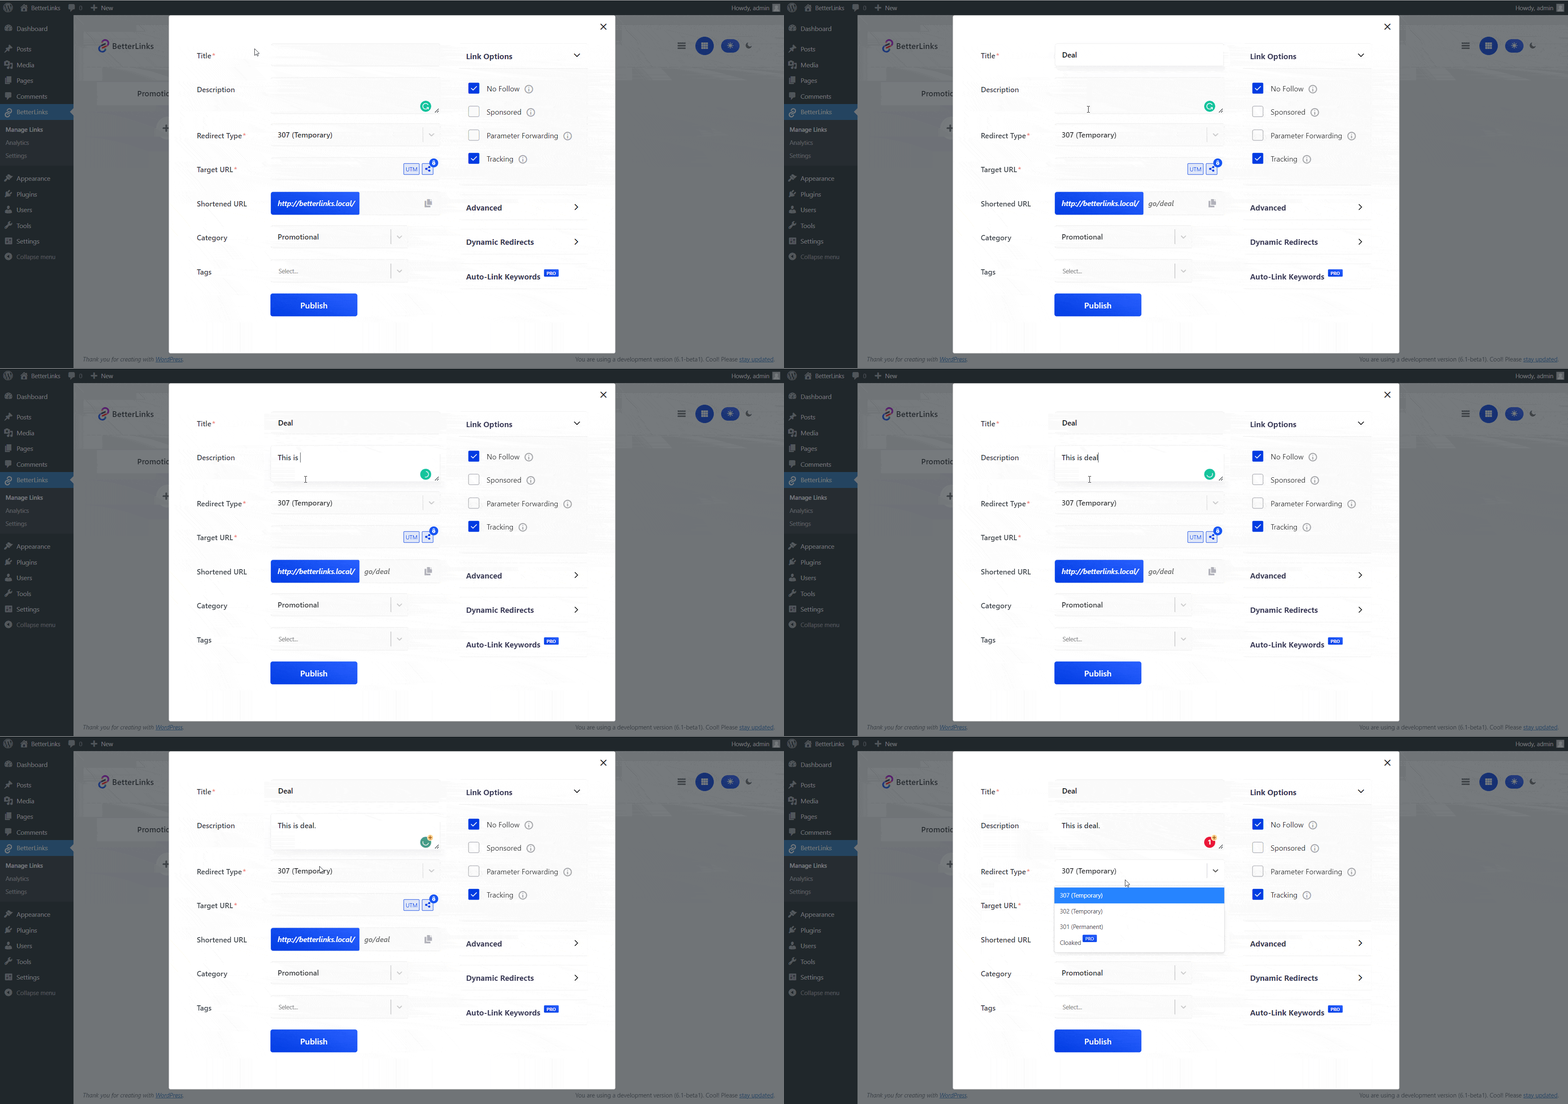
Target URL: You have to provide the link you are going to shorten. Just copy the link from your browser bar and paste that. It’s also a compulsory field.
Shortened URL: After giving the target URL, a shortened new link will be generated automatically. You can customize the shortened link and copy that link directly from your BetterLinks dashboard as well.
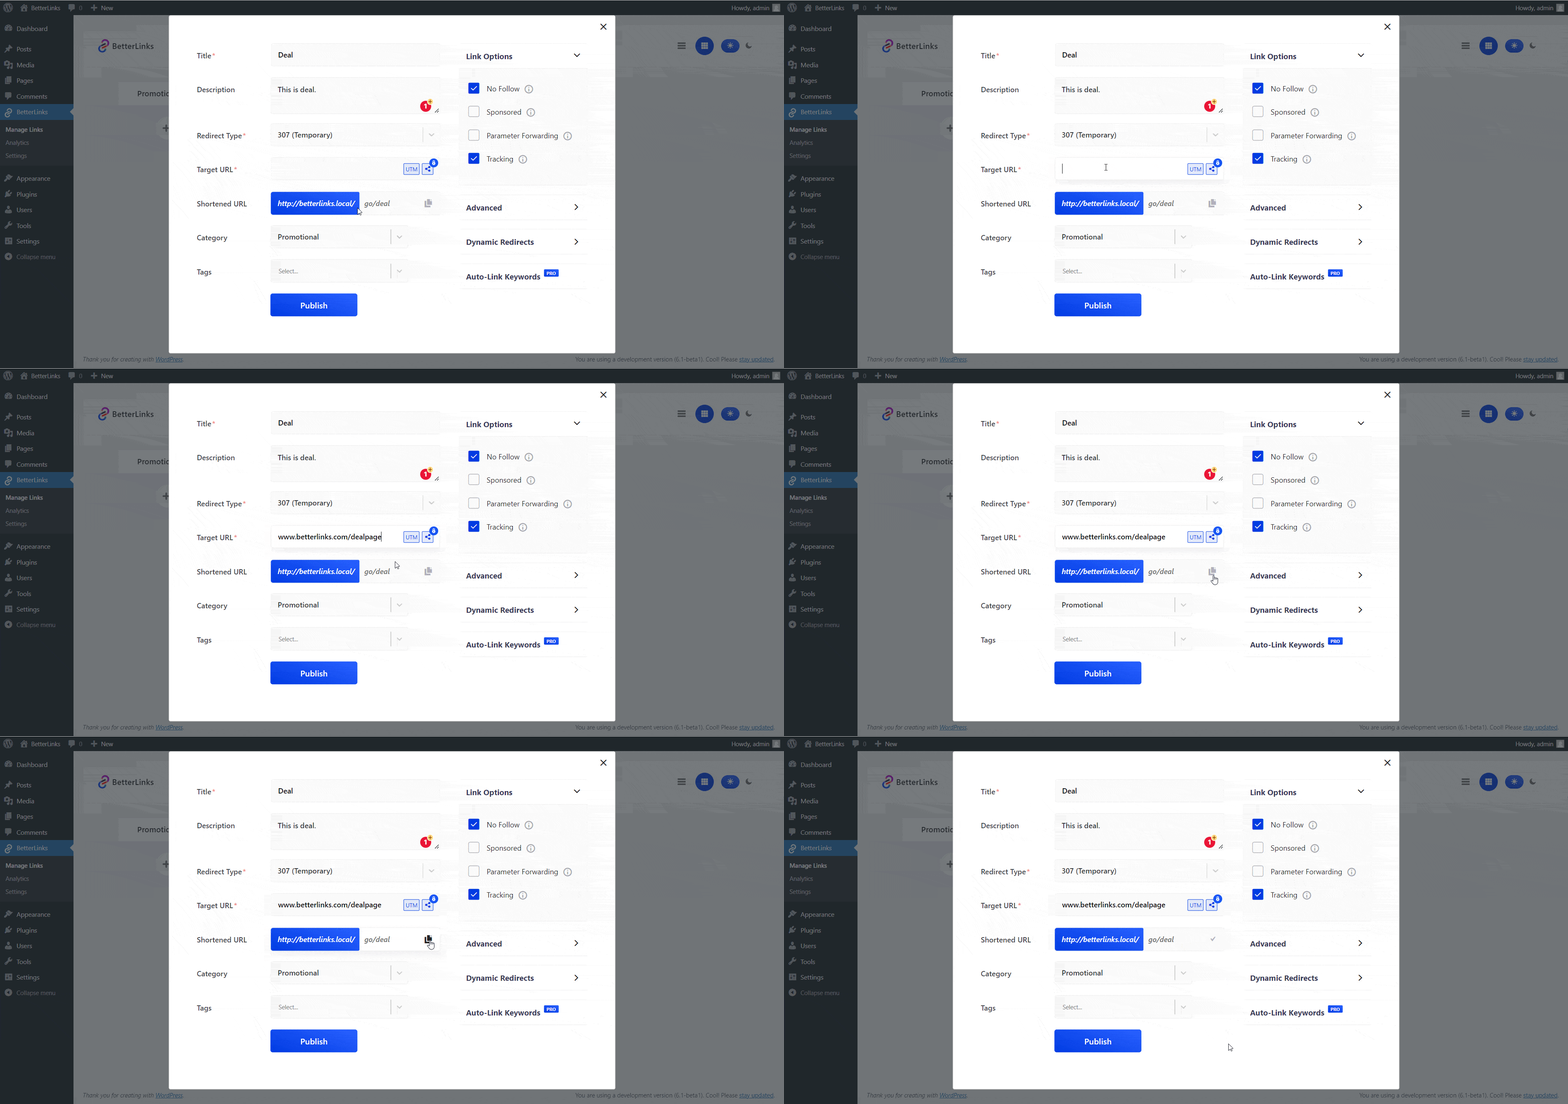
Category: You have to choose a category for the new link from drop-down. If you do not select a category, BetterLinks will categorize it as Uncategorized. When you click the plus button under any category, it will pull up the category name immediately.
Tags: You can create tags instantly in the input field or use previously created tags for the newly created link in BetterLinks. It is an optional field. Tags will help you to categorized new links efficiently.
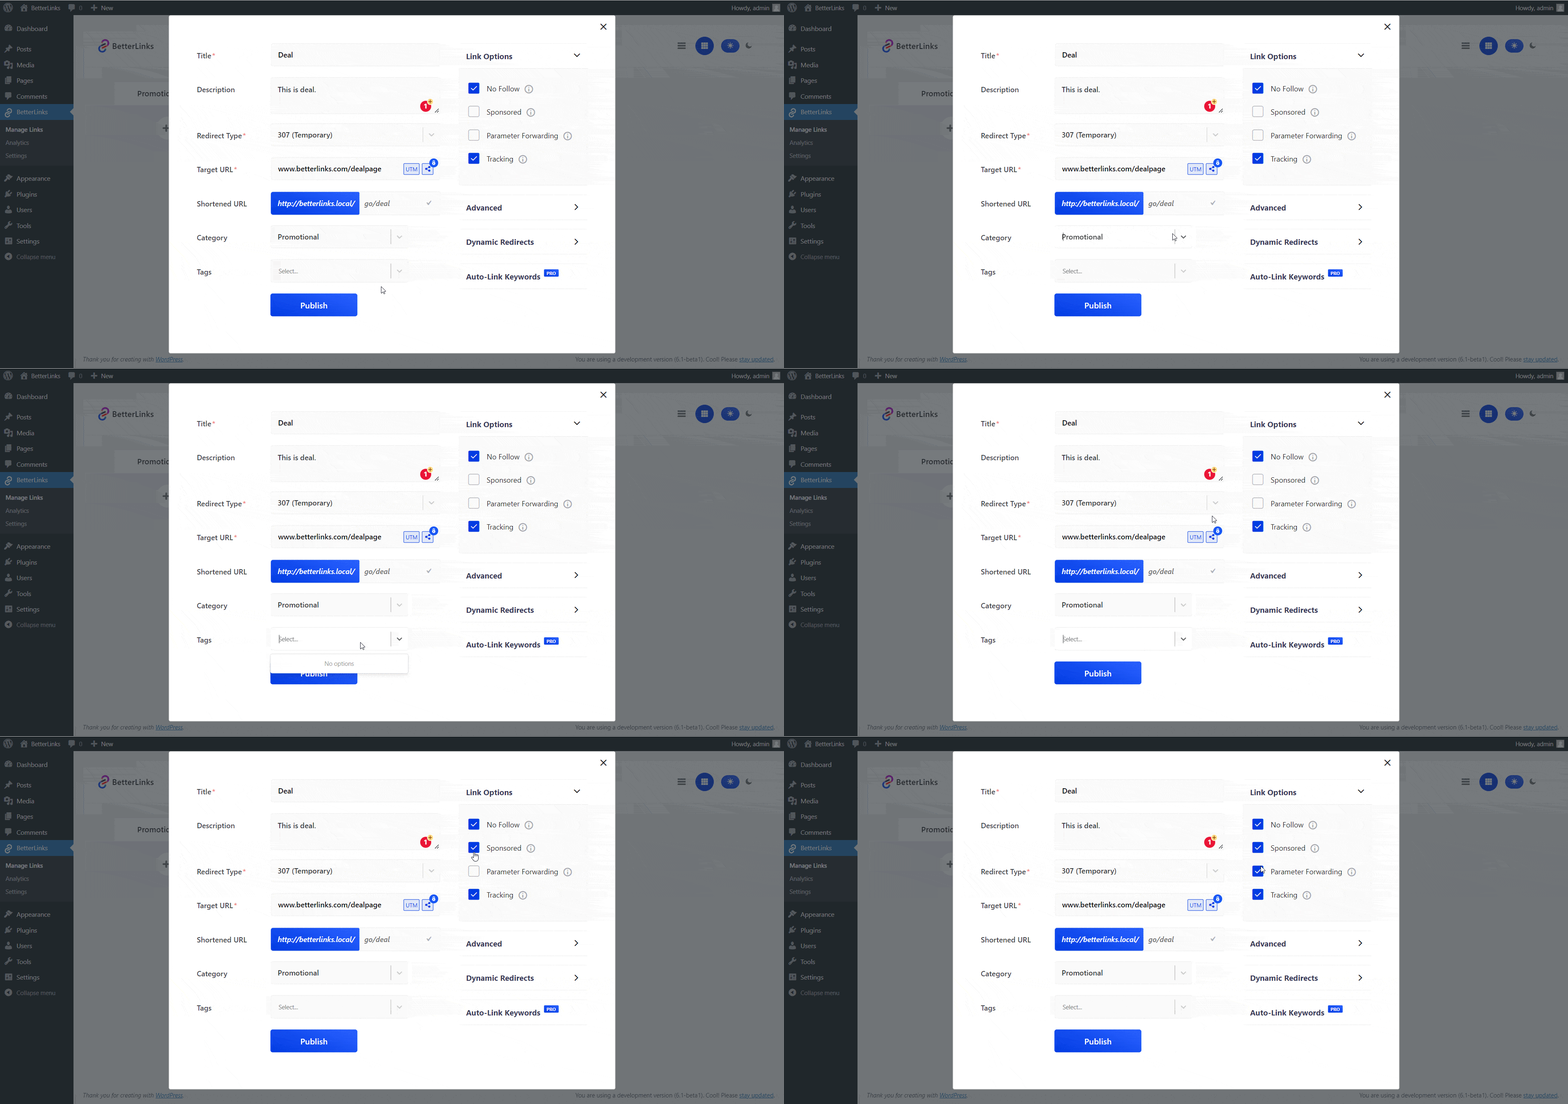
Link Options: Set Your New link’s attributes from this section. Depending on your link’s purpose and attribute you can tick on more than one section. At present there are four types of link options available; No Follow, Sponsored, Parameter Forwarding, and Tracking. Characteristics of every option are given beside each option. you have to tick on the link options based on your new link characteristic.
After filling up every section carefully, hit the ‘Publish’ button. Your new link will be created successfully under your selected category.
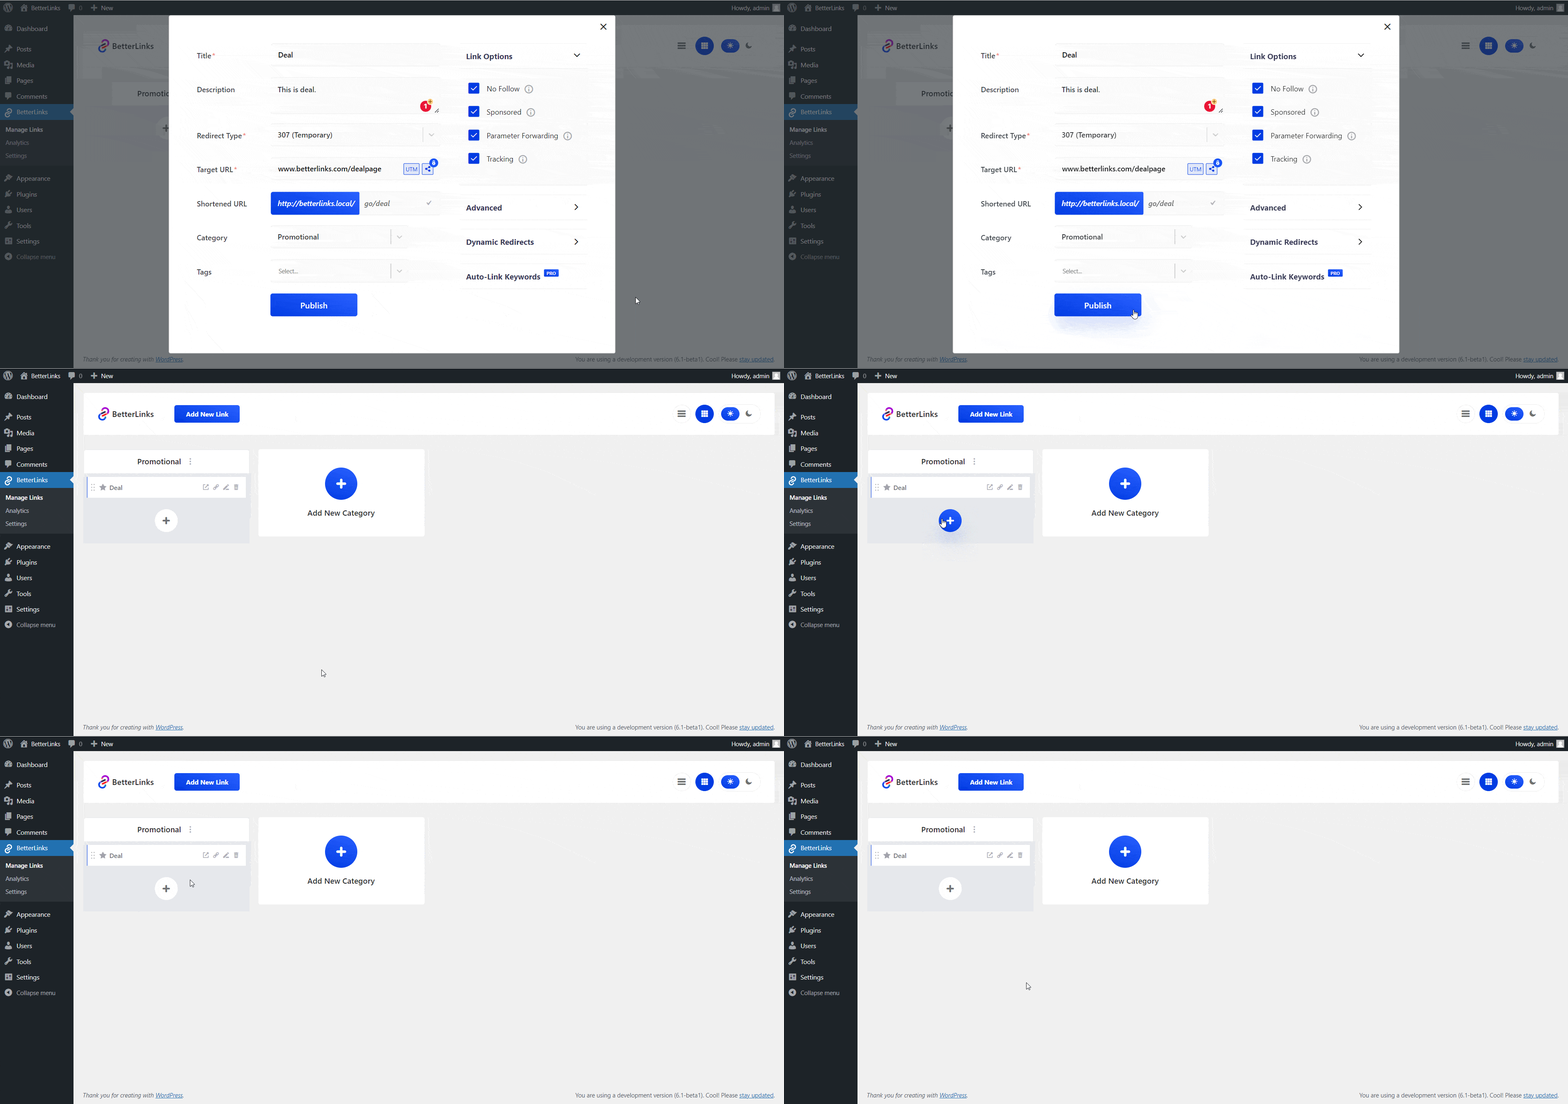
That’s how you can simply configure and create new link with Betterlinks without any hassle.
Need assistance? You are welcome to contact our support team at any time.


