BetterLinks has introduced a PRO feature called Link Scanner, allowing users to scan full site links with just one click. This feature enhances the user experience by helping you in-depth link audit simply and providing detailed data.
Link Scanner in BetterLinks is designed to save time and effort, especially for users who need to check the link health of their website whether for affiliate marketing or SEO audit. Let’s see the step-by-step guide to configure Quick Link Scanner in BetterLinks.
Note: To use the Link Scanner feature, you need to have the latest free and PRO versions installed and activated on your website. This feature is available from BetterLinks v2.1.12 and later, as well as PRO v2.2 and later.
How To Configure Link Scanner in BetterLinks? #
The configuration process is pretty straightforward. Follow the step-by-step guide below to learn how to configure Link Scanner with BetterLinks.
Step 1: Go To Link Scanner Feature #
Once your BetterLinks latest version is installed and activated, go to your WordPress dashboard, click on the BetterLinks plugin, and select the ‘Link Scanner’ option.

Step 2: Scan The URLs #
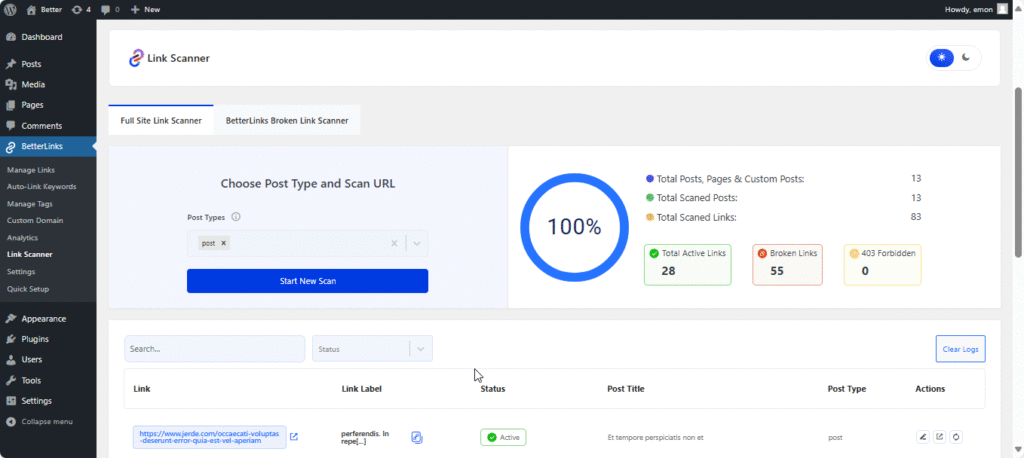
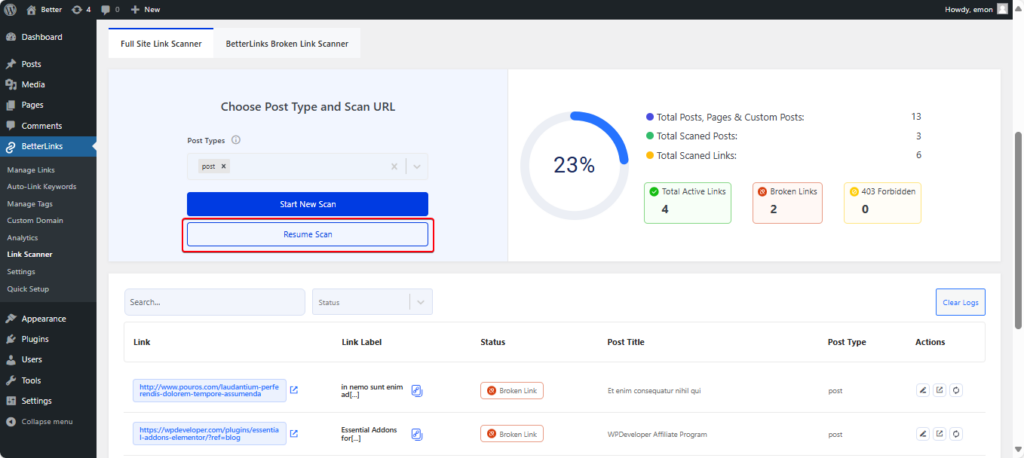
Here, you can start scanning the links of your WordPress website based on post types, such as pages, posts, or all. Once you select the post type, then click on the ‘Start New Scan’ button. Wait for a while till the complete scanning gets done.
Note: Here you’ll find two link scanner options. One is a ‘Full Site Link Scanner’, and the other is a ‘BetterLinks Broken Link Scanner.’ Will only scan the links created by the BetterLinks plugin only, whereas, on the other hand, a full site link scanner will scan all the links on the site regardless of the link types and create the source.

Step 3: Check The Report #
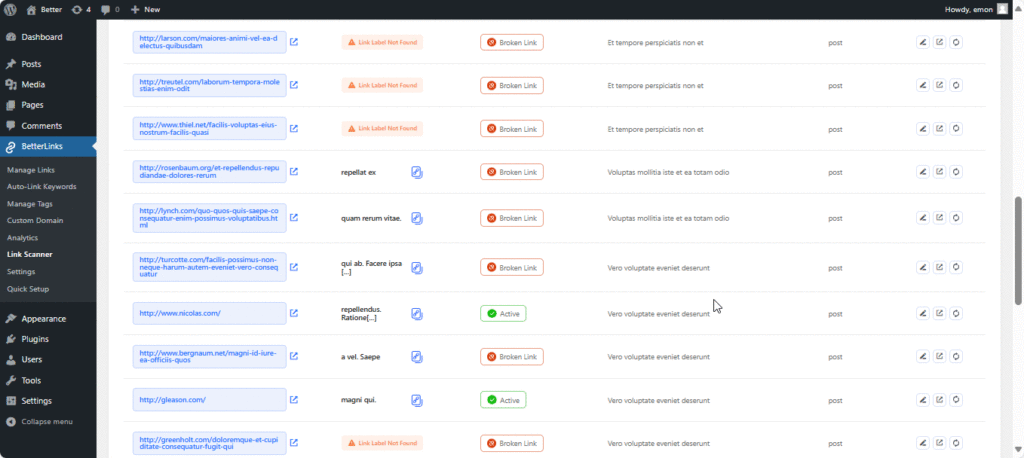
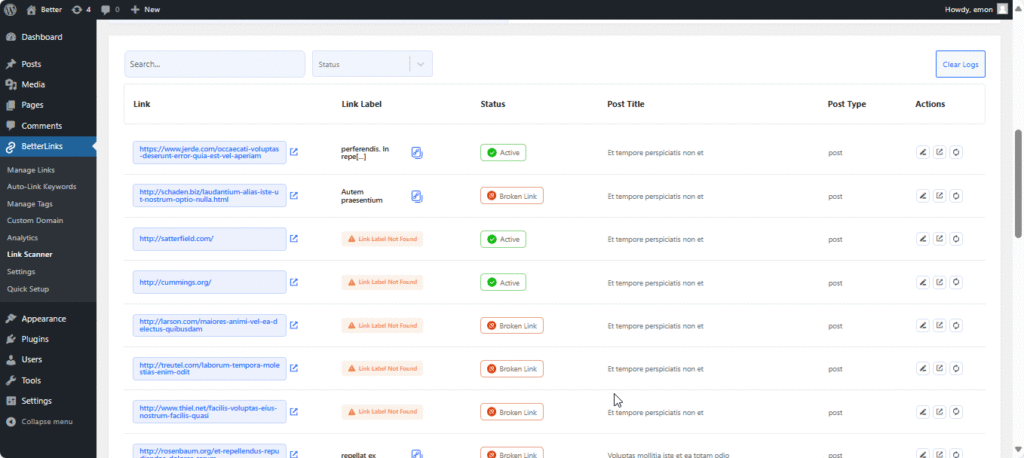
After the scanning is complete, you can check the list of all the scanned links. It’ll show you the link, link label, status, post title, post type, and action.
- Link Label is the source text where you place the link
- Link Status is the current state of the scanned link
- Post Title represents the title of the link you’re scanning
- Post Type determines whether the link you are scanning is a post, page, or custom post types
- Action allows you to edit the post, preview the link, and recheck the link status.
Step 4: Recheck The Link & Verify #
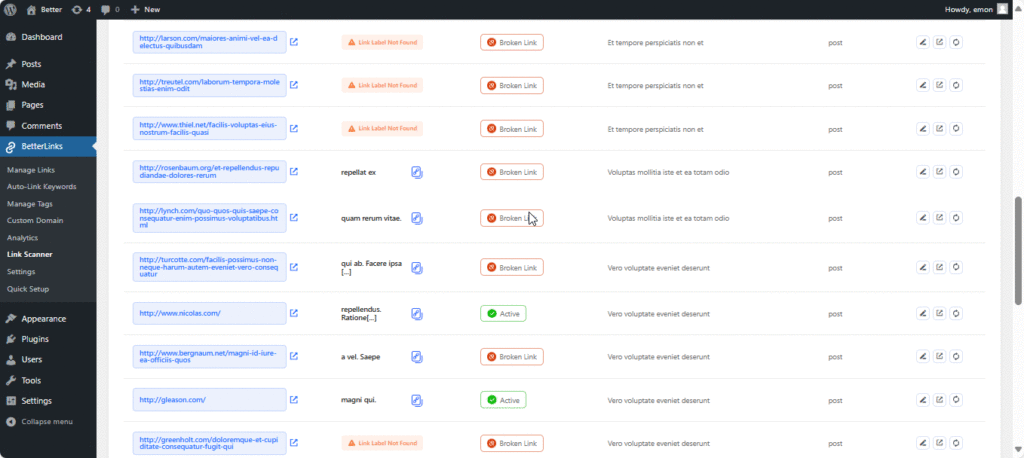
When you scan through the link report and find any broken link, you can click on the link view option to verify whether the link is broken or the error status (404) However, clicking on the recheck option will also allow you to verify the link status.
Note: Edit The Post & Preview #
Click on the Edit post icon. It’ll take you to the post where you’ve placed the link. You can make further modifications and update the link and its context. Plus, by clicking on the Preview icon, you will have the preview directly from the dashboard in a new tab.
Also, you can clear logs to start link scanning afresh. Simply click on the ‘Clear Logs’ button, and it will show a popup for confirmation, select ‘Yes’, and all the logs will be cleared. Also, you can search by link status and filter out the list of links.
If you switch from the link-scanning window, it will pause the link-scanning process. However, if you switch back to the scanning window, you will get the option called, ‘Resume Scan’ to start form the point where it stopped.
That is how easily you can scan all the links on your site with BetterLinks.
Getting stuck? Feel free to contact our support team for further assistance.


