BetterLinks lets you set link expiration date to help you manage your URLs better on your WordPress website. You can now allow a link to expire after it loses its relevance, or after a campaign has ended.
Let’s get a complete step-by-step guide below to find out how to set link expiration dates by using BetterLinks PRO.
How To Set Link Expiration Using BetterLinks #
Before you start working, make sure to install and activate BetterLinks on your WordPress website. As link expiration is a premium feature, you also have to install BetterLinks Pro.
Next, follow the step-by-step guide to find out how to set a date for your links to expire using BetterLinks.
Step 1: Manage Your Links From Dashboard #
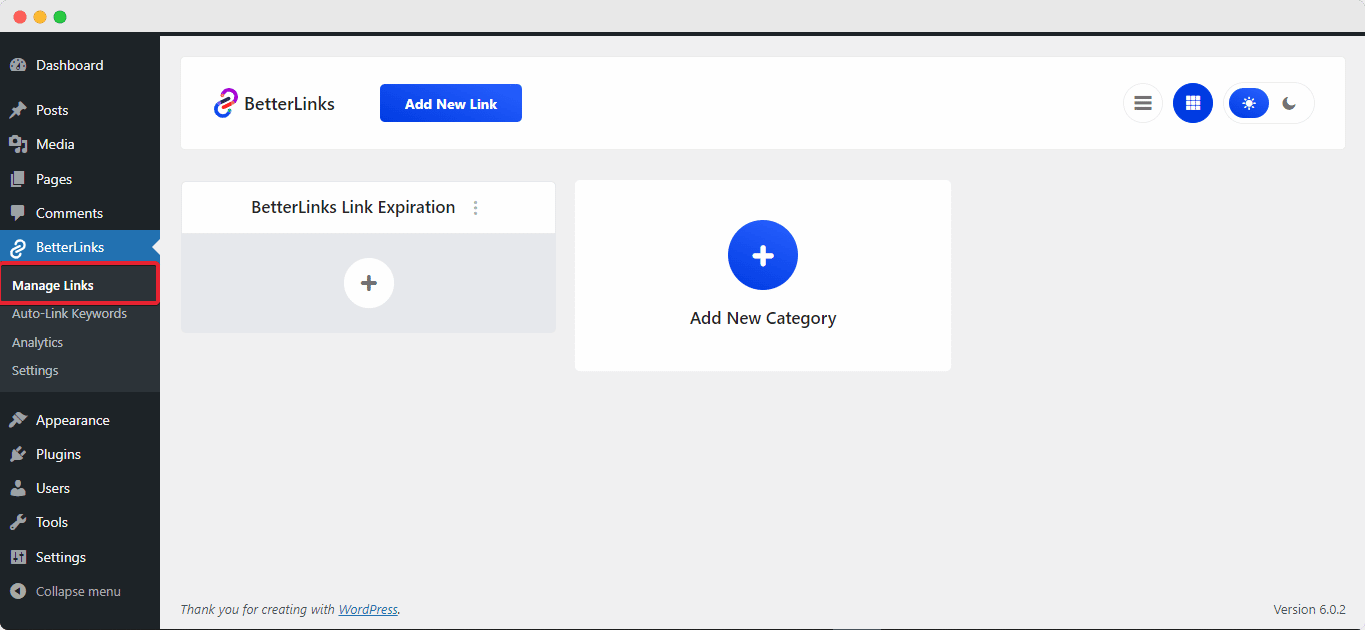
First, navigate to BetterLinks → Manage Links from your WordPress dashboard.

Step 2: Edit Your Links In BetterLinks #
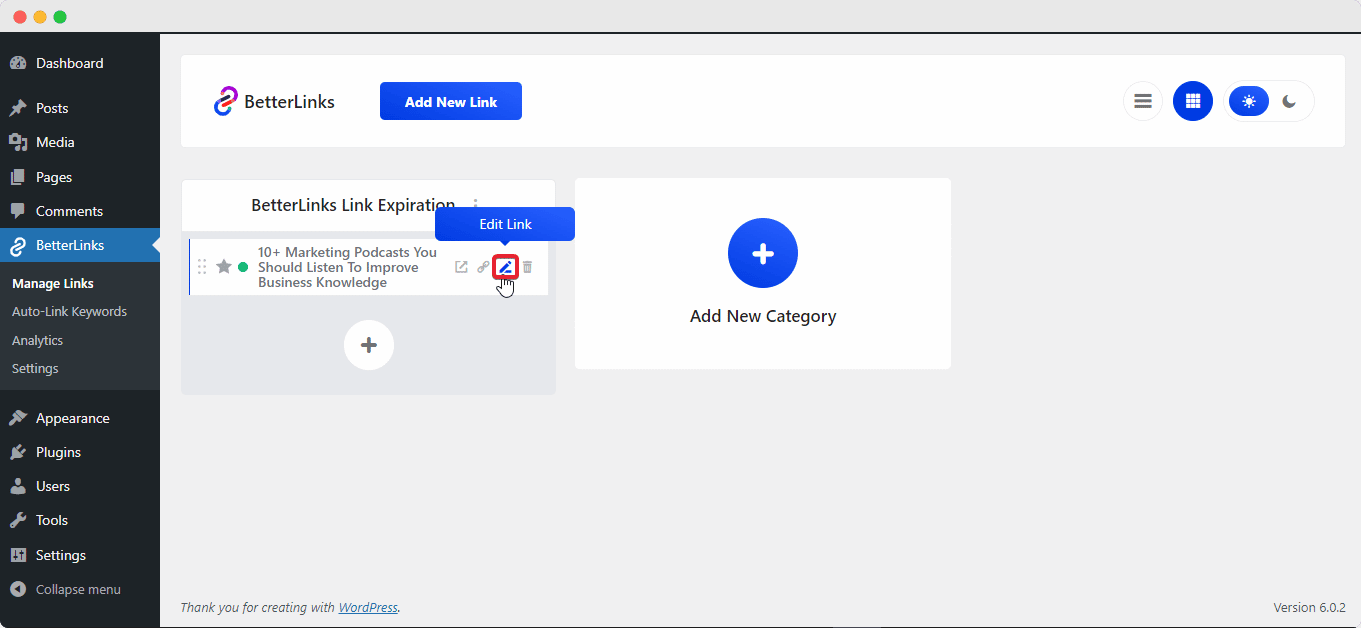
Afterward, choose any link from your BetterLinks dashboard and click the ‘Edit Link’ icon.

Step 3: Set Your Link Expiration Date Using BetterLinks #
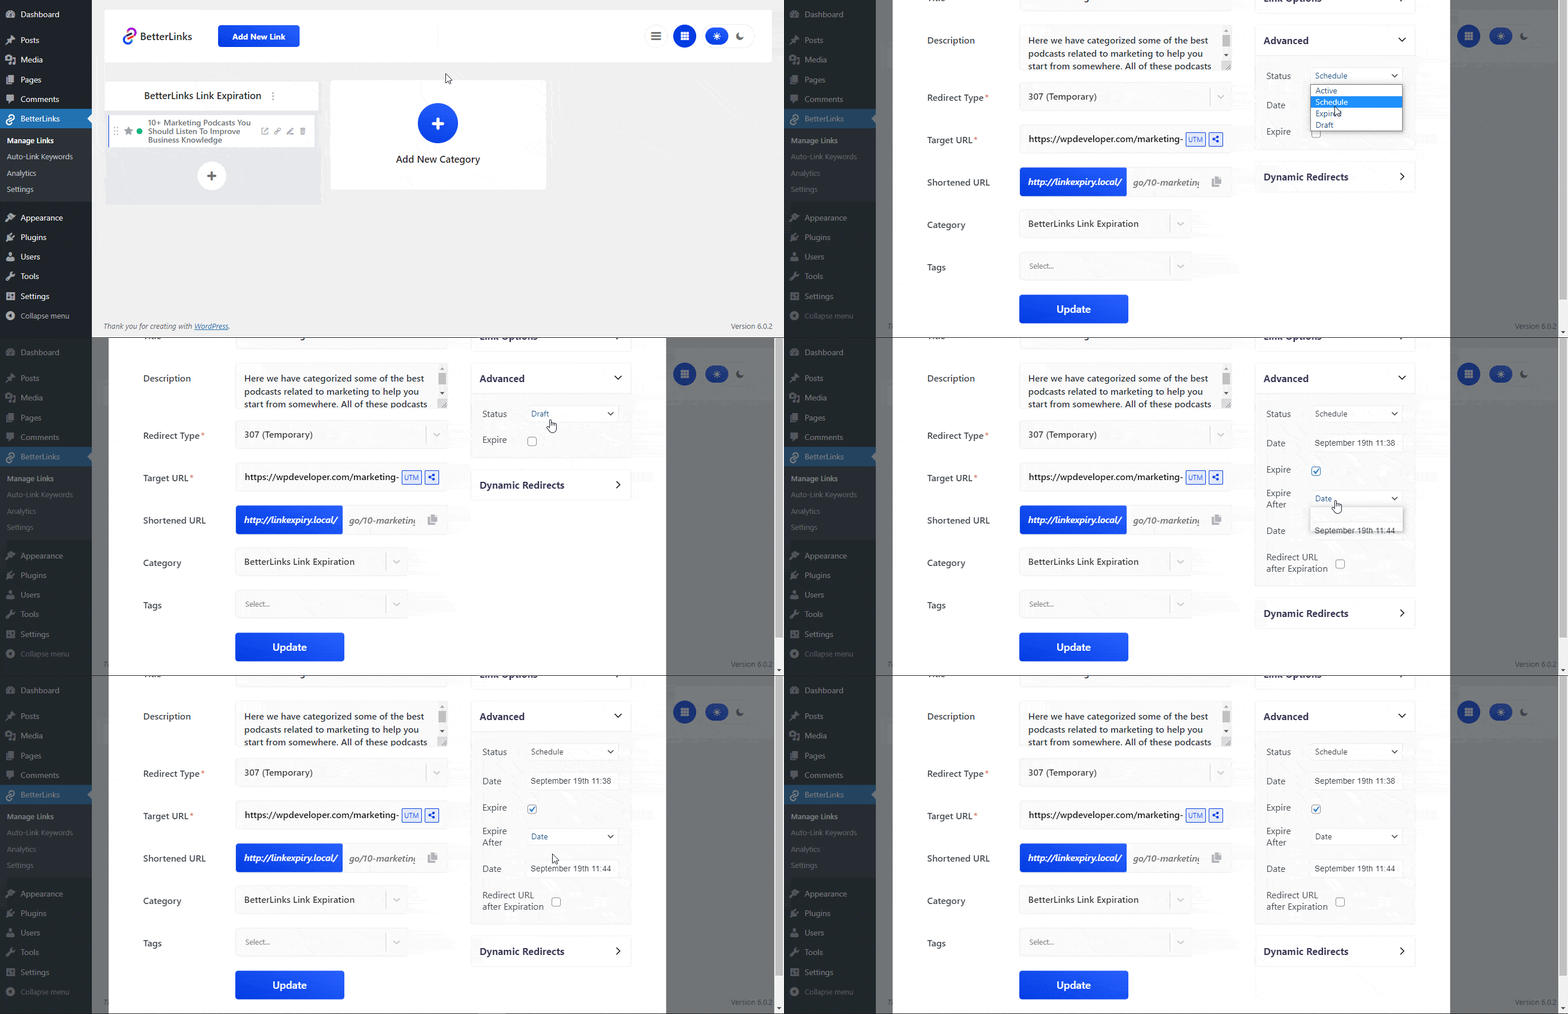
A popup will appear as you can see below and you have to choose options from the ‘Advanced’ field. If you want to expire an existing link, you have to then check the ‘Expire’ box.

You can set the expiration type from the ‘Expire After’ option. Or you can set a specific date of link expiration. You will get the option to redirect the URL after expiration.
If you want to mark a link as expired immediately, you can choose the ‘Expired’ option from the Status. Then click on ‘Update’ to save all your settings.

This is how you can easily set link expiration using BetterLinks.
Need assistance? You are welcome to contact our support team at any time or join our Facebook community to share your experience.


