Ensuring the best user experience for site visitors on your website is essential for any marketer. While there are tons of effective strategies to help you do that, you shouldn’t overlook link management strategies to do so. In this tutorial, we are going to show you how to enhance your site visitor’s experience with BetterLinks dynamic redirection feature.
If you are wondering how link management strategies can help with improving user experience, consider this scenario. Imagine you have created a Christmas landing page to promote your offers, but for whatever reason, the page is not loading with full responsiveness on your user’s device.
To avoid such issues, you can easily create device based dynamic redirects so that your site visitors will be automatically redirected to a different page that is more suited for their device, operating system, browser or more.
Similarly, you can create geolocation based dynamic redirects to send site visitors from a specific geographic location to a different web page or site that’s more appropriate for their region. This is very common in the case of eCommerce websites, to show customers from a specific region offers that are more relevant to their needs.
Before we dive in and see the different ways BetterLinks dynamic redirection feature can help you give your website visitors a better user experience, let’s find out more about this feature below.
Dynamic Redirects Versus Static Redirects: Key Differences

There are several types of link redirections that are used by marketers, each with its own unique purpose. Here, we are going to talk about the differences between dynamic redirects and static redirects.
As the name suggests, a static URL redirect is a website link address that remains unchanged for every site visitor. In other words, this is the type of redirect which, upon clicking the link, will send all users to the same page or site regardless of the visitor’s location, device, or any other factors.
On the other hand, a dynamic redirect will automatically send website visitors to a different site based on some specific factors. These factors could be a weighted average, meaning a certain number of users will be redirected to one target URL and the others will be sent to a different target URL. Or, it could be based on the visitor’s geolocation, device or technology used, time period and much more.
Top 3 Ways Dynamic Redirection Can Enhance User Experience
Now that we know how dynamic redirects work, let’s see how dynamic redirections can help you improve user experience on your website.
Redirect Site Visitors To Appropriate Web Pages Based On Geolocation

When you are running an online business, eCommerce personalization is essential to give your customers tailored product offerings and enhance their shopping experience. To do this, you can create different websites to cater to potential customers for different locations.
In this scenario, creating geolocation based dynamic redirects will help you automatically redirect site visitors to the web page that is relevant for them.
For instance, if your main site is www.mystore.com, then you can create a geolocation based dynamic redirect for customers from Australia that redirects to www.mystore.com/aus.
This way, potential customers who click on your link from that location will instantly be redirected to that site and they will find offerings there that are more suited to their needs.
Ensure Best User Experience On Mobile Devices With Dynamic Redirects
As mentioned previously, you can use dynamic redirection based on device or technology to easily redirect site visitors to mobile responsive websites. In much the same manner, you can also use dynamic redirection to send site visitors to a specific web page that is compatible with their operating system, browser, etc.
Drive Traffic To Your Seasonal Or Limited Time Promotional Campaigns

Imagine you have created an attractive Christmas landing page to promote your offerings for the holiday shopping season only. In this case, for promoting exclusive, limited time offers, you could easily create time-based dynamic redirection. When site visitors click on your link during that specific time frame, they will automatically be redirected to your Christmas landing page.
Similarly, when the time period has passed, you can add a different target URL to which your site visitors will be redirected to if they click on your link after the offer has ended. This way, they will not see any 404 error page, but will instead be redirected to the web page of your choice.
Compare Two Different Landing Page Performance With Split Testing
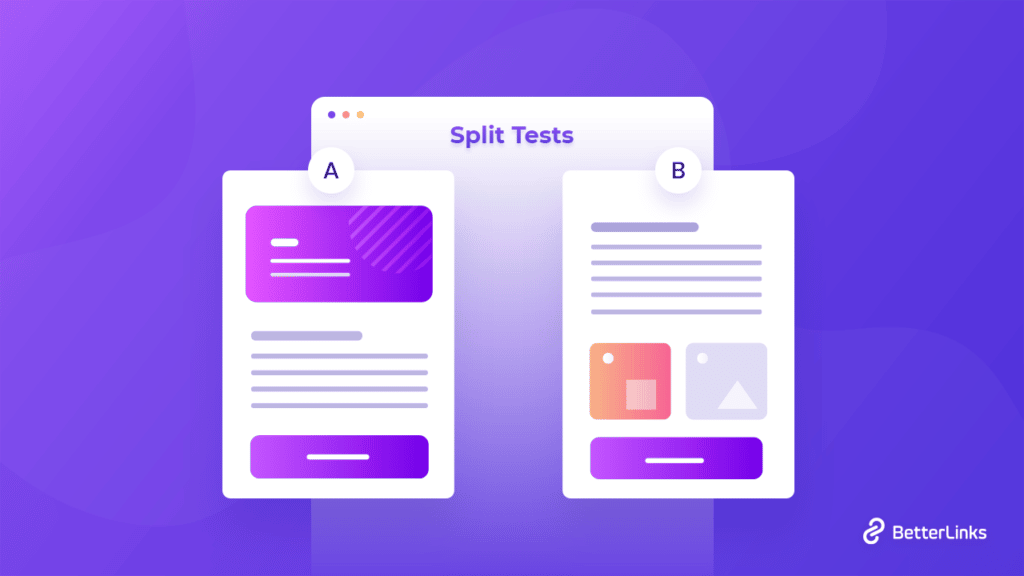
In order to improve user experience, you need to know the reasons why you are getting traffic to a specific page (or alternatively, why you are losing traffic from a particular page). To understand your site visitor’s behaviors and preferences better, you can carry out two different campaigns and see which one performs better using a technique called split testing.
Split testing or A/B testing is a method in which marketers send different versions of a promotional campaign such as emails, deal pages, or even social media posts, to different groups of people. Afterwards, the marketer analyzes the responses both versions of the campaign received to understand which was more successful.
In much the same way, you can set up dynamic redirection to carry out split testing and see which of your landing pages are performing better. You can then analyze the reasons why one landing page is more successful and use that knowledge to improve user experience on your website.
How To Create Dynamic Redirects On WordPress With BetterLinks?
With BetterLinks, an advanced all-in-one WordPress link management plugin, creating dynamic redirections is effortless and takes only a few minutes. Let’s find out how you can use BetterLinks dynamic redirection feature to improve user experience on your website.
Step 1: Install And Activate BetterLinks WordPress Plugin
The first thing you need to do is install and activate BetterLinks WordPress plugin on your website. Simply look for the ‘BetterLinks’ plugin from your WordPress dashboard by going to Plugins→ Add New as shown below.
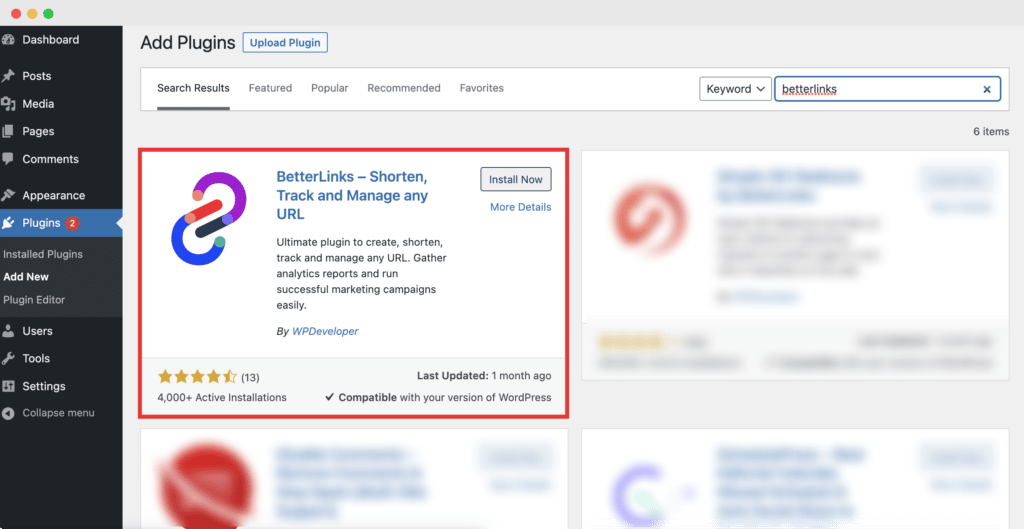
Note: Since BetterLinks dynamic redirection is a premium feature, you will need to install BetterLinks PRO on your website along with the free plugin.
Step 2: Add The URL Of Your Landing Page Or Campaign
After installing the plugin, head over to BetterLinks→ Add New Link. Check out our detailed documentation here to learn more about how to add and shorten URLs in WordPress using BetterLinks.
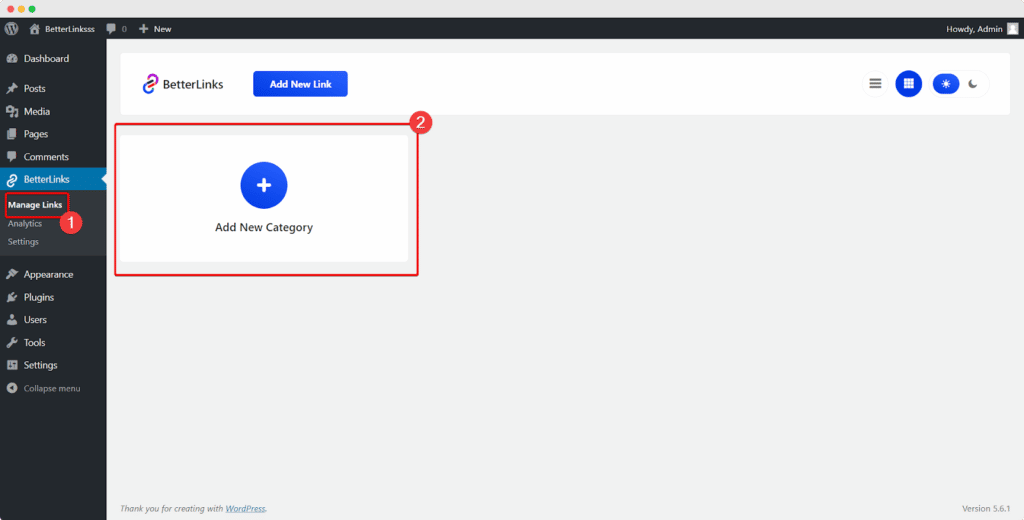
Step 3: Enable BetterLinks Dynamic Redirection Feature
Next, it is time to enable BetterLinks dynamic redirection feature. Click on the ‘Dynamic Redirects’ option, and press the ‘Click here’ button, as shown below. This will take you to a new interface where you can configure the feature as required by clicking on the ‘Enable Dynamic Redirect’ checkbox.
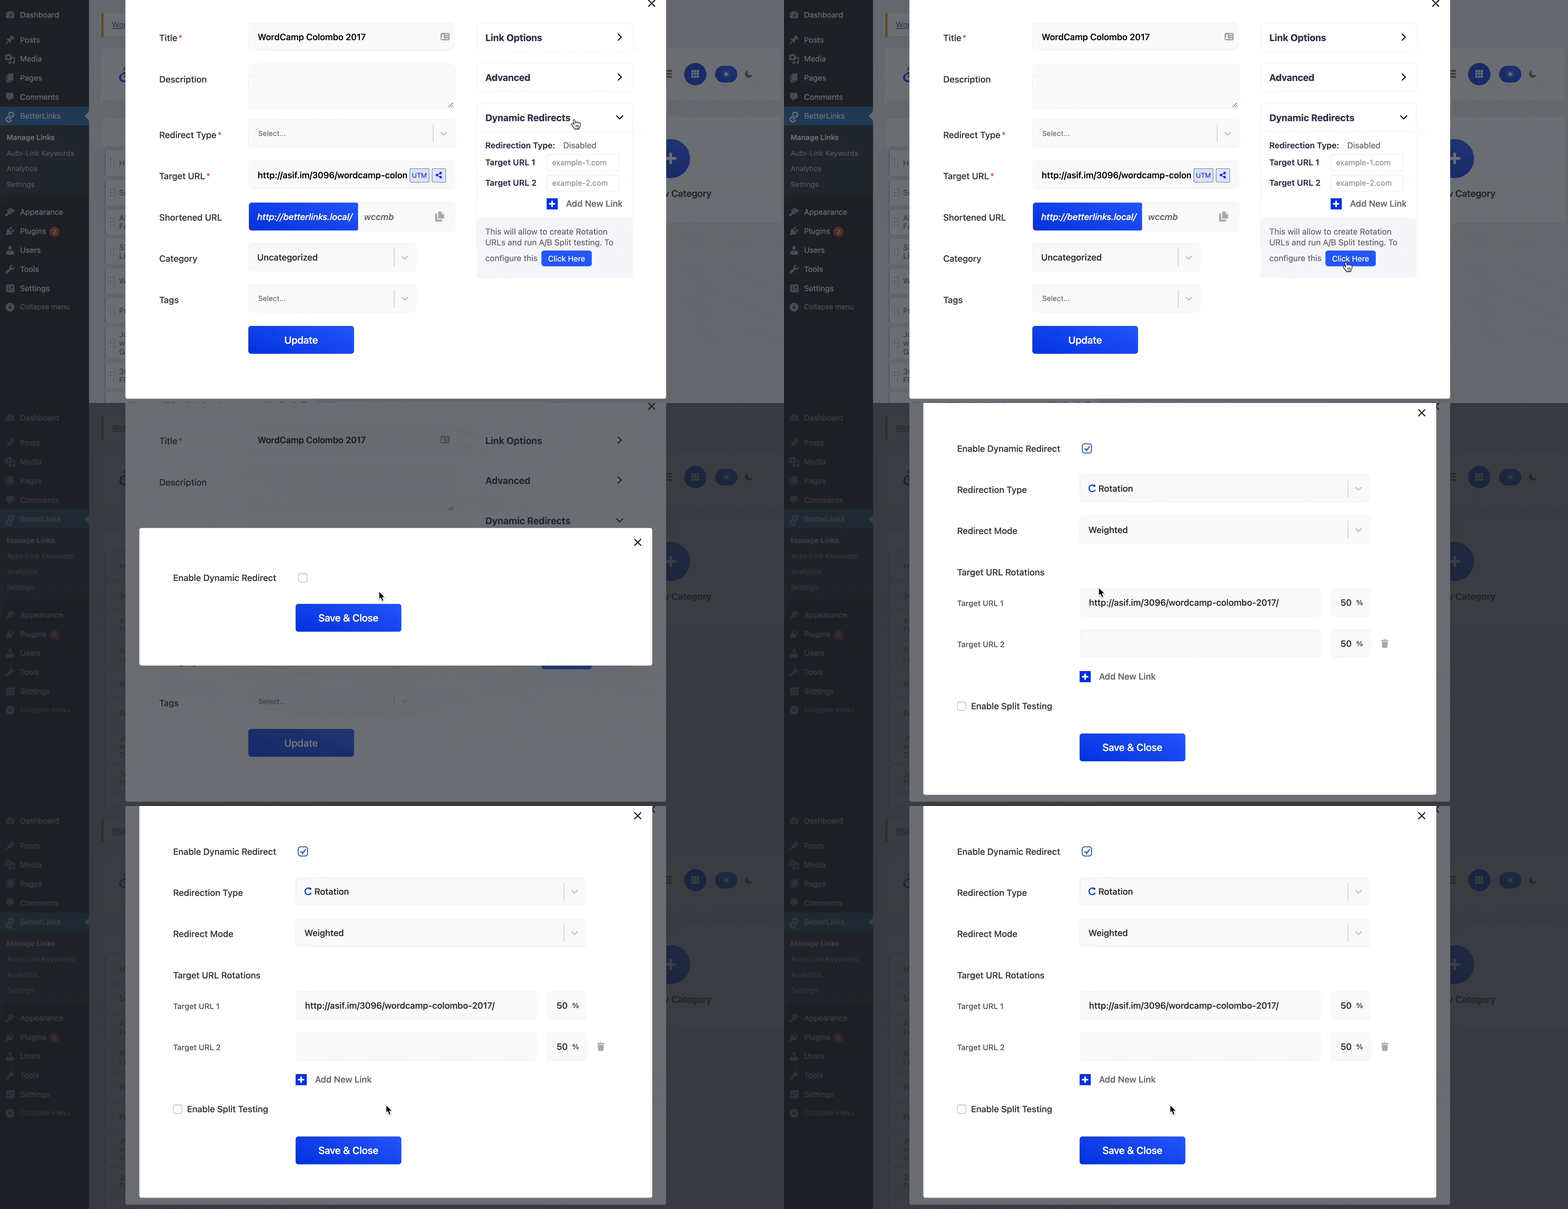
Step 4: Select Your Preferred Dynamic Redirection Type
After enabling BetterLinks Dynamic Redirection feature, you need to set the redirect type for your URL. You can do this by clicking on the ‘Redirection Type’ option as shown below. For this tutorial, we have selected ‘Geography’ as our redirect type.
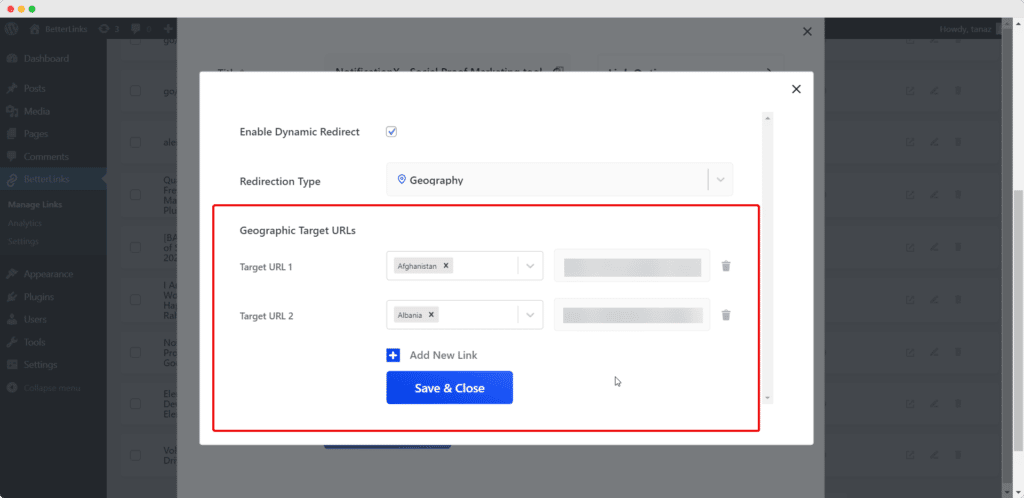
Step 5: Add The Target URL You Want Redirect Users To
Now, simply add your target URLs according to the geographic regions as shown in the image above. You can add as many target URLs as needed by clicking on the ‘+ Add New Link’ button. When you are done, just click the ‘Save & Close’ button to update your changes.
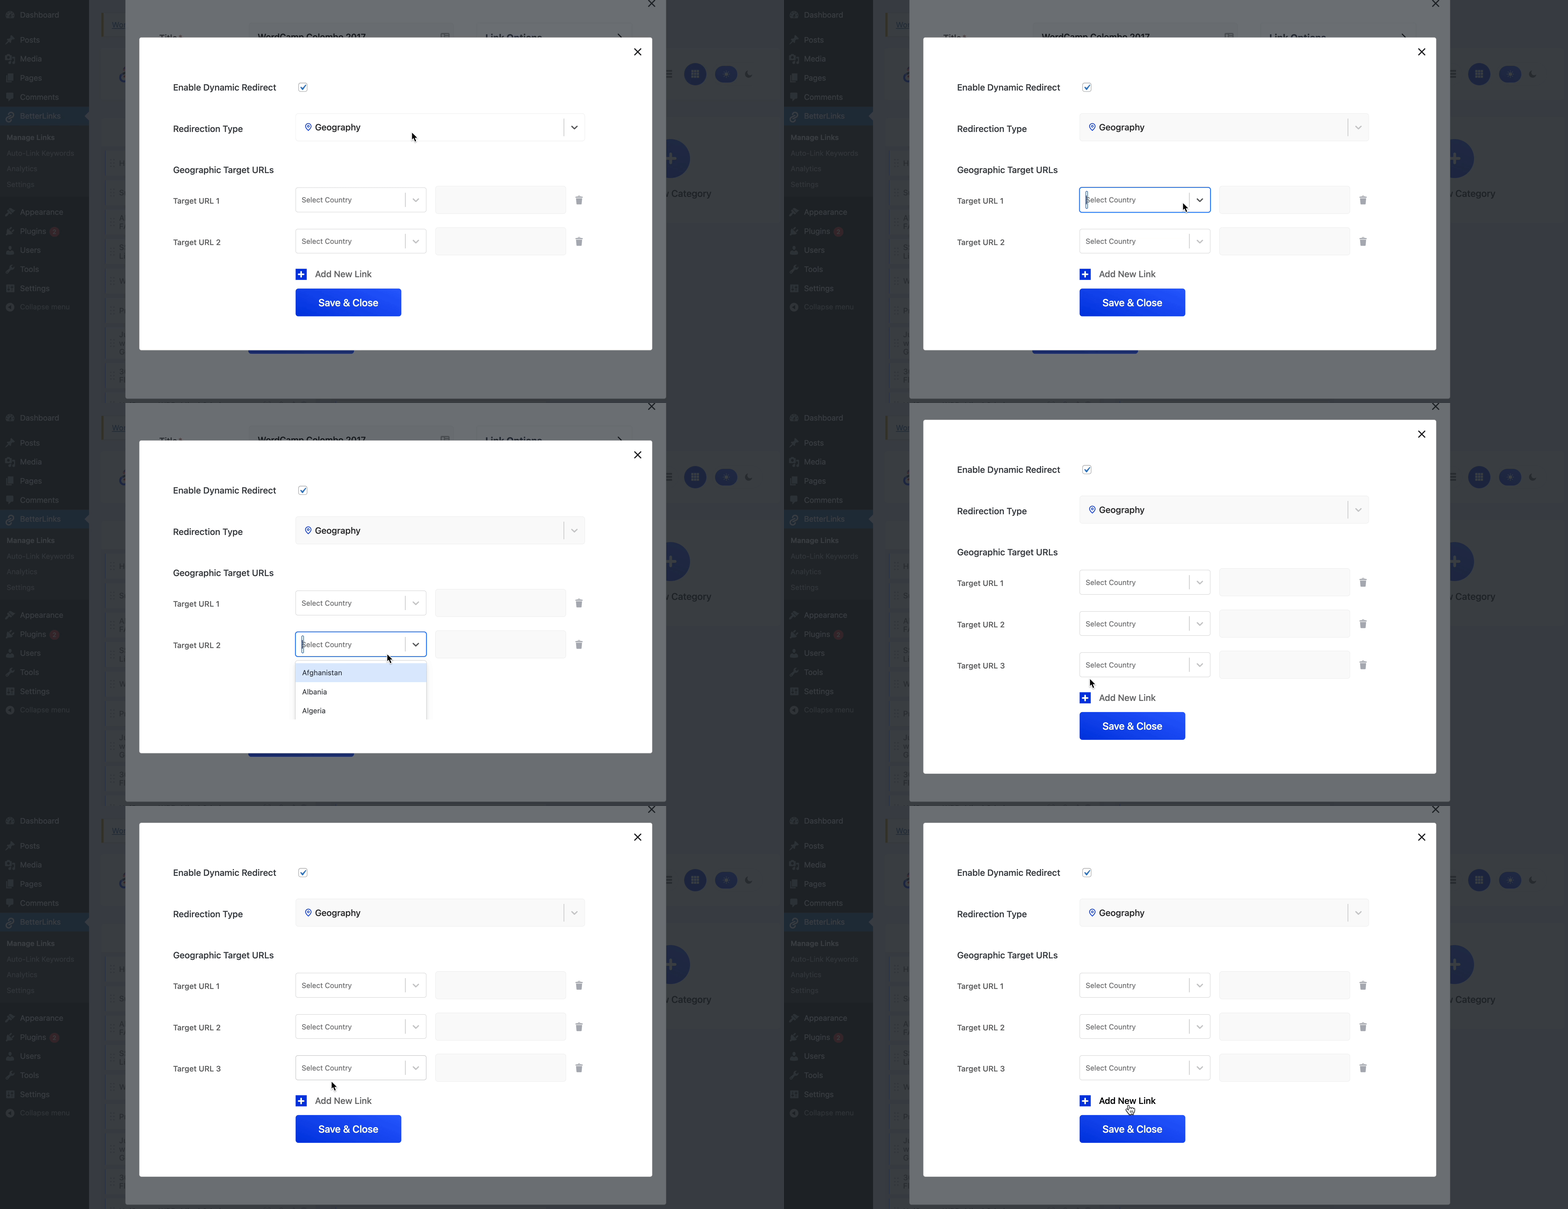
That’s it! By using BetterLinks Dynamic Redirection feature, you can easily redirect your website visitors to specific web pages based on their device, geographic location and more.
How To Do Split Testing With BetterLinks Dynamic Redirection?
We mentioned that you can use BetterLinks Dynamic Redirection feature to easily carry out split testing, and see which of your landing pages or campaigns are performing better.
To carry out split testing with BetterLinks Dynamic Redirection feature, you need to set the ‘Redirection Type’ to ‘Rotation’ and then choose the percentage of visitors that should be sent to your different target URLs. Of course, make sure to check the ‘Enable Split Testing’ option.
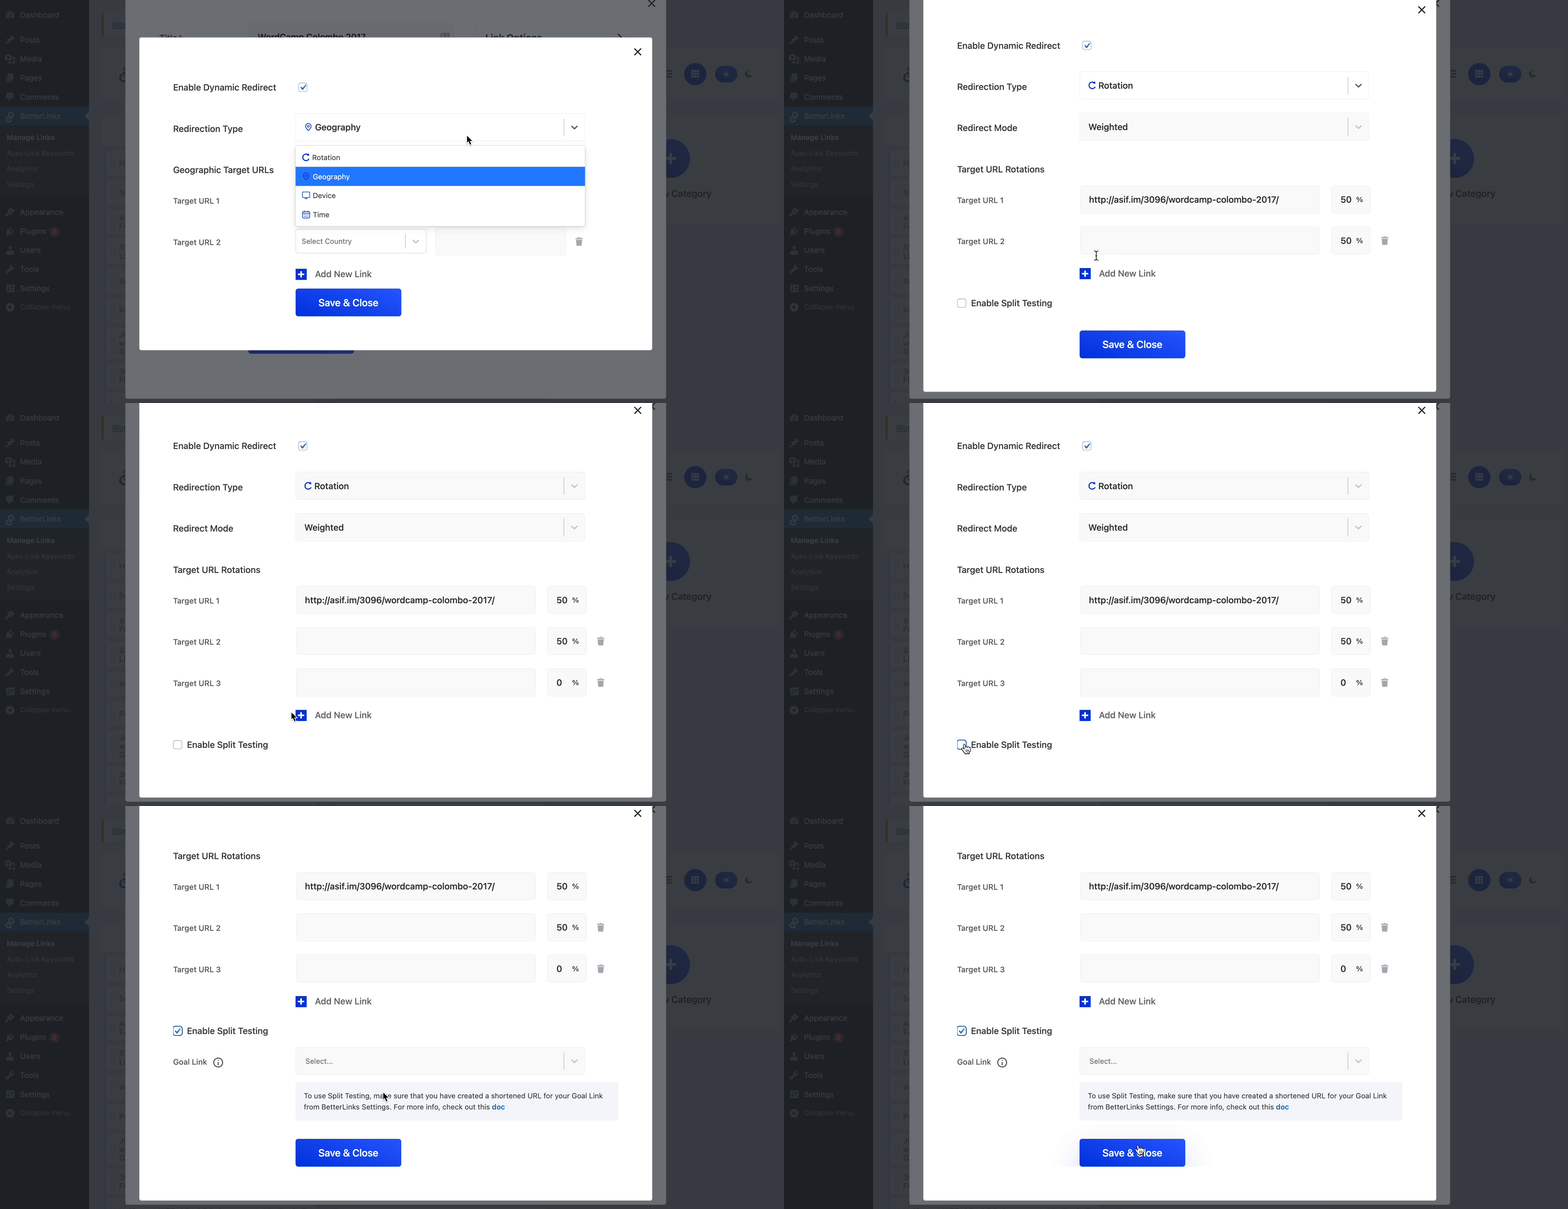
To learn more about this advanced feature, make sure to check out our detailed tutorial on BetterLinks A/B Split Tests feature here, and track your campaign performances better easily.
Effortlessly Manage Your Website URLs With BetterLinks
As you can see, BetterLinks makes it super easy to leverage your link management strategies and turn your website URLs into valuable assets for creating successful marketing campaigns effortlessly.
Enjoyed this post? Subscribe to our blog for more fun tutorials, news and updates, or join our friendly Facebook community.


