When it comes to targeted marketing campaigns, the Facebook Pixel tracker could be a missing piece of the puzzle for you. If you want to boost the return on your investment, this handy tool could be the game changer. In this blog, we are going to discuss everything you need to know about Facebook Pixel and how you can benefit from it.

💡 Facebook Pixel: Everything You Need To Know
Facebook Pixel aka Meta Pixel is a few lines of code you can install on your website to monitor and measure your marketing campaigns. Using this tool you can effectively measure your ad campaigns and retarget your ads to relevant audiences. So, you can reach out to your potential customers and boost your return on investment.
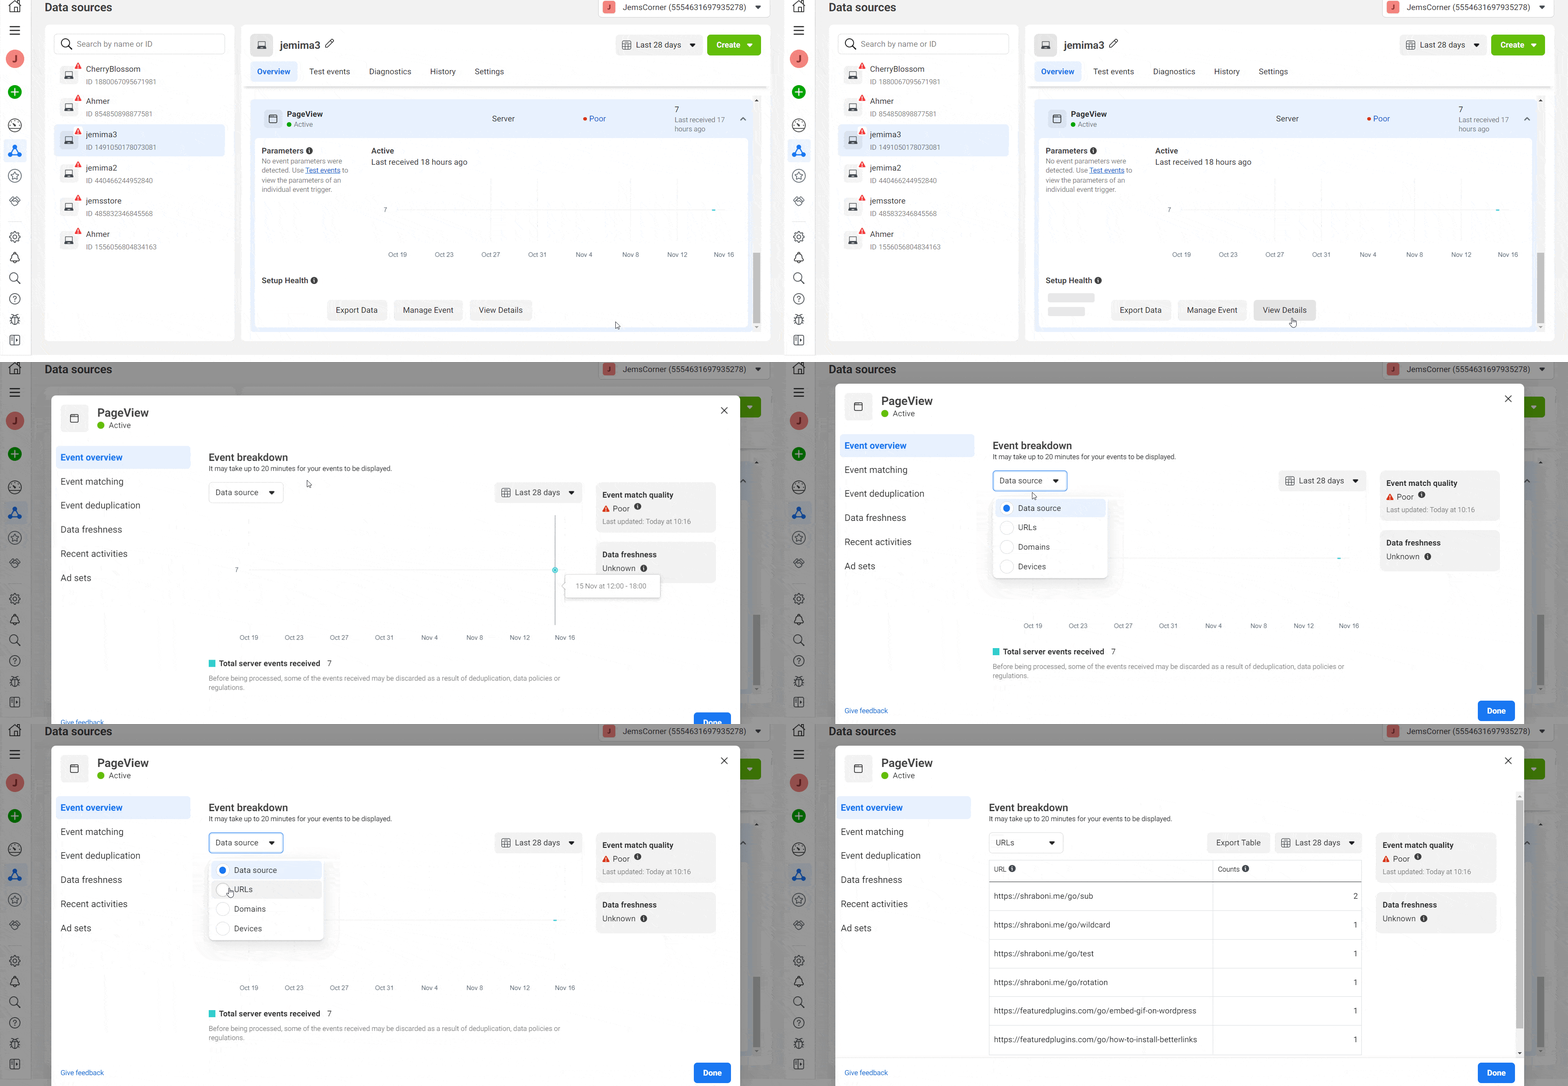
After installing Facebook Pixel on your website, you can track your visitor’s activity on your website, how much time they have spent on your site, their purchase, add to carts, etc. easily. You can use these insights to set up ad campaigns and reach out to these visitors to get a higher return on your investment.
So, Facebook Pixel is just a feature that can track your live site visitors’ activity, and help you to create your custom audience base to create targeted ad campaigns for Facebook and Instagram. Setting up these targeted ad campaigns you can reach out to the people that are already interested in your product or service.
📢 How Facebook Pixel Tracker Can Help In Marketing Campaigns
So, you already know what Facebook Pixel is, now let’s learn how you can fuel up your marketing campaigns using this brilliant piece of code. Check these cool benefits that you can get from the Pixel tracker below:
⭐ Find Your Relevant Audiences

While setting up ad campaigns it is quite hard to find audiences that are interested in your product. Therefore, it becomes hard for marketers to get the expected conversion rates. There comes the magic of Facebook Pixel. Using this small piece of code you can now track the buyers who are already interested in your product or services. So, you can now target while setting up your ad campaigns and get a better conversion rate.
⭐ Expand Your Audiences Base
Facebook Pixel is a great tool to expand your customer base. You can set up a custom audience list from the people who are already interacting with your website. It will allow you to create your custom audience list with people who have similar interests or demographics and expand your audience base for ad campaigns.
⭐ Optimize Your Conversions Rates

Facebook Pixel can help you to track your audiences’ activity on your website. You can now see which customers are spending the most and create a separate list for them to show ads only to these customers and get more returns from your ad campaigns. In addition, you can create separate audience lists and target specific audiences for purchase or sign-ups.
⭐ Create Dynamic Ad Campaigns
Setting up Dynamic Ad is the coolest feature that you will get while using Facebook Pixel. From now on, you can create dynamic ad templates and only showcase products that are relevant to your audiences. In this way, you set up your ad campaign with a lot of products and show them based on user behavior.
⚙️ Integrate Facebook Pixel In WordPress Websites Using BetterLinks
To integrate Facebook Pixel in WordPress, you must have a Meta business account and set up Meta Pixel first. If you didn’t set them up already follow the steps below. If you already have a Pixel ID & Access token you can jump to step 4 now.
Step 1: Login To Meta Business Account
Go to Facebook Business Manager and then log in to your meta business account to get your Pixel ID & Pixel API Access Token to integrate into WordPress.

Step 2: Set Up Meta Pixel
Afterward, navigate to Events Manager and click on the green ‘+’ icon then select ‘Web’ as the data source. Then click on the ‘Connect’ button and provide your business name and WordPress website URL and complete the necessary steps.

Step 3: Collect The Pixel Id & Access Token
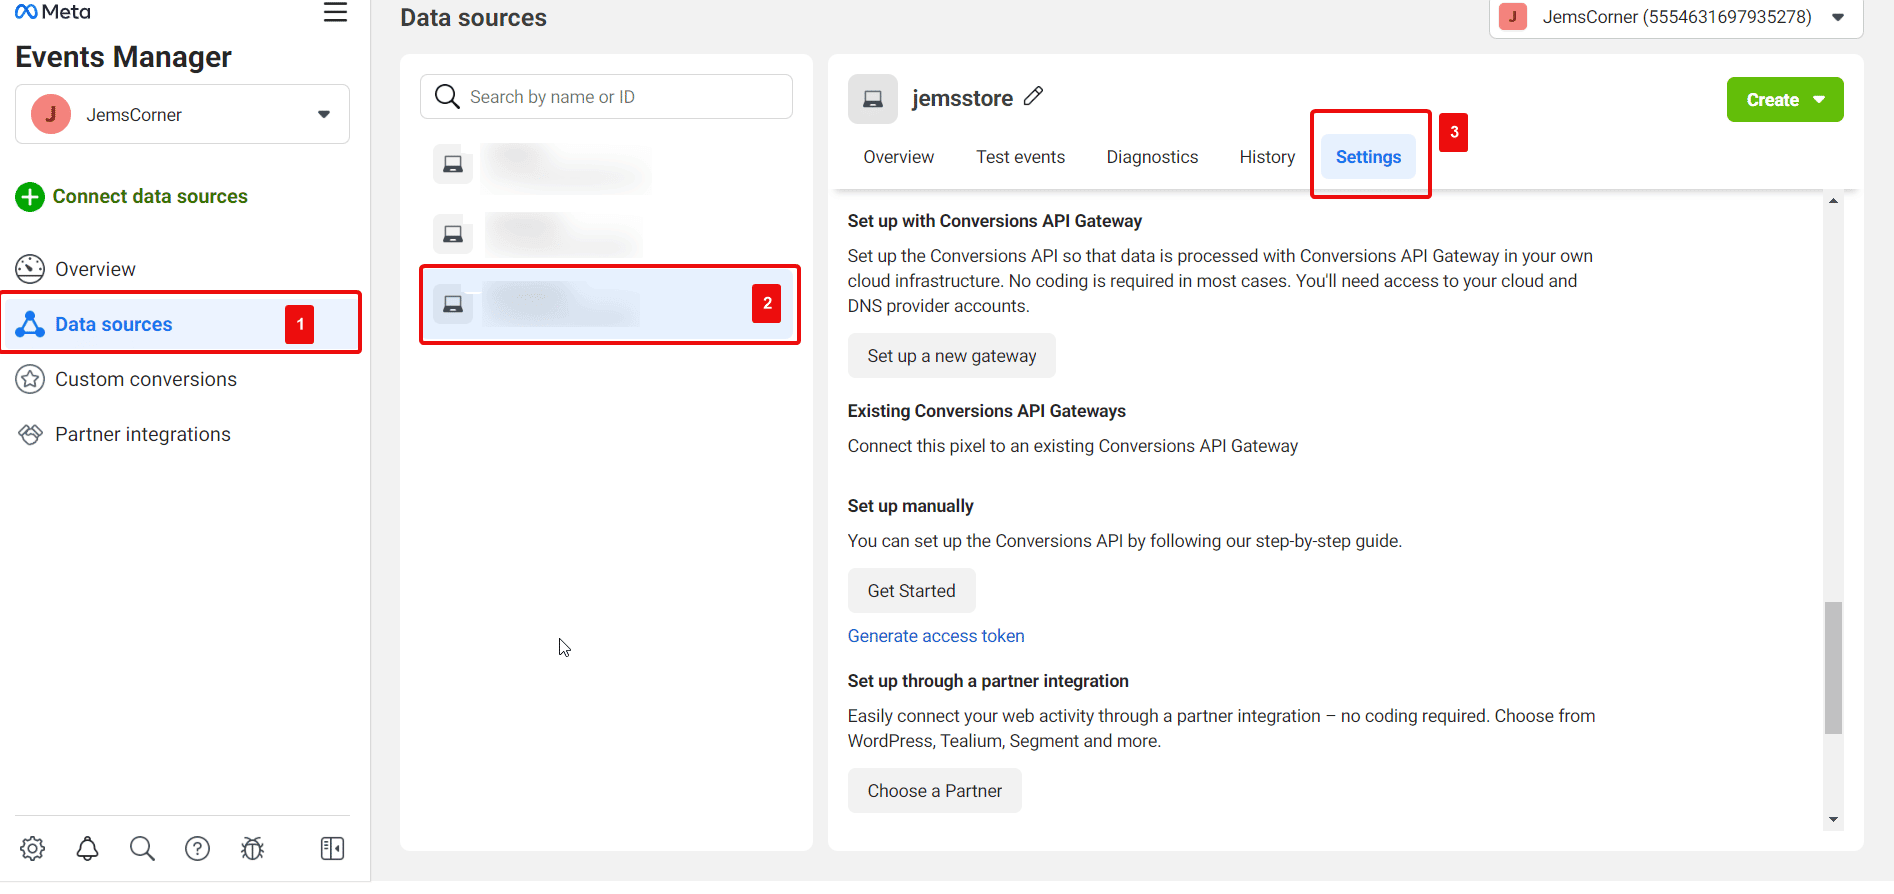
From your Event Managers dashboard hit on ‘Data Sources’ and select the pixel you want to collect the Pixel ID & Access Token for. Then, navigate to ‘Settings’ to collect the Pixel ID.

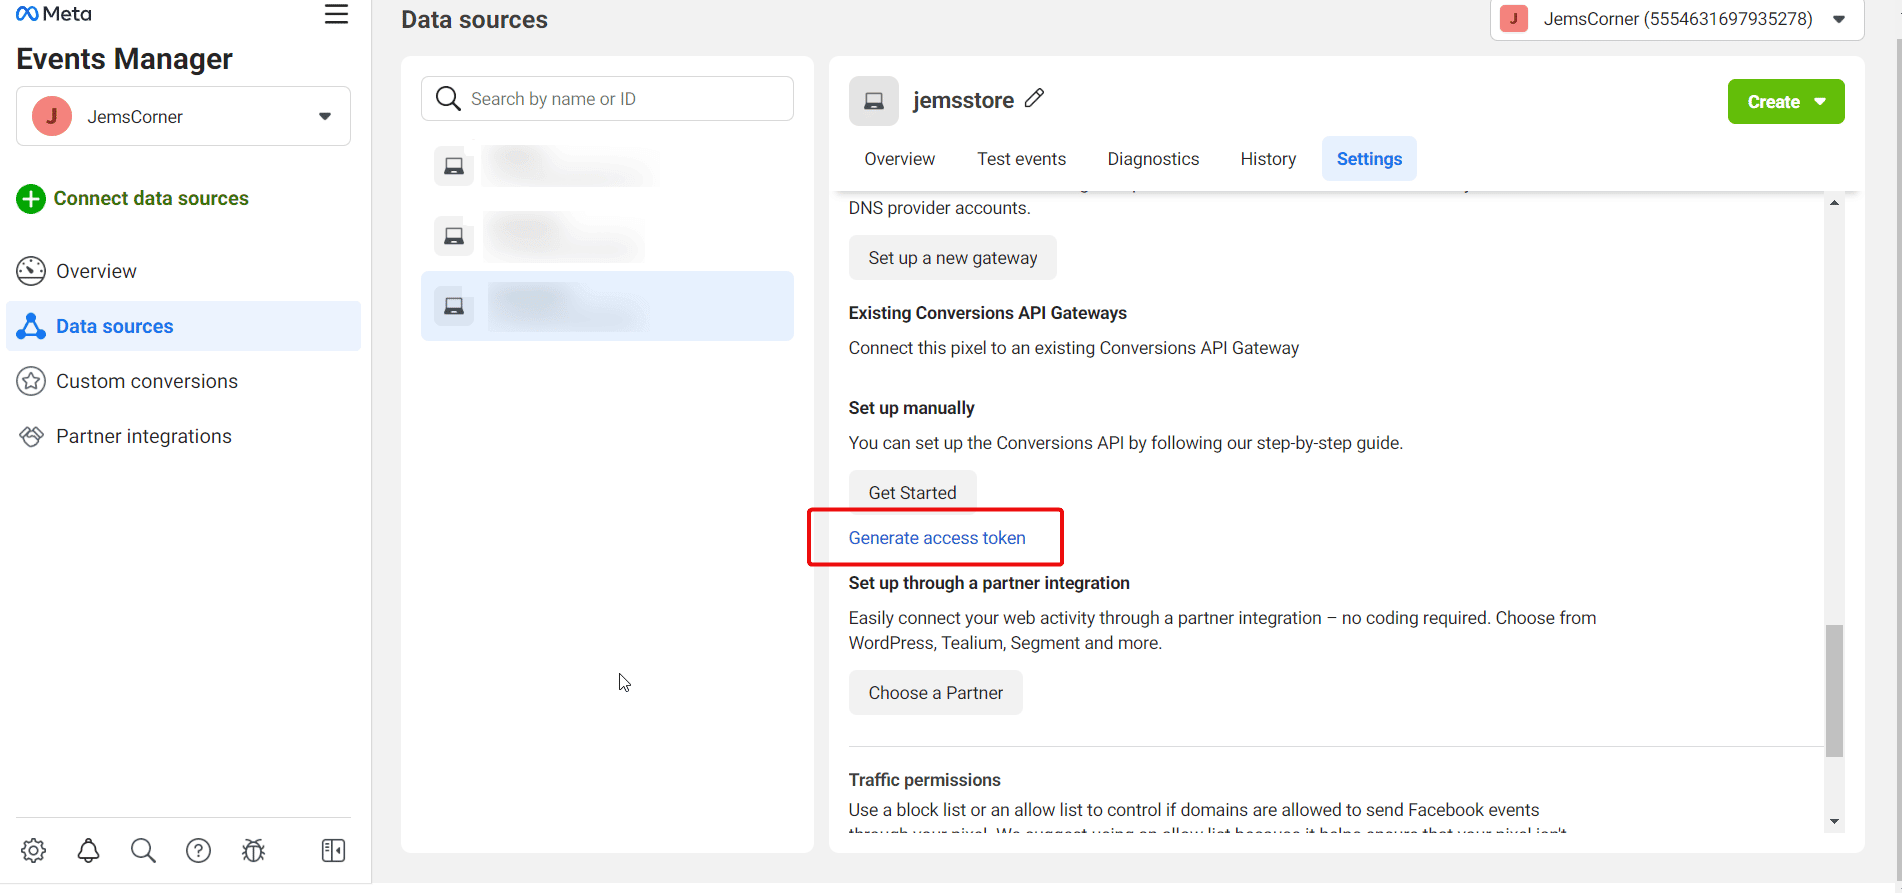
Now, copy your Pixel ID and click on the ‘Generate Access Token’, and collect the token from there.

Step 4: Add Facebook Pixel In WordPress
Once you have the Facebook Pixel ID and Access token, now you can integrate them into your website. Therefore, install BetterLinks Free & PRO on your website to easily install pixel in WordPress.

From your WordPress dashboard, go to ‘BetterLinks’→ ‘Settings’ → ‘Tracking’. Now, checkmark the ‘Enable Facebook Pixel Tracking’ and provide your collected Pixel ID and Pixel API Access Tokens there, and hit the ‘Save Settings’ option.

Final Outcome
That’s it. This is how you can easily connect Facebook pixel to WordPress websites to track and monitor user activity, and traffic. From now on, you can set up more powerful marketing campaigns with Facebook Pixel as it will track all the user activity on your website now. You can also follow this documentation to learn how to configure Facebook Pixel Tracking with BetterLinks this detailed.

⚡ Supercharge Your Marketing Campaigns Using Facebook Pixel
Now that you know how to connect the Facebook Pixel tracker with your WordPress website and the benefits of using this amazing tool, we hope you can maximize your returns on investment easily. So, don’t wait anymore and get BetterLinks PRO if you don’t have it yet to enhance your marketing campaigns using Facebook Pixels.
Have you found our blog useful? If you do, then please subscribe to our blog for more useful tutorials, updates, tips, and more. Also, don’t forget to join our Facebook community and share your thoughts.


