You spend money and effort driving people to a landing page. Ads, emails, social posts and short links all point to one place. But if that page takes too long to load, many visitors leave before they ever see your offer. The fastest way to protect that traffic is to speed up landing pages at the server level, and that is exactly what xSpeed Cache is built for.
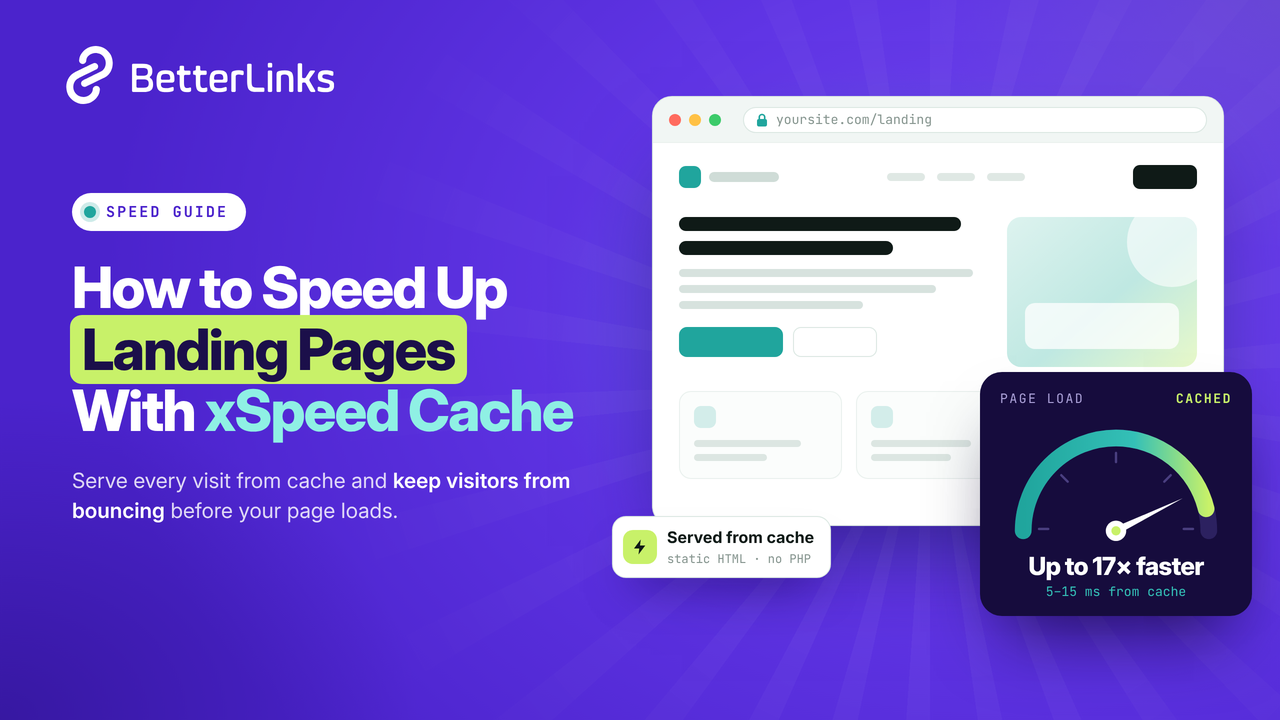
This guide explains why landing page speed decides your conversion rate, what slows pages down and how to fix it step by step with xSpeed Cache, the WordPress performance plugin from WPDeveloper, the team behind BetterLinks.
A Quick Summary (TL;DR)
- Speed is a conversion factor. Google found bounce probability rises 32% as load time goes from 1 to 3 seconds.
- Small gains pay. A 0.1 second faster mobile site lifted retail conversions by 8.4% in a Google and Deloitte study.
- Aim for “good” Core Web Vitals: LCP 2.5 s or less, INP 200 ms or less, CLS 0.1 or less.
- xSpeed Cache serves cached pages as static files before WordPress loads, with 5–15 ms responses on cache hits.
- The 7-step setup: measure, enable page cache, preload it, fix the hero image, delay heavy scripts, add a CDN and compression, then re-test. Or hand the work to an AI assistant through the free MCP server and xSpeed Hub.
- Track the payoff with BetterLinks UTM links so you can see which campaigns convert better on the faster page.
Why Landing Page Speed Decides Your Conversion Rate
Landing page speed matters because every visitor arrives with one task in mind, and a slow page gives them a reason to quit before they act. Unlike a blog post, a landing page has a single goal: a signup, a demo request or a sale. Any delay sits directly between the click you paid for and the result you want.
The research is consistent on this point:
- Conversions fall as load time grows. Portent’s study found a B2B site that loads in 1 second converts 3x higher than one that loads in 5 seconds.
- Even 100 milliseconds count. In the Milliseconds Make Millions study, a 0.1 second mobile speed gain raised conversions by 8.4% for retail sites and 10.1% for travel sites.
- Paid traffic costs more on slow pages. Google Ads rates landing page experience as part of Quality Score, and it shows a mobile speed score from 1 (very slow) to 10 (extremely fast) for each landing page.
- Most sites still have room to improve. The HTTP Archive’s 2025 Web Almanac put the share of origins with good Core Web Vitals at 48% on mobile and 56% on desktop.
[Image 2 – Infographic] A simple bar graphic: “1 s vs 5 s load time = 3x conversion gap” with the Portent source line underneath. Alt text: landing page load time vs conversion rate.
In short, a faster landing page gets more value from the traffic you already have. That makes speed one of the cheapest conversion wins available.
What Slows Down a WordPress Landing Page?
Most slow landing pages share the same few problems, and almost all of them can be fixed without rebuilding the page. Here are the usual suspects:
- Uncached pages: WordPress builds every page with PHP and database queries on each visit unless a cache serves a ready-made copy.
- A heavy hero section: a large background image or video above the fold is usually the Largest Contentful Paint (LCP) element, so it sets your loading score.
- Too much JavaScript: chat widgets, tracking pixels, sliders and page builder scripts all compete for the browser’s main thread and hurt responsiveness (INP).
- Layout shifts: images without set dimensions and late-loading fonts make the page jump, which hurts CLS and causes misclicks on buttons.
- Uncompressed files and no CDN: visitors far from your server wait longer for every file.
- Extra redirect hops: a tracking link that bounces through several URLs adds wait time before the page even starts loading. We cover this in our guide on link cloaking and Core Web Vitals.
The good news is that one plugin can handle most of this list from a single dashboard.
How to Speed Up Landing Pages with xSpeed Cache
xSpeed Cache is a full-site performance plugin for WordPress. It saves your pages as static HTML and serves them before WordPress loads, which brings cache-hit response times to 5–15 ms compared with about 85 ms for a PHP-served cache.
It also bundles minification, lazy loading, font and image fixes, CDN support and database cleanup, so you can tune a landing page from one place.
Follow these seven steps in order. Each one targets a specific cause from the list above.
Step 1: Measure Your Landing Page First
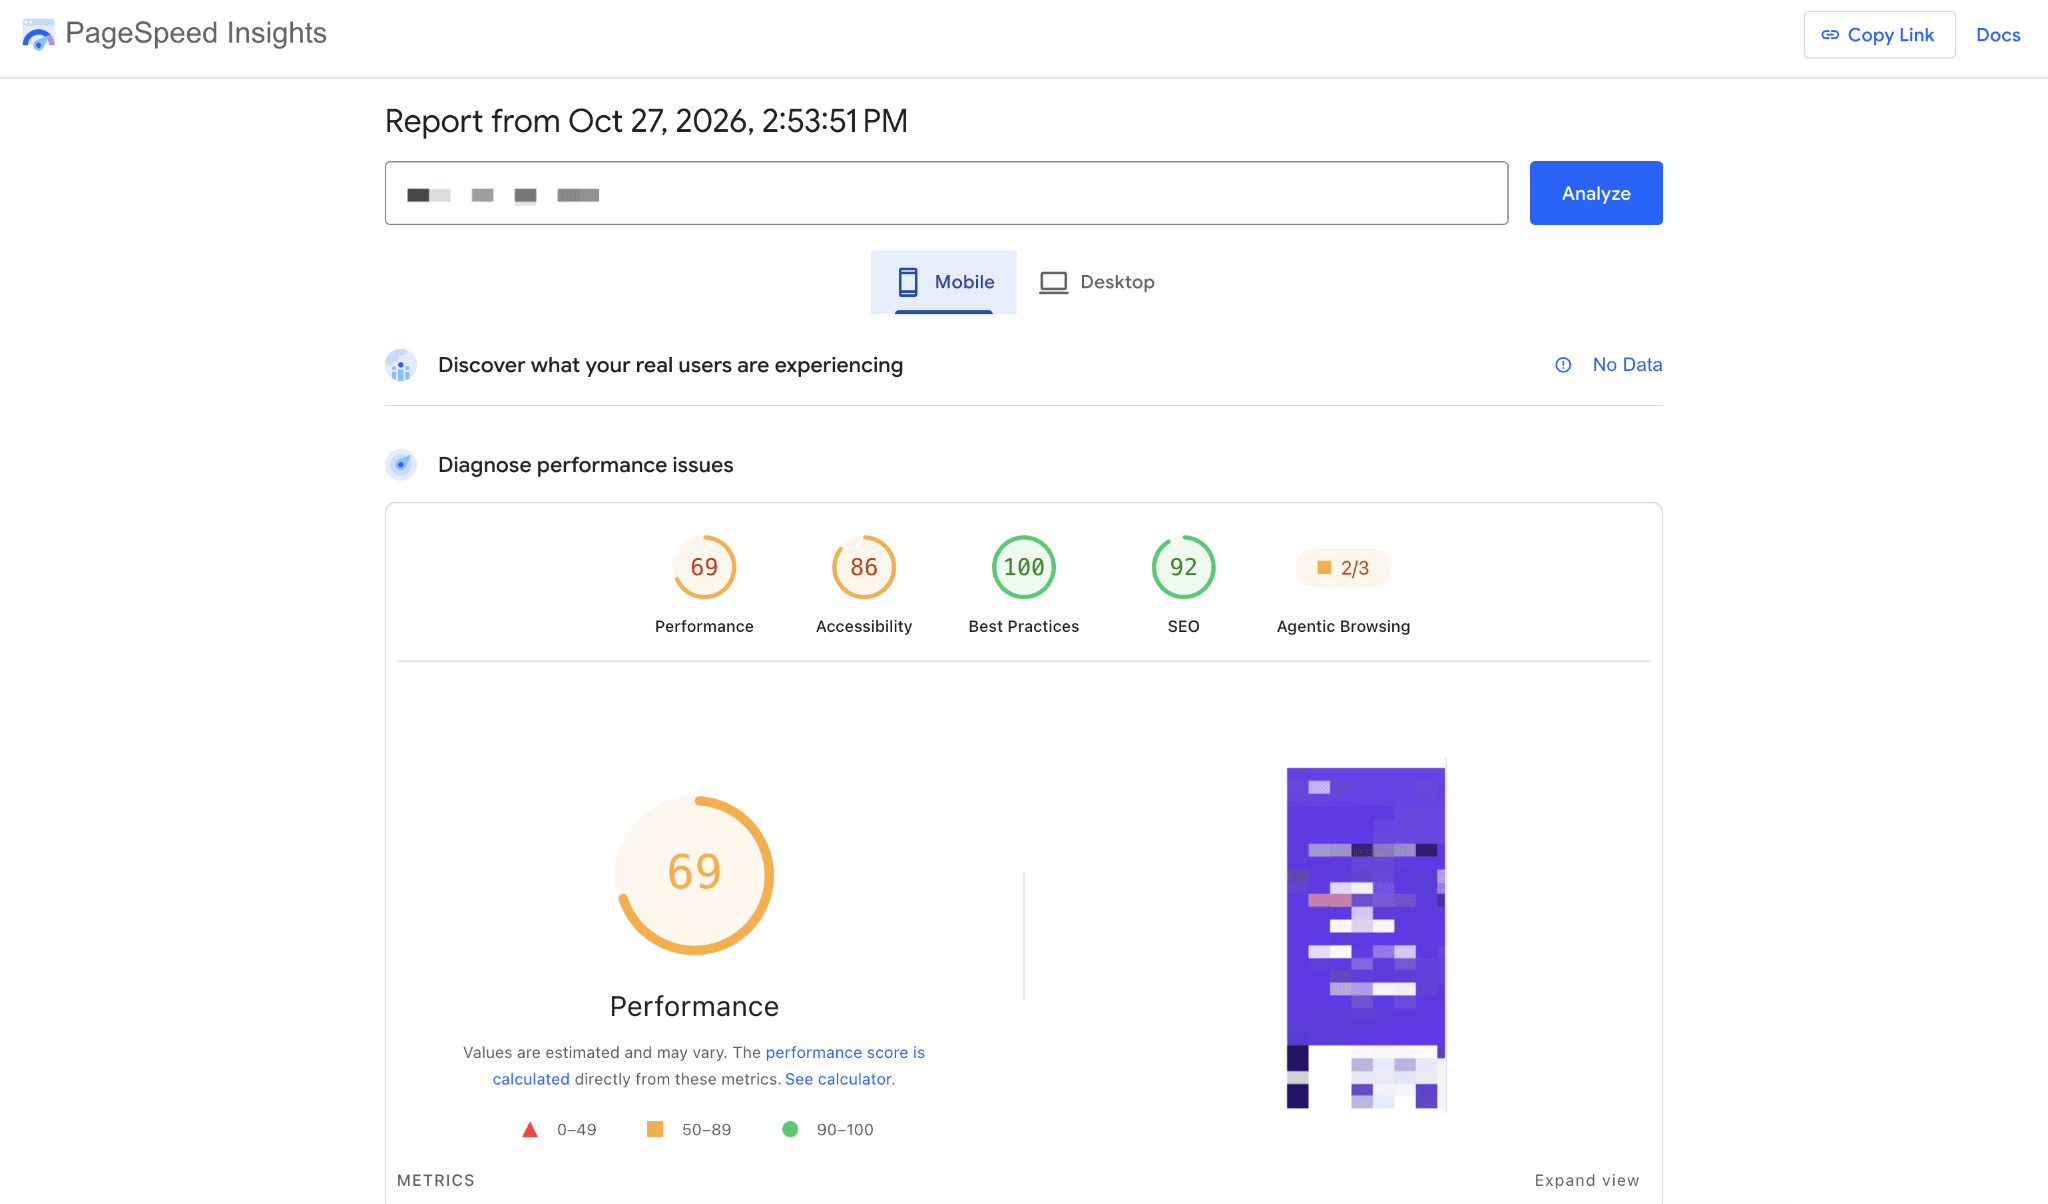
Run the exact URL your ads and links point to through PageSpeed Insights, not just your homepage. For a fix list tied to plugin settings, also run the free xSpeed Scan covered later in this guide. Note the mobile score plus LCP, INP and CLS. Google treats a page as “good” when LCP is 2.5 seconds or less, INP is 200 ms or less and CLS is 0.1 or less.
Step 2: Install xSpeed Cache And Run the Setup Wizard
From your WordPress dashboard, go to Plugins → Add New, search for xSpeed Cache, then click Install Now and Activate. The 3-step setup wizard handles first-time configuration in under 2 minutes.
If you already use WP Rocket, W3 Total Cache, WP Super Cache or LiteSpeed Cache, use the Import from other cache plugins tool to bring your settings across. Choose Import & switch to xSpeed and it takes over the page cache for you, so only one page-cache plugin runs at a time.
Step 3: Turn On Page Caching for the Landing Page
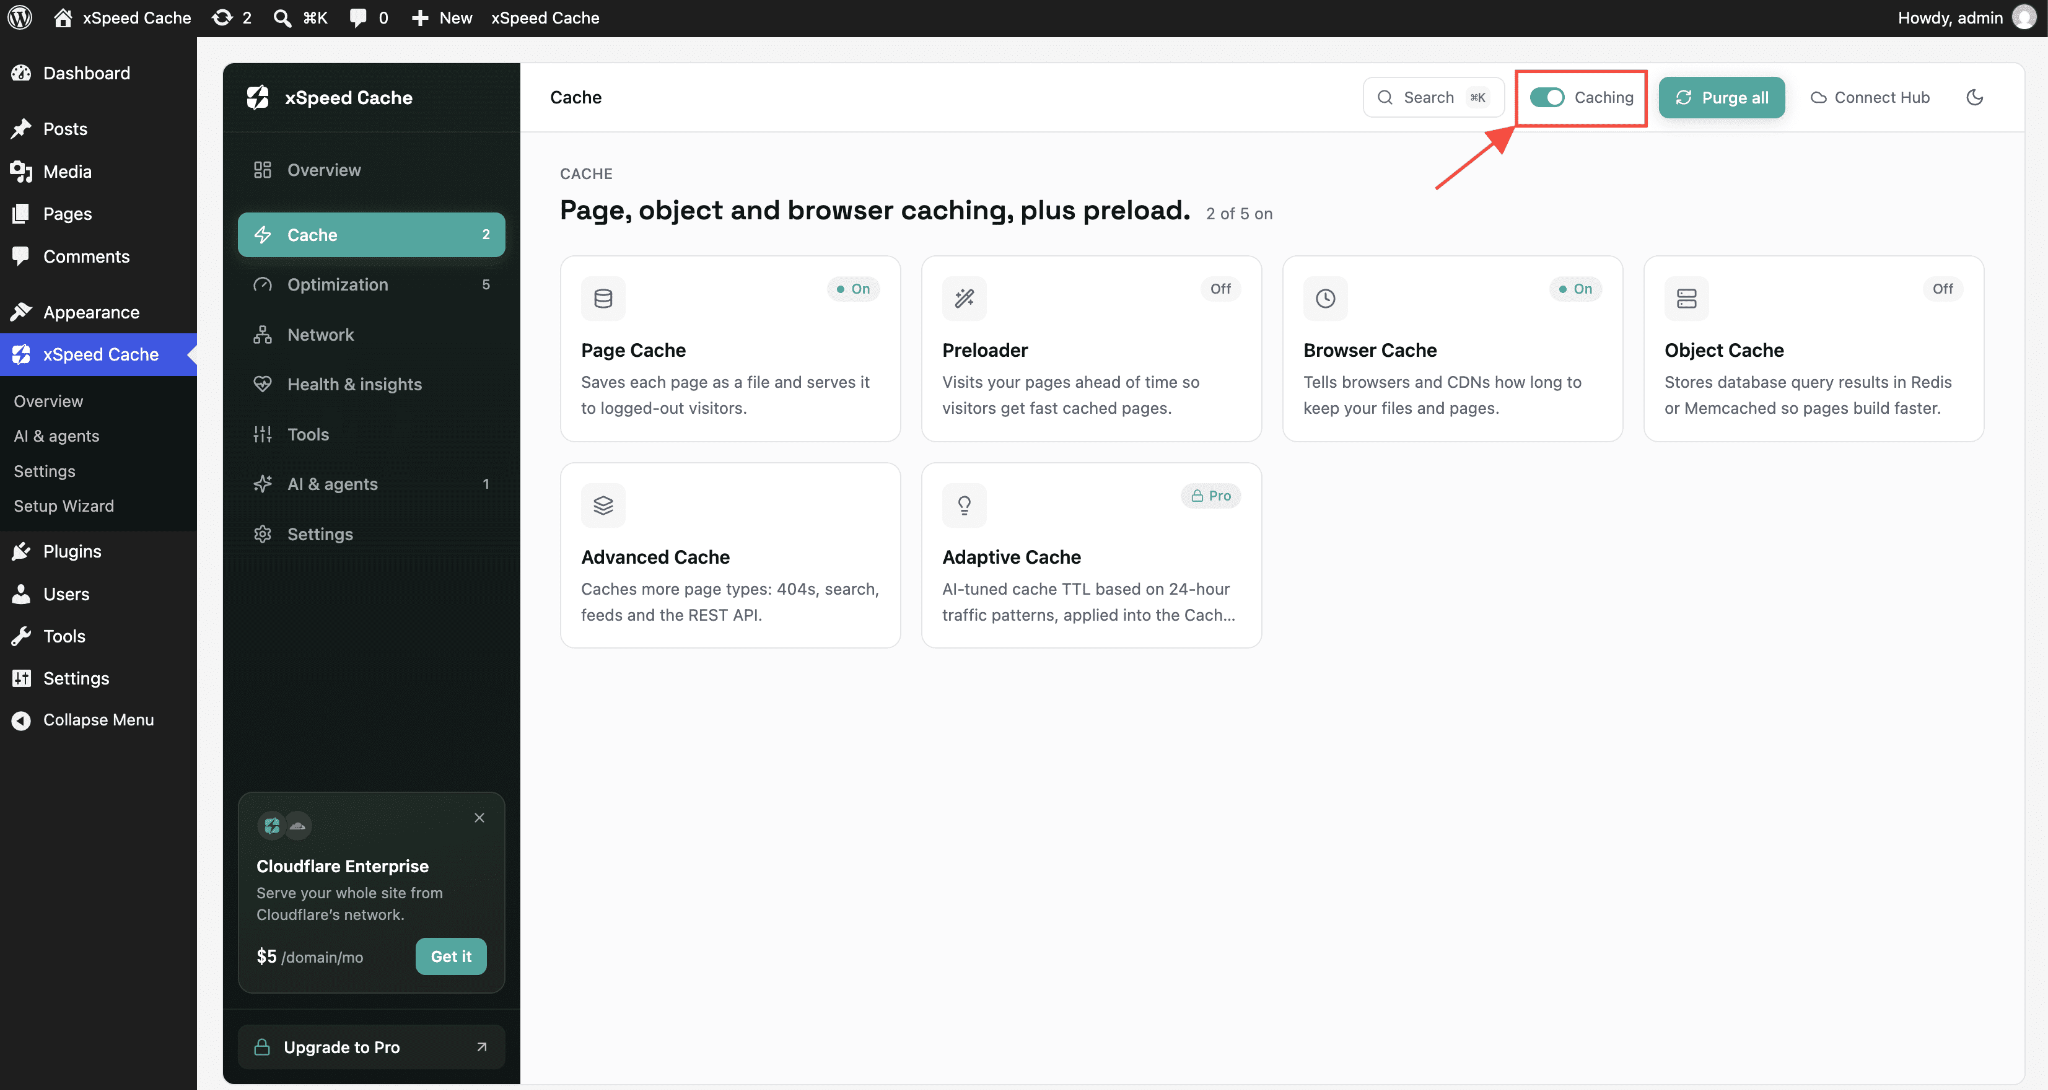
Open the Cache panel and switch the cache on. For landing pages, check these settings:
- Separate mobile cache so phone visitors get a version built for mobile.
- Cache expiry set to match how often the page changes (1 to 720 hours).
- Ignored query parameters for UTM and click IDs, so links with tracking tags still hit the same cached page instead of creating a new copy for every campaign.
- Excluded URLs only for pages that show personal data. WooCommerce checkout and logged-in customers are never cached by default.
Step 4: Preload the Cache Before Traffic Arrives
The first visitor after a purge normally gets an uncached page. The Cache Preloader fixes this with a sitemap-driven warmer. Turn on Warm new content immediately so a freshly published landing page is cached before your campaign link goes live. On Pro, you can also turn on Warm scheduled posts on publish so posts set to go live later are cached the moment they publish.
Step 5: Make the Hero Section Load Fast (LCP and CLS)
In the Optimization panel, focus on what visitors see first:
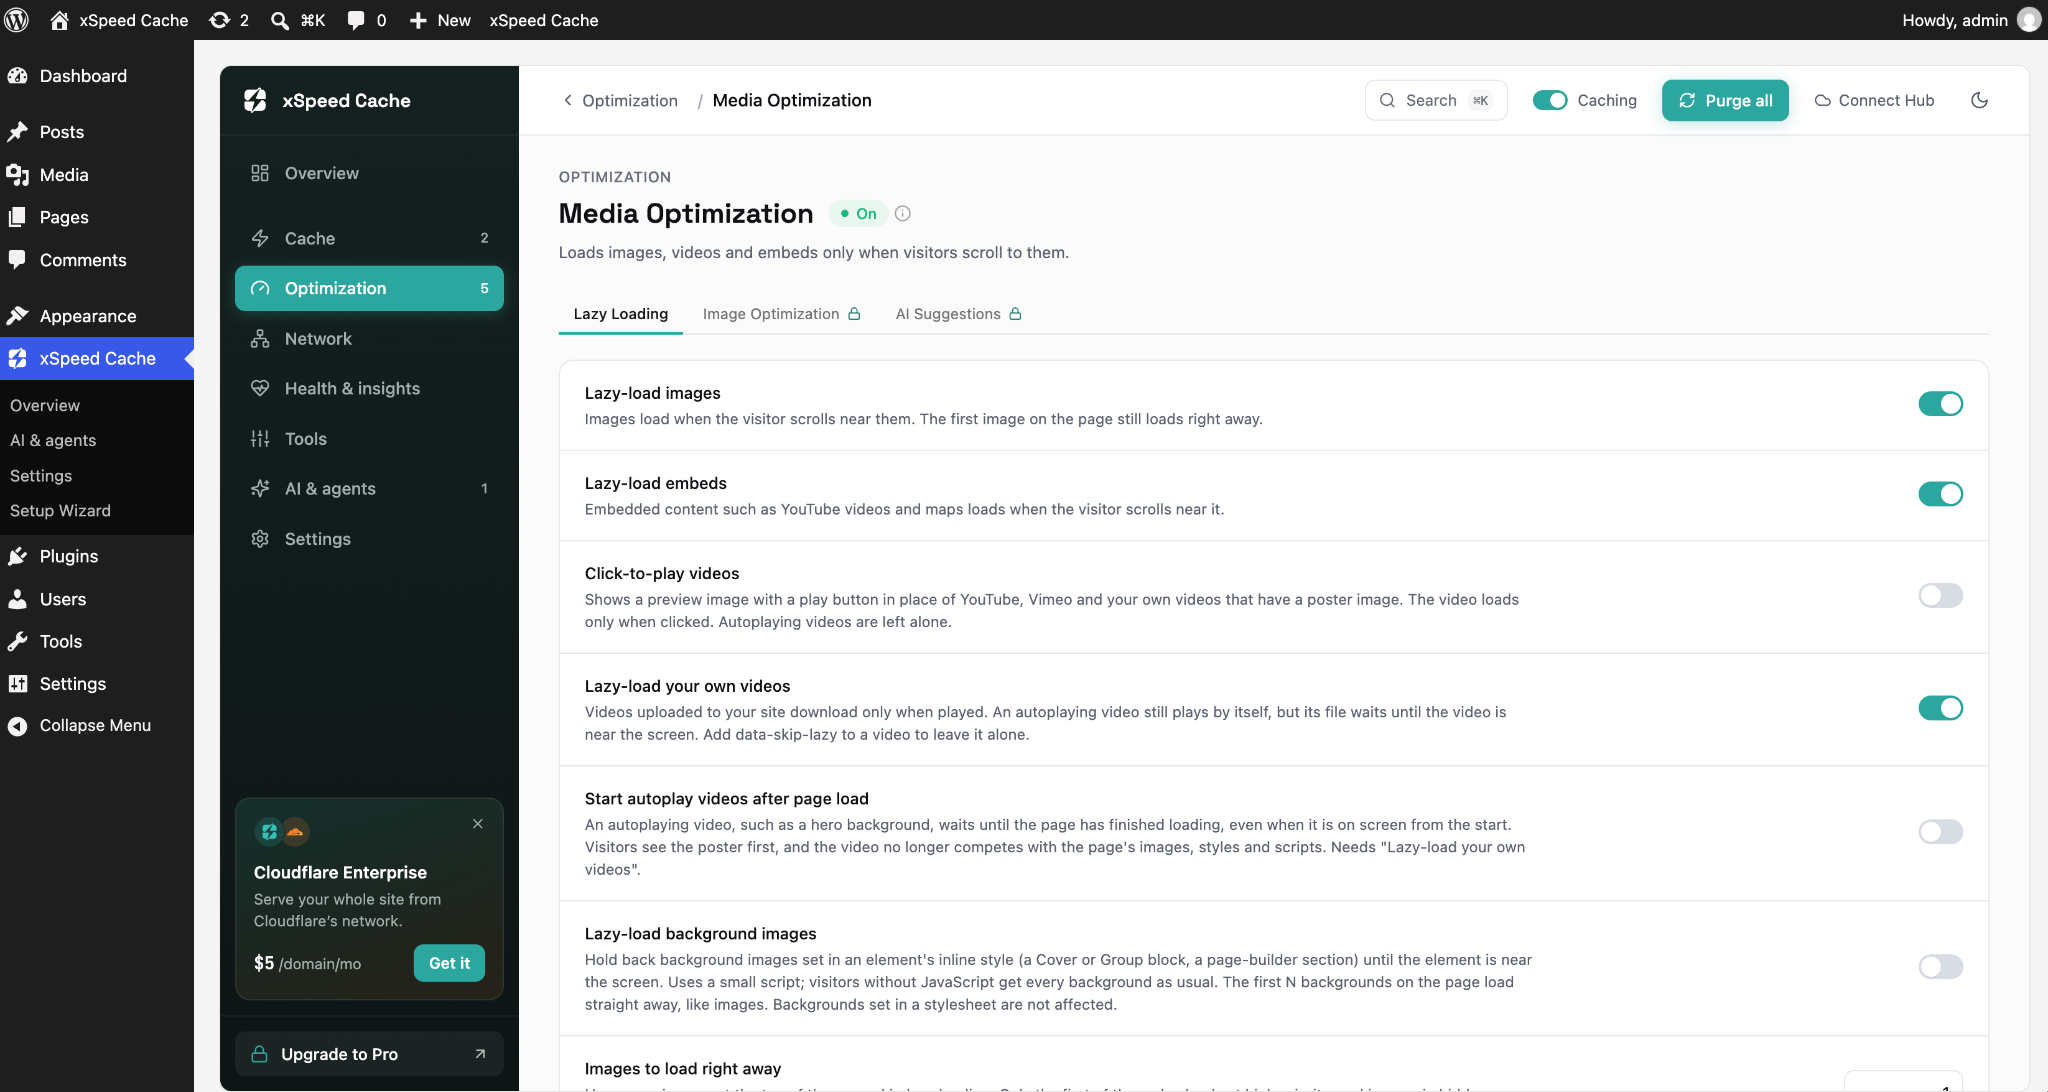
- Preload LCP image and Eager-load first N images so the hero image is never lazy-loaded.
- Lazy-load images, iframes and HTML5 videos below the fold, and use the click-to-play video facade for embedded demo videos.
- Add missing image dimensions to stop the layout from jumping.
- Add font-display: swap, Preload font URLs and Preconnect to font hosts so headlines appear without a blank flash.
On Pro, Critical CSS, Remove Unused CSS and WebP/AVIF conversion cut the hero’s weight further.
Step 6: Trim JavaScript and Page Bloat (INP)
Still in Optimization, enable Minify HTML, CSS and JavaScript, Defer JavaScript and Delay JavaScript until interaction. Delay works well for chat widgets and marketing pixels that do not need to run on first paint. Add your form and checkout scripts to Defer / Delay Exclusions so they stay instantly usable.
Then switch off features a landing page rarely needs: Disable emojis, Disable dashicons, Disable oEmbed and Strip jQuery Migrate. Set Frontend heartbeat control to reduce background requests.
Step 7: Add a CDN, Compression and Browser Caching
In the Network panel, add your CDN URL or connect Cloudflare to auto-purge on publish. Turn on GZIP compression in the Optimization panel (it configures itself on Apache and LiteSpeed; on nginx or IIS, paste the config snippet it gives you) and browser cache headers in the Cache panel so returning visitors load static files from their own device.
Finally, re-run PageSpeed Insights on the same URL and compare. The Health & Insights panel also shows your cache hit ratio and can pull PageSpeed scores (with a Pro license) and GTmetrix scores (with your own GTmetrix API key) into the dashboard.
Let AI Speed Up Your Landing Pages: xSpeed Scan, MCP Server and xSpeed Hub
The steps above work by hand, but xSpeed Cache is built to let an AI assistant do most of this work for you. It is an AI-native plugin: you can ask “Why is my landing page slow?” and an assistant connected to your site can diagnose the problem, change settings and re-test the page. Four tools make that possible.
xSpeed Scan: Find What Is Slowing Your Landing Page
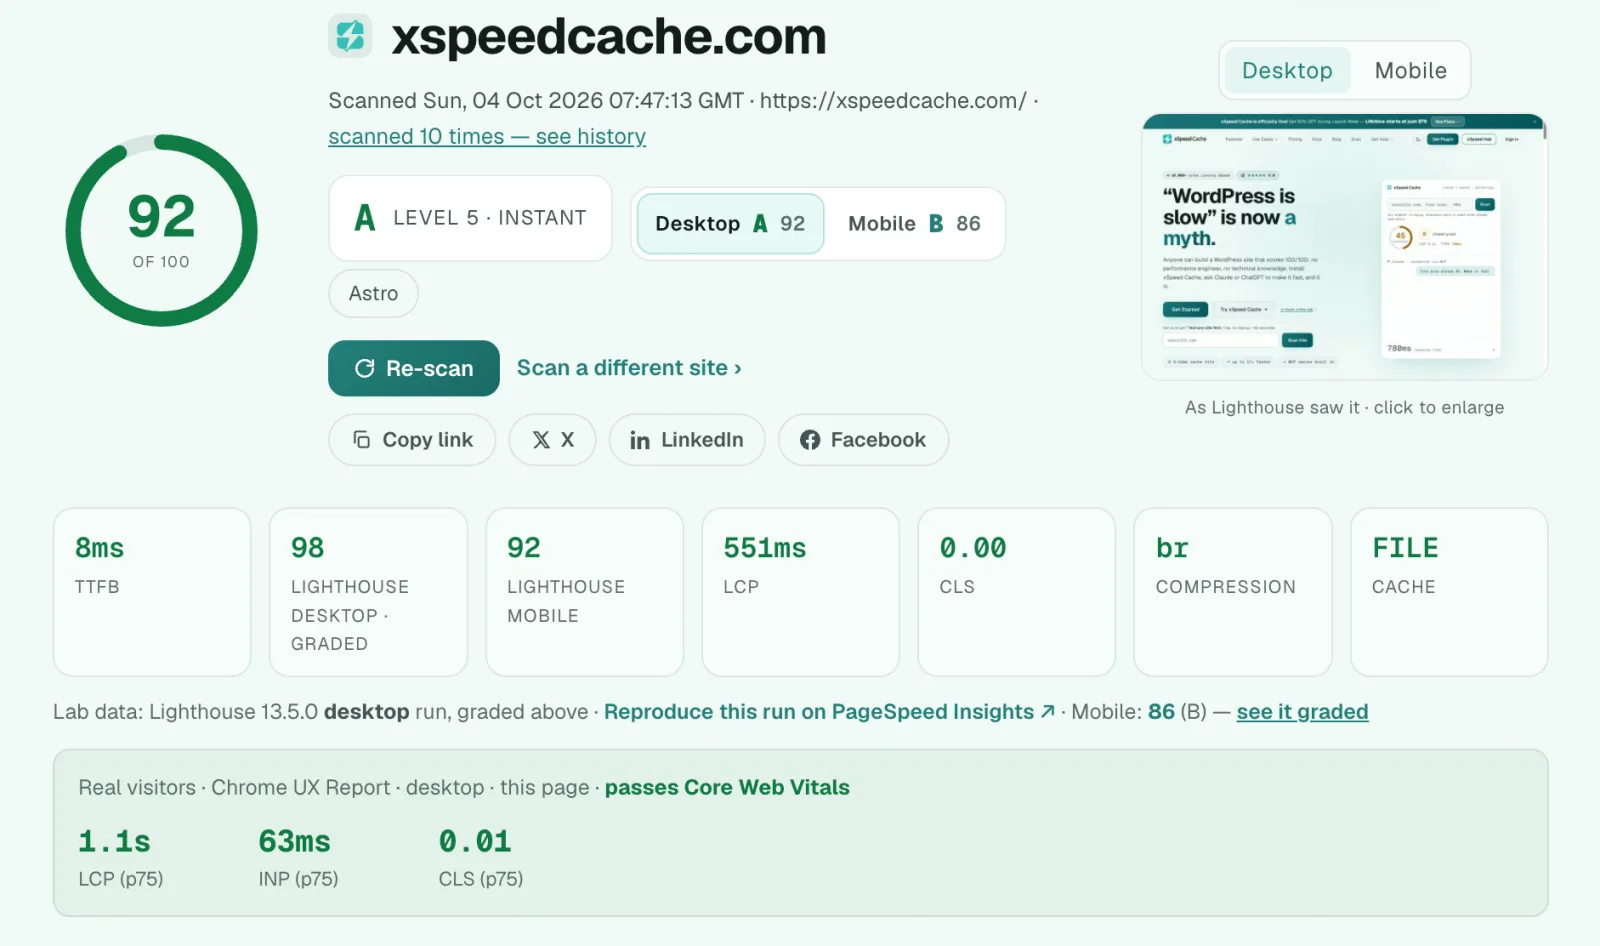
xSpeed Scan is a free speed test that grades any site from 0 to 100 in under a minute. Each failing check is mapped to the xSpeed Cache feature that fixes it, and each one comes with a ready-to-paste AI prompt. Run it on your landing page URL before Step 2, and you get a fix list that matches the plugin’s own settings.
One caution: if the site is not connected to xSpeed Hub, the scan report is listed on a public page for your domain, so connect the site first if you are testing a campaign page that has not launched yet.
MCP Server: Talk to Your Site Through Claude or ChatGPT
xSpeed Cache includes a free, built-in MCP server. MCP (Model Context Protocol) lets assistants such as Claude or ChatGPT check your cache, change a setting, clear and preload pages, then re-test to confirm the change worked. To set it up, open the MCP card on Overview, pick an access level (read-only or read-and-write), click Connect and add the connection to your AI client (Claude connects through OAuth, so there is no snippet to paste).
Safety is built in. Every action the AI takes is logged, tokens can be rotated or revoked at any time, and each action that cannot be undone, such as Database Clean or applying a migration, waits for your approval before an AI agent can run it. You choose read-only or read-and-write access scopes, and read-only connections stay read-only.
Prompts that work well for landing pages:
- “Run a speed scan on /spring-offer/ and tell me what is hurting LCP.”
- “Preload the hero image on my demo page and delay the chat widget script.”
- “Purge and re-warm the cache for my new landing page, then re-test it.”
xSpeed Hub: One AI Connection for Every Site
If you run landing pages on several WordPress sites, xSpeed Hub links them all to one AI conversation. Connect your sites and your AI once, then type something like “purge cache on acme” and it runs on the right site.
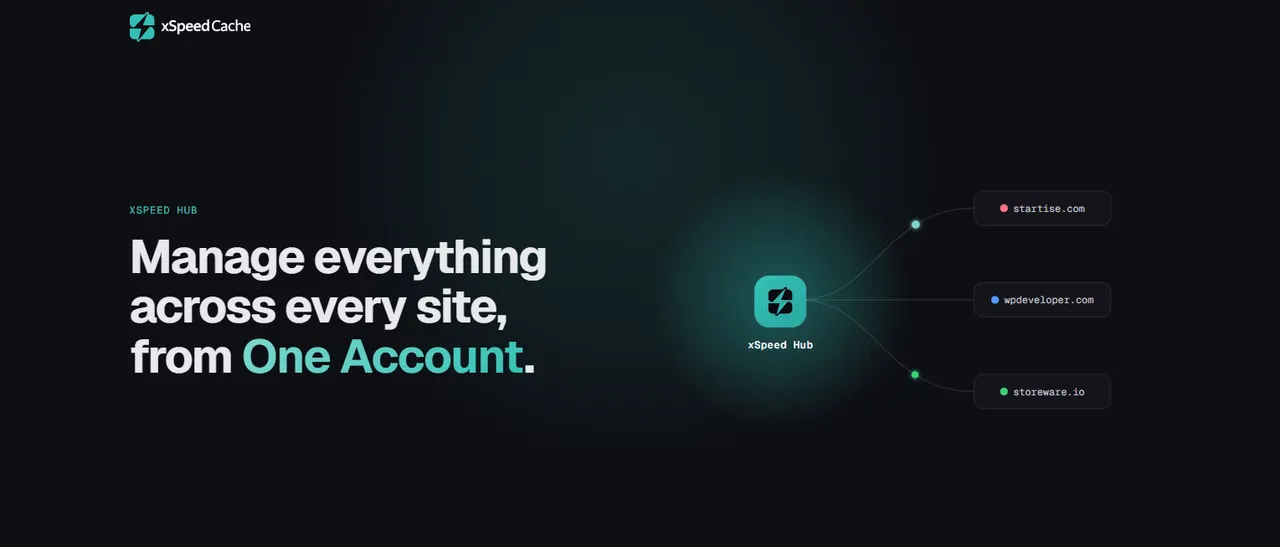
The Hub also adds daily monitoring with Slack or email alerts, report history, an exportable activity log, plus team roles and scoped credentials for agencies.
Built-in AI Recommendations and Pro AI Features
Even without an AI client, the Overview dashboard shows a next-best-action recommendation and takes you straight to that setting. Pro adds deeper AI tools that suit high-traffic landing pages:
| Feature | What It Does for a Landing Page | Plan |
| xSpeed Scan | Grades the page 0–100 and maps each issue to a fix | Free |
| MCP server | Lets Claude, ChatGPT and other MCP clients diagnose, fix and re-test | Free |
| xSpeed Hub | One AI connection, monitoring and alerts across all your sites | Free |
| Next-best-action | Points you to the single most useful setting to change next | Free |
| AI site audit | Scans your site and ranks fixes by severity with concrete reasons | Pro |
| AI-suggested cache TTL | Recommends cache lifetimes based on the last 24 hours of traffic | Pro |
| SmartPredict | Prefetches and prerenders the page a visitor is likely to open next, such as pricing or signup | Pro |
| Smart Image (AI) | AI-assisted image optimization alongside WebP and AVIF conversion | Pro |
| Bring your own AI key | Use OpenAI, Anthropic, Gemini or OpenRouter keys with model choice and usage counters | Pro |
xSpeed Cache’s AI tools work much like BetterLinks MCP does for your links, so one AI assistant can manage both your page speed and your campaign links.
Unoptimized Landing Page vs. xSpeed Cache
The table below shows which landing page problem each xSpeed Cache feature solves and which Core Web Vital it helps most.
What changes once xSpeed Cache is set up 👉🏻
| Problem | Without Optimization | With xSpeed Cache | Metric It Helps |
| Server response | PHP and database run on every visit | Static HTML served before WordPress loads, 5–15 ms on cache hits | TTFB, LCP |
| First visitor after a purge | Gets an uncached, slower page | Cache Preloader warms the page in advance | LCP |
| Hero image | Lazy-loaded or discovered late | LCP image preloaded and eager-loaded | LCP |
| Third-party scripts | Run on load and block the main thread | Deferred or delayed until interaction | INP |
| Layout jumps | Images without dimensions, late fonts | Missing dimensions added, font-display: swap | CLS |
| Global visitors | Every file comes from one server | CDN rewriting and Cloudflare integration | LCP |
| Campaign URLs with UTM tags | Can create separate, uncached copies | Ignored query parameters keep one cached page | TTFB, LCP |
Pair a Faster Landing Page With Smarter Links in BetterLinks
A fast landing page only pays off if you can prove which traffic converts. That is where BetterLinks completes the picture: xSpeed Cache makes the page fast, and BetterLinks makes every link to it clean, trackable and healthy.
- Tag every campaign link. Use the BetterLinks UTM builder to add source, medium and campaign tags. Compare conversions before and after your speed work in Google Analytics.
- Keep redirects to one hop. Point short links straight at the final landing page URL, not at another redirect. Fewer hops mean the page starts loading sooner. Read more in Link Cloaking vs Core Web Vitals.
- Watch for broken links. A fast page with a dead link is still a lost visitor. With BetterLinks PRO, set up automatic link monitoring to run scheduled scans and email you a link-health report after each one.
- Track clicks per link. BetterLinks analytics shows which channels send the most clicks, so you know where to focus your next optimization.
Who Gets the Most Out of Faster Landing Pages
Anyone who sends traffic to a single goal page benefits from this setup. Here is how different users put it to work.
| User | How xSpeed Cache + BetterLinks Help |
| Affiliate marketers | Fast review and bridge pages keep readers moving to the offer, while cloaked BetterLinks track every click. |
| PPC advertisers | A faster page supports landing page experience in Google Ads, and UTM-tagged links show which ad groups convert. |
| SaaS and lead-gen teams | Demo and signup pages load quickly on mobile, and delayed scripts keep forms responsive. |
| WooCommerce store owners | Product and promo pages are cached, while cart and checkout stay uncached by default. |
| Agencies | The setup wizard gets each client site running fast, and Pro’s save-and-share config lets you reuse one setup across sites. |
Turn More Clicks Into Conversions With Faster Landing Pages
A slow landing page quietly wastes the traffic you worked hard to earn. With xSpeed Cache, you can cache the page at the server level, fix the hero section, tame heavy scripts and serve files from a CDN, all from one WordPress dashboard. Pair it with BetterLinks to track every campaign link, and you will know exactly how much that speed is worth.
Ready to get started? Download xSpeed Cache for free, or visit xspeedcache.com to explore Pro. Then get BetterLinks to keep every link to your landing page fast, clean and trackable.
Is this blog helpful? Join our community to stay updated with the latest blogs, product reviews and WordPress solutions. Subscribe to our blog for in-depth tutorials, tips and product demos.